6 operating the device, 1 operating principle – Weller WX2 User Manual
Page 32
8-20
WX 2
2
1
13
3
4
6
7
8
5
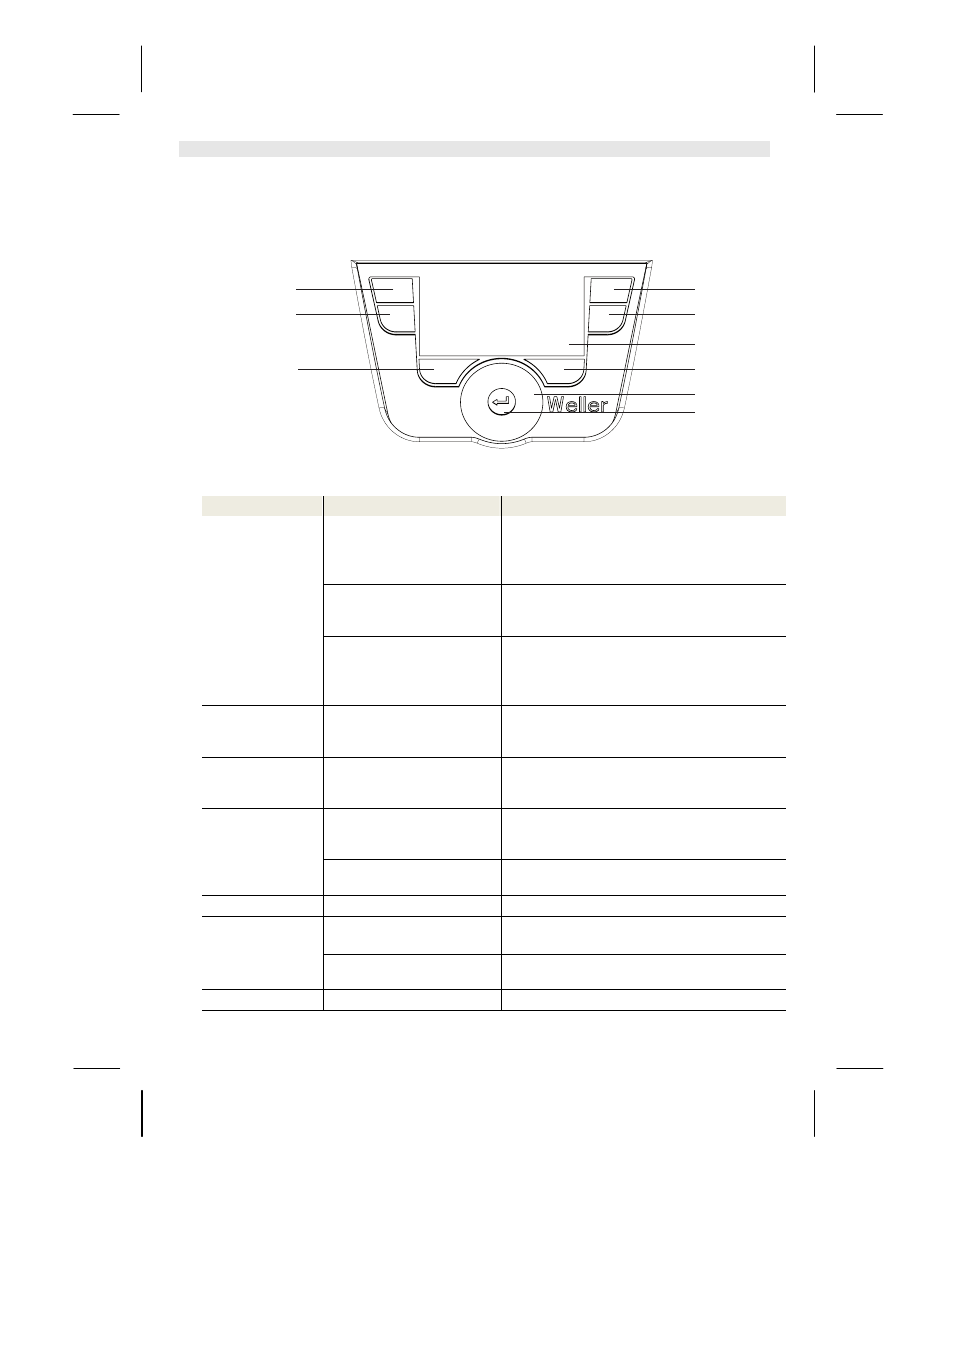
6 Operating the device
6.1 Operating principle
Fig. 6: Control elements on the WX 2
Keys
Operation
Function
Control key 1, 2, 3,
4
Briefly press key 1, 2, 3 or 4
once
The fixed temperature (23/24/32/33)* becomes
the active set-point temperature (26/30)*.
(tool channel: key 1, 2 = left; key 3, 4 = right)
−
Scroll within the Parameter menu
Press and hold down key 1, 2,
3 or 4
for 3 sec.
−
The active set-point temperature is saved as
the fixed temperature under the key being
pressed (1, 2, 3 or 4).
Press and hold down keys 1
and 2 or 3 and 4
simultaneously
−
1 and 2 = left channel (12)* is disabled or
opened
−
3 and 4 = right channel (9)* is disabled or
opened
Press and hold
down keys 13 and 1
or 2
keys 13 and 1 or 13 and 2
simultaneously
−
Open Parameter menu
Press and hold
down keys 6 and 3
or 4
keys 6 and 3 or 6 and 4
simultaneously
−
Open Parameter menu
Selection key 6, 13 Briefly press key 6 or 13 once − Select auxiliary device, this being a
requirement for opening the parameter
settings of the auxiliary device (e.g. WFE)
Press and hold down keys 6
and 13 for 3 sec.
−
The set-point temperature window opens
Key 6
Briefly press key 6 once
−
Exit parameter menu
Turn-and-click
wheel 7
Move your finger over the
turn-and-click wheel
−
Select/set value
−
Navigate within a menu
Click left or right
−
The set-point temperature window opens for
the soldering tool connected on the left/right
Enter key 8
Briefly press key 8 once
−
Confirm value/selection
*) see also overview diagrams (Fig. 1 and Fig. 2).