Rp- 07 series (lip seal), Danger, Disassembly – Viking Pump TSM343.3: Vi-Corr Pumps User Manual
Page 9
DANgER!
Before opening any viking pump liquid chamber (pumping chamber, res-
ervoir, relief valve adjusting cap fitting etc.) Be sure:
1. That any pressure in chamber has been completely vented through
suction or discharge lines or other appropriate openings or
connections.
2. That the driving means (motor, turbine, engine, etc.) Has been “locked
out” or made non- operational so that it cannot be started while work is
being done on pump.
3. That you know what liquid the pump has been handling and the
precautions necessary to safely handle the liquid. Obtain a material
safety data sheet (MSDS) for the liquid to be sure these precautions are
understood.
Failure to follow above listed precautionary measures may result in seri-
ous injury or death.
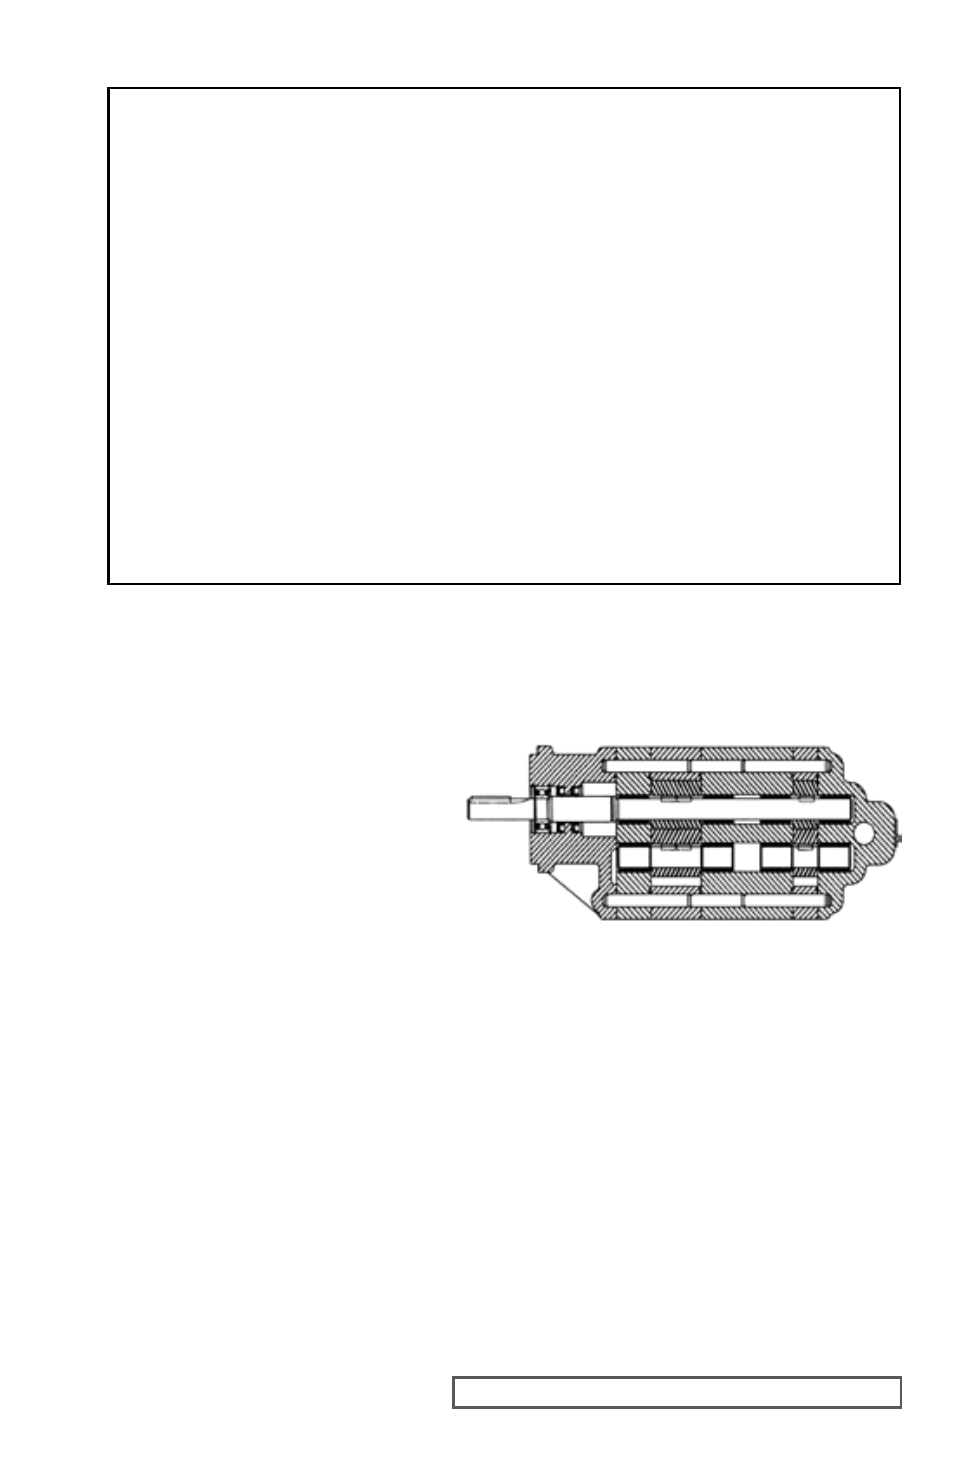
FIgURE 7
RP-0724 SECTIONAL vIEW
SECTION TSM
343.3
ISSUE
F
PAGE 9 OF 20
RP- 07 SERIES (LIP SEAL)
Disassembly:
1. Remove key from the driver shaft.
2. Remove the 4 assembly capscrews.
Remove snap ring on the drive shaft
in front of the bracket ball bearing.
Pump is now held together by the
alignment sleeves.
3. Hold the head of the pump and gently
tap on the sides of the pump bracket
with a soft hammer, alternating sides
of the pump. This should slowly
separate the sections. Note the
position of alignment sleeves for
assembly. Do not hit the sections
hard or use a screwdriver to pry them apart as this may damage the mating surfaces.
NOTE: If pump has 2 casing and gear sets (RP-0724) and (RP-0732),the casing and gears are
matched sets. Keep individual casing and gears together. See Figure 7.
4. After the pump is apart, inspect all parts for signs of wear. Look carefully at the shaft,
bushings, inside of the casing, gear teeth, lip seals, and the faces of the pump sections that
are located on each side of the casing for signs of wear.
5. If replacing the shafts, remove the retaining rings from both sides of the gear. Press the gear
off the shaft and remove drive pin(s) or balls from the shaft.
6. Check the bracket ball bearing for roughness. Roughness can be determined by turning the
inner race by hand. Replace if the bearing has roughness.