A. insert axle, B. install wheels on axle, C. install wheels – Tweco Welding Equipment Basic Utility Cart User Manual
Page 4: D. install castors, E. attach handle assembly
WELDING EQUIPMENT basIc UTILITy caRT assEMbLy INsTRUcTIONs
December 01, 2011
4
0-5221
A.
Insert Axle
Insert the axle (8) through the holes in the bottom of
the base assembly (6).
8
6
Art # A-10649
B.
Install Wheels on Axle
1. Attach a plain washer (11) to the axle.
2. Slide a wheel (9) over the axle followed by a washer
(11) as shown.
9
11
11
Art # A-10650
C.
Install Wheels
1. Insert a cotter pin (10) through the hole in the axle
from the top down as shown.
2. Spread the cotter pin apart by using a pair of pliers.
3. Repeat steps B and C with the other wheel.
10
Art # A-10651
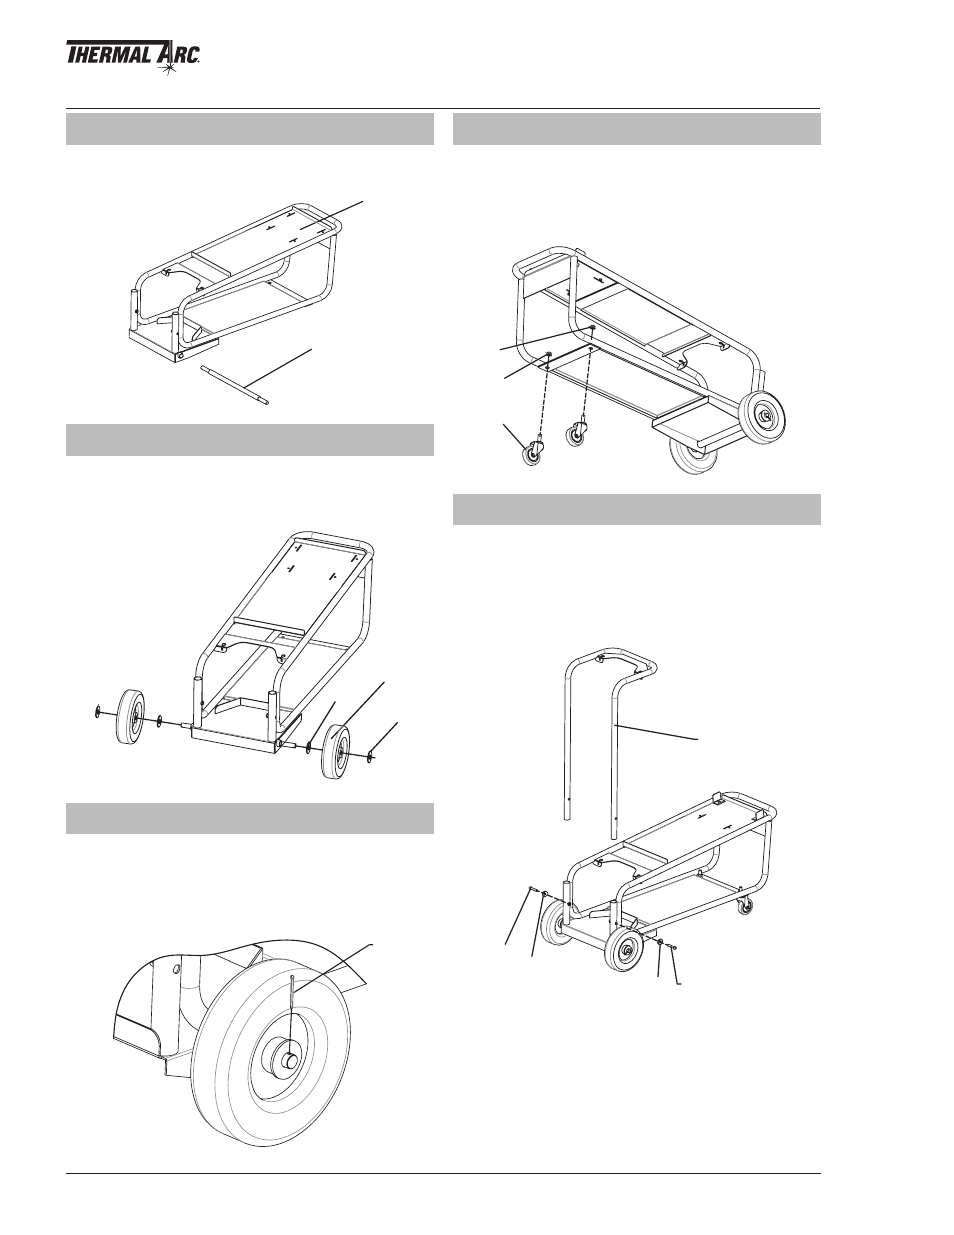
D.
Install Castors
1. Insert a castor (7) through the hole in the bottom of
the base assembly.
2. Fasten the castor using the castor nut (4) as shown.
3. Install the other castor following steps 1 and 2.
7
4
4
Art # A-10652
E.
Attach Handle Assembly
1. Attach handle assembly (2) to base assembly and
line up its 2 holes with the 2 holes in the base assembly.
2. Fasten the handle assembly using saddle washers
(12) and bolts (13) as shown.
2
12
12
13
13
Art # A-10653