Torch specifications, Connecting torch, Spare parts label – Tweco SL80 Plasma Cutting User Manual
Page 2: Torch parts selection
October 20, 2006 Rev. AA.01
2
Manual 0-4797
Torch Specifications
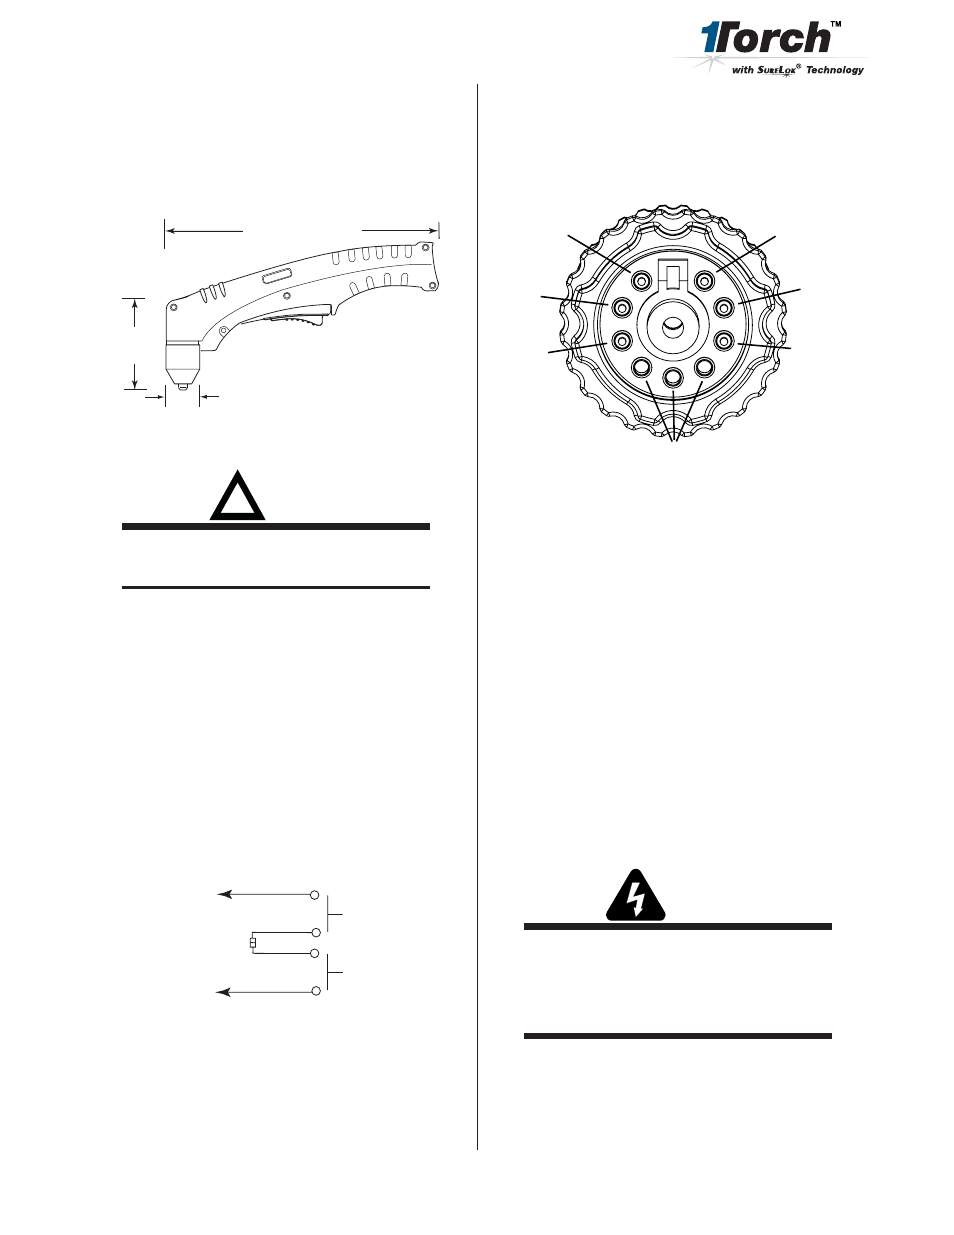
A. Torch Configuration and Dimensions
The torch head is at 75° to the torch handle. The torch
includes a torch handle and torch trigger assembly.
9.5" (241 mm)
3.75"
(95 mm)
1.17" (29 mm)
Art # A-03322
B. Operating Notes
!
WARNING
This torch is not to be used with oxygen (O
2
).
NOTE
Operating pressure varies with torch model,
operating amperage, and torch leads length. Refer
to gas pressure settings chart for each model.
C. Direct Contact Hazard
For exposed tip the recommended standoff is 1/8" - 1/4"
(3 - 6.4 mm).
D. Parts-In-Place (PIP) Circuit - 12 vdc
The torch and leads include circuitry called Parts-In-
Place (PIP). This circuit includes a switch on the torch
head. The shield cup closes this switch when properly
installed. The torch will not operate if this switch is
open.
A-04791
Torch Trigger
PIP Switch
Shield Cup
To Control
Cable Wiring
Torch Switch
E. Torch Lead Pin Out
This pin out is for the torch lead connector that at-
taches to the console. It indicates the placement of the
individual lead wires.
1
2
3
4
5
6
7
8
9
Green
White
Red
Red
Black
Orange
Empty
Art # A-07609
Connecting Torch
Torch leads connect directly to the power supply receptacle.
Align the leads connector with the power supply
receptacle. Press the connector into the receptacle fully.
Turn the connector locking ring to secure the connector to
the receptacle. Do not use the locking ring to pull the
connector into the receptacle.
Spare Parts Label
Included with the torch is an adhesive label. Apply the
label to the power supply, where the operator can see it for
easy reference.
Torch Parts Selection
Refer to the Consumables Selection Chart for the various
torch parts for the application and operation.
WARNINGS
Disconnect primary power to the system before
disassembling the torch or torch leads.
DO NOT touch any internal torch parts while the
AC indicator light of the Power Supply is ON.
The shield cup (or shield cup body and shield cap or
deflector) holds the tip and start cartridge in place. Position
the torch with the shield cup facing upward to keep these
parts from falling out when the cup is removed.
Change the torch parts as follows: