Tweco FP-260 User Manual
Page 11
grasp it with pliers so that it cannot exit from the spool. If necessary, straighten it before inserting it in the
wire input guide. Insert the wire on the lower roll and in the torch liner.
Keep the torch straight. When feeding a new wire through the liner, make sure the
wire is cut cleanly (no burrs or angles) and that at least 2” from the end is straight (no curves).
Failure to follow these instructions could cause damage to the liner.
5. Lower the upper roll and lift the tension adjustment knob. Tighten slightly. If tightened too much, the wire
gets locked and could cause motor damage. If not tightened enough, the rolls will not feed the wire.
When changing the wire diameter being used, or replacing the wire feed roll, be
sure that the correct groove for the wire diameter selected is inside, closest to the machine.
The wire is driven by the inside groove. Feed rolls are marked on the side identifying the
nearest groove. Feed rolls installed on the FP 200, and FP 260 are marked "0.6" on one
side. When this side is inside, closest to the machine, the groove is suitable for use with
0.023" (0.6mm) hard wire. The other side is marked "0.8". When this side is inside, closest
to the machine, the groove is suitable for use with 0.030" (0.8mm) hard wire and 0.035"
(0.9mm) flux core wire.
6. Connect the power supply cable to the power output line. Turn on the switch. Press the torch switch. The
wire fed by the wire feeding motor must slide through the liner. When it exits from the torch neck, release
the torch switch. Turn off the machine. Mount the contact tip and the nozzle.
DO NOT place fingers in the wire feed mechanism. The rolls, when moving, may
crush the fingers. Periodically, check the rolls. Replace them when they are worn and compro-
mise the regular feeding of the wire.
FLUX CORE (FCAW) AND MIG (GMAW) WELDING
This unit can be used to perform either Flux Core (FCAW) or MIG (GMAW) welding process. An easy-to-
change polarity reversal system has been installed inside the cabinet, making it easy to change polarity at any
time. When changing polarity, jake sure the welder power has been disconnected from the supply power con-
nection.
When changing the polarity, make sure the connectors are hand tight.
For Gasless Welding
1. Connect the welding machine to the 230V, 60 Hz line.
2.
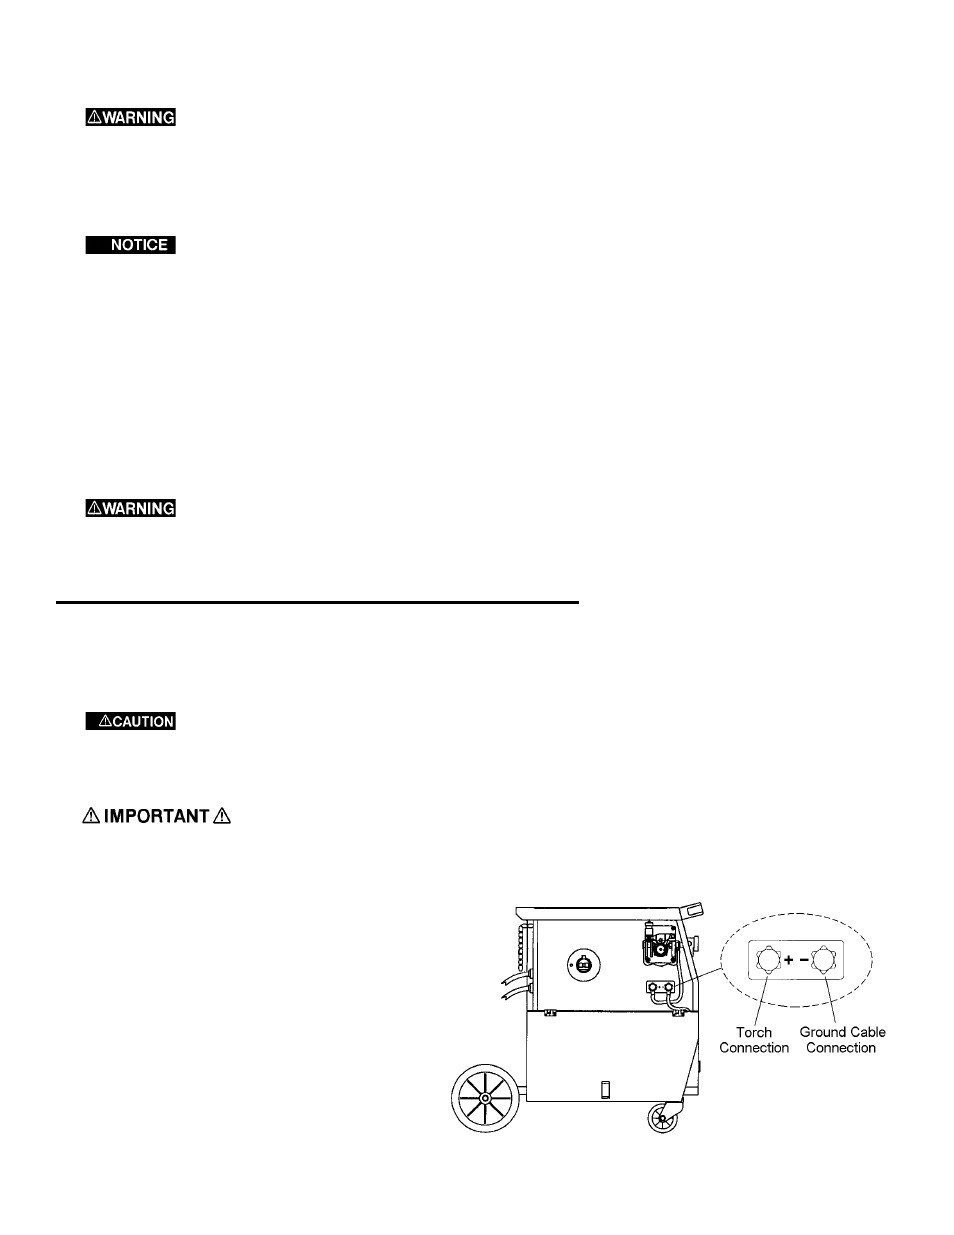
Make sure that the polarity of torch and ground cable is correctly set. For Flux Core
(FCAW) welding, the Welding Gun is connected to the negative pole and the work cable to the positive pole
(See Figure 3).
3. Connect the work clamp to the work piece.
Make sure there is a good contact. Surface must
be clean of rust, oil and paint in order to provide
good contact.
4. Make sure the wire-feeding roll is correctly
positioned (groove matching the wire diameter).
Note that each roll has two grooves, one is
marked “.035/0.9mm” and the other is marked
“.030/0.8mm”.
5. Gasless welding requires “flux-cored wire.”
Flux-cored wire simplifies the use of this
machine.
9
Figure 3: Polarity Preparation for Welding without Gas