Standby, Connection and setup basic operation – SONIQ QSP320T User Manual
Page 9
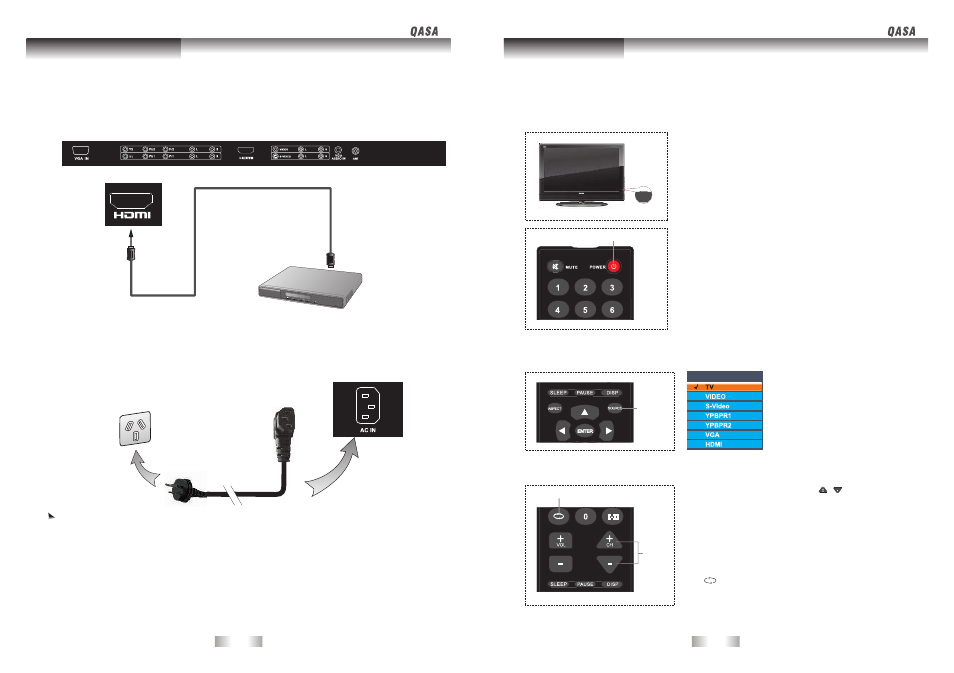
After the power cord is plugged into a wall outlet, the unit will enter standby mode and the red
indicator will be on.
In standby mode, press
STANDBY button at the control
panel on the unit, or
POWER button on the remote control.
The unit will turn on and power indicator will light up in blue
before picture appears.
Press
STANDBY button at the control panel, or POWER
on the remote control again, and the unit will turn off.
Connection and setup
Basic Operation
-15-
-16-
Connect the HDMI output terminal of your HDMI device to the HDMI
input terminal on the unit
using an HDMI cable.
1. Connect the female end of the AC power cord to the AC input on the unit.
2. As shown in the diagram connect the male end to a wall power outlet.
The product must be operated only from the type of power source indicated on the marking
label (100-240~ 50/60Hz).
If the unit will not be used for a long period of time, it should be unplugged from the wall
outlet.
HDMI cable
HDMI device
Power cord
STANDBY
POWER
Connecting HDMI signals
Connecting the Power Cord
Power On/ Off and Standby
Turning on the unit
Turning off the unit
Power outlet
STANDBY
Press
SOURCE button on your
unit or remote control to display
input signal.
Press the button several times to
cycle through various sources.
1.
2.
Switching Source
Source
Using
CH+ /- button on your unit or / buttons on the
remote control to sequentially select the TV channels
available in your channel list.
Using numerical buttons to directly input channel.
Eg. To select channel 8, press 8 button on the remote control.
Using button to return to the previous channel.
To select channel 12, press 1 button and then 2 on the
remote control.
Return
Changing Channels
TV
VIDEO
S-Video
YPBPR1
YPBPR2
VGA
HDMI
SOURCE
CH+/-