Osd(on screen display) menu – SONIQ QSP320T User Manual
Page 18
-33-
-34-
OSD(On Screen Display) Menu
OSD(On Screen Display) Menu
Back
EXIT
Video
Audio
TV
Parental
Auto Synchronization
Date
screen
Timer
Power On Timer
Power Off Timer
Time
Select
/
Setup
On
2007/12/11
21:58:28
Off
00:00:00
00:00:00
4. Press
ENTER button and then use /
button to highlight Auto Synchronization.
5. Use / to select
On in the Auto
Synchronization and
then press Menu
button to return to normal TV viewing.
Back
EXIT
Video
Audio
TV
Parental
Steep Timer
Time
Time Setup
Enter
Select
ENTER
/
Off
Setup
Back
EXIT
Video
Audio
TV
Parental
Display Mode
Subtitle
Teletext
Version Info
Reset Default
All White
DPMS
Time Setup
Setup
Select
/
Normal
On
Setup
Enter
ENTER
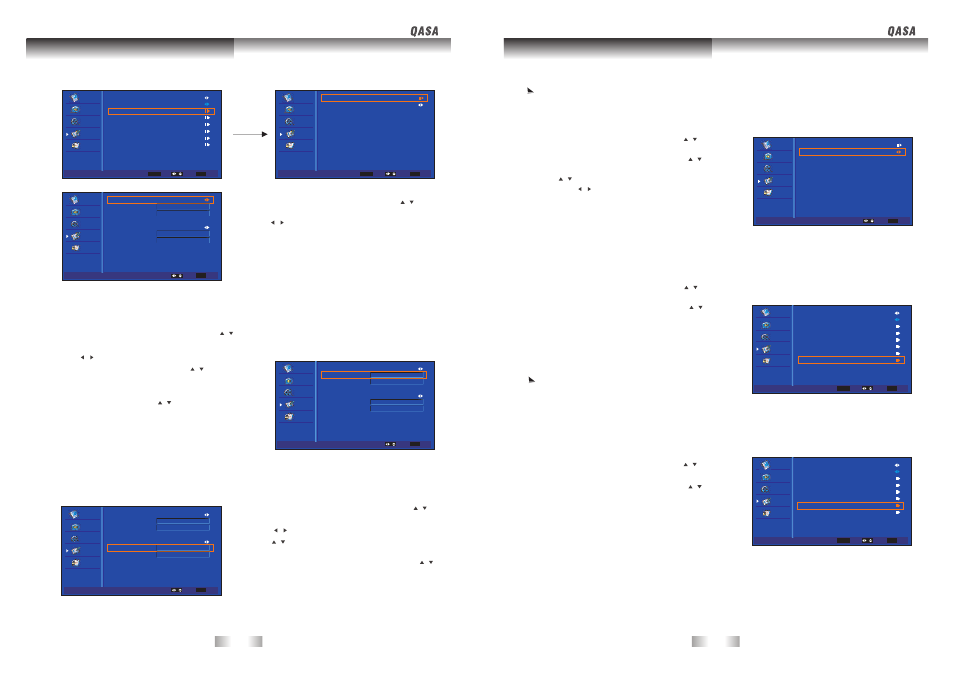
Set the time manually, if current time is set incorrectly by the auto synchronization.
1. After bringing up the Time menu
, use /
button to highlight Auto Synchronization
.
2. Use / to select Off in the Auto
Synchronization
and then use / to
highlight
Date.
3. Changing the date by directly inputting digital
numbers and then
use / button to
highlight
Screen.
4. Changing the screen time by directly inputting
digital numbers and then press the Menu
button to return to normal TV viewing.
Manual Time Setup
Back
EXIT
Video
Audio
TV
Parental
Auto Synchronization
screen
Timer
Power On Timer
Power Off Timer
Date
Time
Select
/
Setup
Off
21:58:28
On
00:00:00
00:00:00
2007/12/11
Set the power of your unit automatically turn on and off daily
.
Setting Power On/Off Timer
1. After bringing up the Time menu, use
/
button
to highlight Timer.
2. Use / to select
ON in the Timer and then
use / to highlight Power On Timer.
3. Changing the power on time by directly
inputting digital numbers and then use /
button to highlight Power Off Timer.
4. Changing the power off time by directly
inputting digital numbers.
Back
EXIT
Video
Audio
TV
Parental
Auto Synchronization
Date
screen
Timer
Power Off Timer
Power On Timer
Time
Select
/
Setup
Off
2007/12/11
21:58:28
On
00:00:00
00:00:00
Power On/Off Timer function can be canceled by selecting Off in the Timer.
Digital number can be inputted by pressing numerical buttons on the remote control
1. Press
MENU button and then use /
button to select the Setup menu.
2. Press
ENTER button and then use /
button to select the Time Setup menu.
3. Use / to highlight Sleep Timer and
then use / to select sleep timer
optional (Off, 10, 20, 30, 40, 50, 60, 90
and 120 minutes)
.
Setting Sleep Timer
Back
EXIT
Video
Audio
TV
Parental
Time
Steep Timer
Time Setup
Select
/
Off
Setup
A frozen still picture from a PC/video game displayed on the screen for prolonged periods will
result in a ghost image. Use the below method to minimize any fixed image on the screen.
1. Press
MENU button and then use / button
to
select the Setup menu.
2. Press
ENTER button and then use / button
to highlight
All White.
3. Press the
ENTER button to start removing
ghost
image.
4. Press
MENU button to return to normal TV
viewing.
An excessive permanent image may be
impossible to clear entirely with All White.
Removing Ghost Image
Use to reset all menu options to the original factory default settings.
1. Press
MENU button and then use /
button
to select the Setup menu.
2. Press
ENTER button and then use /
button to select Reset Default.
Reset System
Back
EXIT
Video
Audio
TV
Parental
Display Mode
Time Setup
Subtitle
Teletext
Version Info
All White
DPMS
Reset Default
Setup
Enter
Select
ENTER
/
16:9
On
Setup
Back
EXIT
Video
Audio
TV
Parental
Display Mode
Time Setup
Subtitle
Teletext
Version Info
Reset Default
DPMS
All White
Setup
Enter
Select
ENTER
/
16:9
On
Setup