Smart tv function, Program edit, Picture menu – SONIQ E55V13A User Manual
Page 19
33
34
Smart TV Function
Smart TV Function
Program Edit
Press Up and Down to select Program Edit, then press OK Button to enter sub-menu.
1. Press Green Button to rename the current channel. (only available in ATV)
2. Press Yellow Button to change the program order.
Selected channel can be moved by using Up and Down, then press OK for confirm.
3. Press Blue Button to skip the selected channel.
4. Press Red Button to delete the selected channel.
Blue Button
Green Button
Red Button
Yellow Button
Program Edit
901
Delete
Rename
Move
Skip
C-00
ATV
Select
Confirm
Return
Exit
OK
B.DTV Manual
1. Press / to highlight DTV Manual Tuning, Press "OK" button to enter sub-
menu.
2. Users can select channel number by pressing / ,and set frequency number
by pressing numeric buttons.
3. Press "OK" to start.
CHANNEL
C
H
A
N
N
E
L
P
IC
T
U
R
E
S
O
U
N
D
O
P
T
IO
N
T
IM
E
L
O
C
K
Select
Comfirm
Exit
Returm
Auto Tuning
Programme Edit
DTV Manual Tuning
ATV Manual Tuning
CHANNEL
C
H
A
N
N
E
L
P
IC
T
U
R
E
S
O
U
N
D
O
P
T
IO
N
T
IM
E
L
O
C
K
Select
Comfirm
Exit
Returm
Digital Scan
Frequency
Start
strength
Cht2
226.50MHz
100
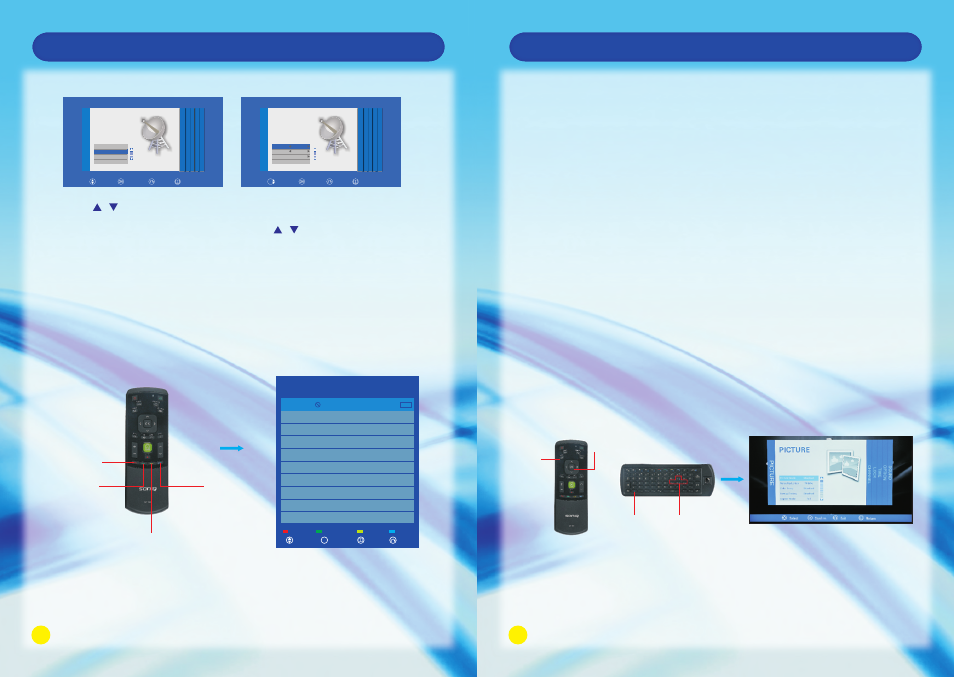
Picture Menu
Press MENU Button to bring up the main menu, then press Left and Right to select the
PICTURE MENU.
1. Picture Mode:
Press Left and Right to adjust the mode colour by Standard. Dynamic, User, Mild
and 3D Mode. Contrast, Brightness, Color, Sharpness can be adjusted only
under User mode, press MENU to return to the main menu.
2. Noise Reduction:
Press OK Button to adjust among Strong, Weak, Middle and Off.
3. Colour Temp:
Press Left and Right Button to select Cool, Standard, Warm and User. You can
adjust
R Gain, G Gain, and B Gain in User mode.
4. Energy Saving
Press OK Button to adjust among Middle, High, Low, Standard in this section.
5. Aspect Ratio:
This function will be available under VGA or HDMI, and you can choose Full, 4:3 and
Auto by pressing Left and Right Button.
6. Screen Mode (available under VGA or HDMI)
Press Up and Down to choose Screen Mode, press OK to confirm. Press Left and
Right to select PC/Video.
7. PC Settings (available under VGA or HDMI)
Press Up and Down to select PC Settings, press OK to enter the sub-menu, you can
also choose auto adjust to adjust the picture to full screen, or you can select clock,
phase, horizontal position, vertical position for adjusting.
FN Button and Left, Right, Up or Down Buttons
at the same time.
MENU
Button
OK Button