HK Audio VR 21214 User Manual
Page 13
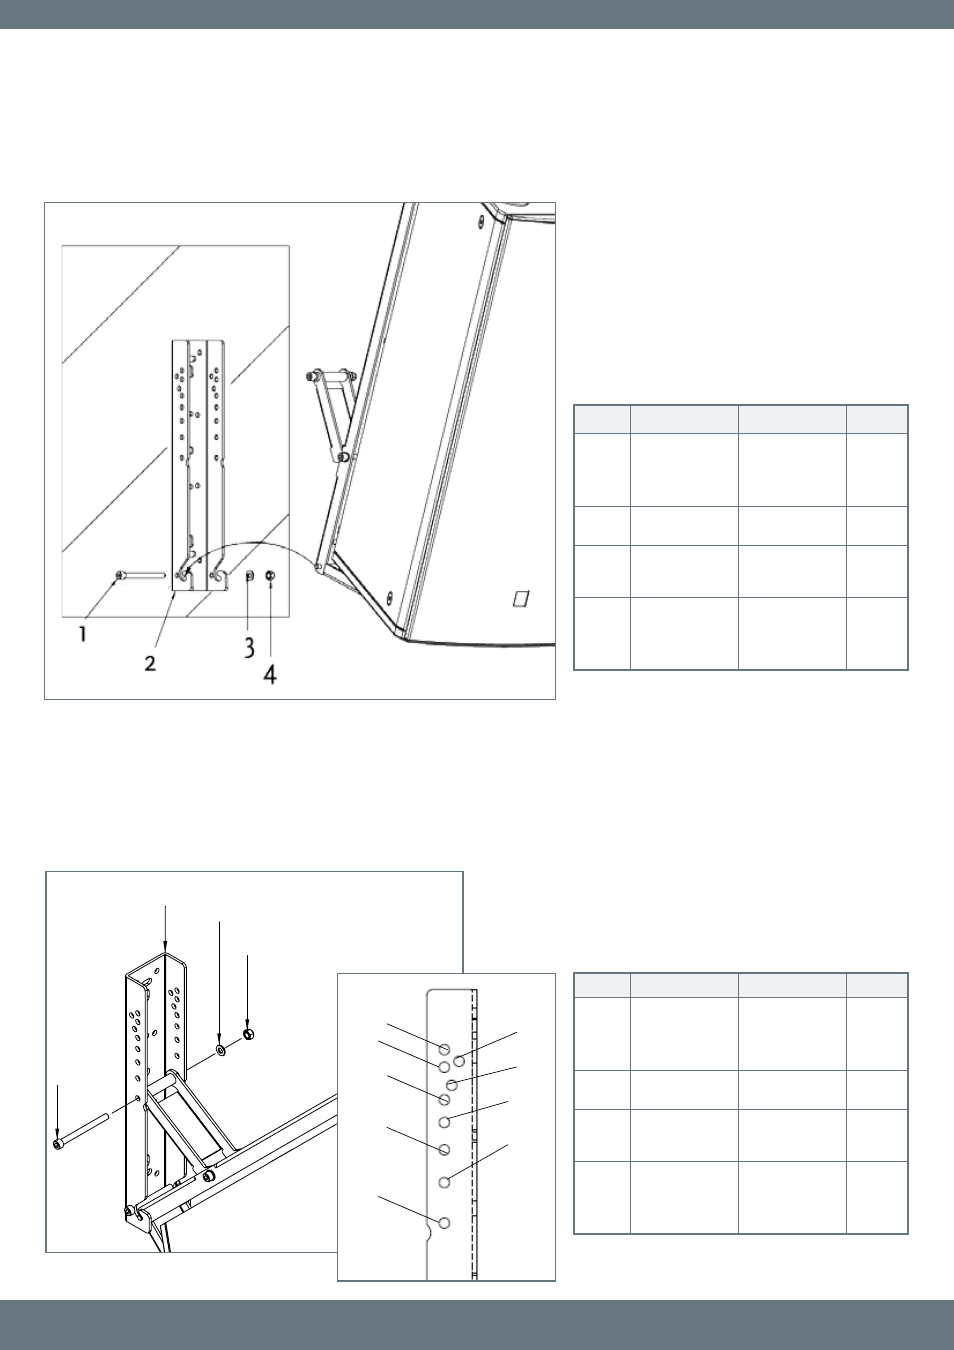
3.4 Verbinden der Lautsprecher mit Neigevorrichtung (ohne Wandplatte) /
Connecting Enclosures to the Speaker Tilt (without the Wall Plate)
Tipp: Befestigen Sie zuerst die Neigevorrichtung an der Wand,
somit lässt sich der Lautsprecher mit montiertem Bügel bequem
in die dafür vorgesehenen Halterungen einhängen.
Tip: Mount the speaker tilt to the wall first. Then it will be easier
to lift the cabinet and slide the attached U-bracket into the
retaining fixture.
Pos.Nr.
Beschreibung
description
quantity
1
Inbusschraube
DIN912 Zylin-
derkopf M8x90
Hexagon socket
head cap screw
DIN912 M8x90
1
2
Neigungsschiene
Speaker tilt
1
3
Unterleg-Scheibe
8,4 sw
washer, form A,
D=8.4mm, black
1
4
Stopmutter M8
self locking
hexagon nut with
plastic insert, M8
1
3.4.1 Einstellen des Winkel an Neigevorrichtung /
Adjusting the Speaker Tilt Angle
3
4
2
1
Pos.Nr.
Beschreibung
description
quantity
1
Inbusschraube
DIN912 Zylin-
derkopf M8x90
Hexagon socket
head cap screw
DIN912 M8x90
1
2
Neigungsschiene
Speaker tilt
1
3
Unterleg-Scheibe
8,4 sw
washer, form A,
D=8.4mm, black
1
4
Stopmutter M8
self locking
hexagon nut with
plastic insert, M8
1
Hinweis: Durch die Auswahl unterschiedlicher Löcher kann ein
anderer Neigungswinkel erzielt werden (siehe Zeichnung 3.4.1 B)
Note: You can reach different angles by choosing different holes
(see figure 3.4.1 B)
7,5°
15°
25°
35°
45°
10°
20°
30°
40°
3.4.1 A
3.4.1 B
13