E-flite P-40 Warhawk 300 ARF User Manual
Page 5
5
E-flite P-40 Warhawk Assembly Manual
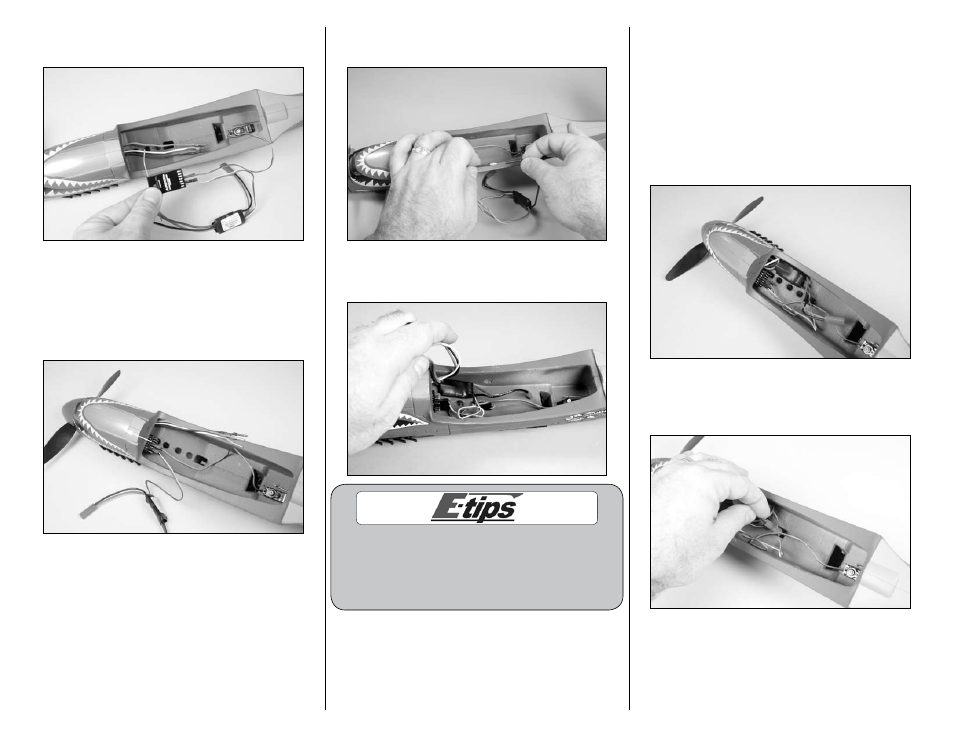
7. Plug the speed control and elevator servo
connectors into the receiver.
8. Place a small piece of two-sided tape on the
receiver. Slide the receiver into the fuselage and
press it against the tape to secure it into the
fuselage. Make sure to leave enough of the receiver
exposed to know which port to plug the aileron
servo into.
9. Connect the leads from the motor to the
speed control.
10. Use two-sided tape to secure the speed control
in the fuselage as shown.
Before checking the rotation of your motor,
make sure to remove the propeller to avoid any
accidental injuries. The details for removing
the propeller can be found on Page 10,
“Propeller Removal and Installation.”
11. Check the operation of your motor at this
time using the radio system. The motor should
spin counterclockwise when viewed from the front
of the fuselage. If not, follow the speed control
manufacturer’s recommendations to reverse the
direction if necessary. Once the direction of
rotation is verified, you can install the propeller
back on the motor.
12. Tuck the motor leads in the fuselage as shown.
13. Insert the lead for the battery from the speed
control into the larger hole in the fuselage. The lead
will enter the compartment under the canopy.