2 sample changer setup – Metrohm 748 DH Sample Changer User Manual
Page 8
2.2 Sample Changer setup
748 DH Sample Changer
6
2.2 Sample Changer setup
2.2.1 Setting up the basic instrument
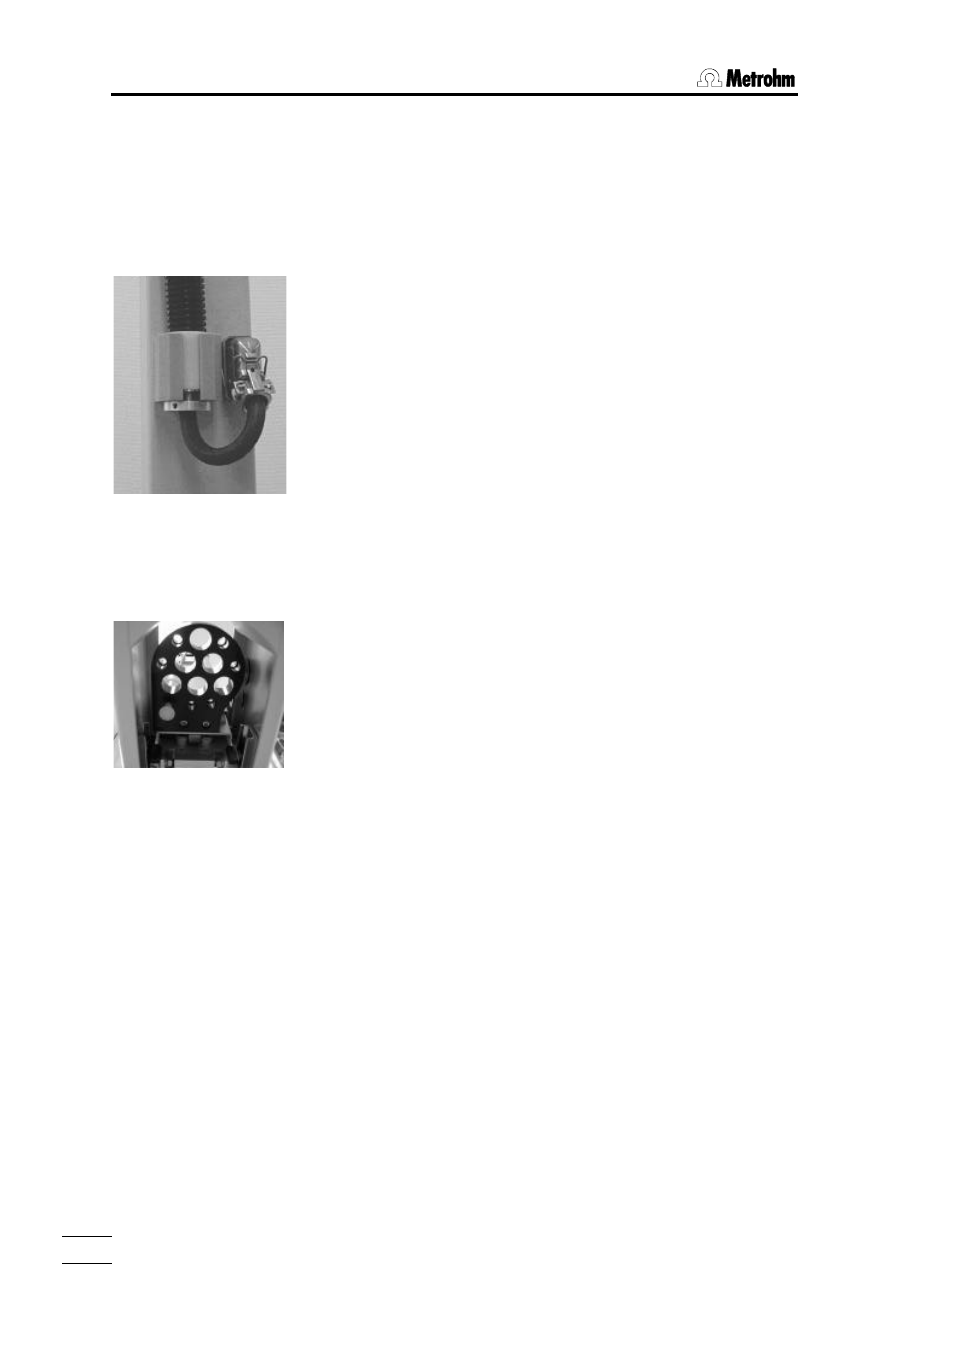
Attaching the
control cable:
Fastening the titration head,
sample arm from below:
Important:
Do not lift the sample changer by the sample arm.
Check the delivery immediately on receipt for complete-
ness and transport damage.
Setup
1. Attach control cable to sample arm: insert the white
sleeve with the washer in the cable holder and screw
the holding ring tight (with 1.5 mm Allen key).
Insert cable and secure with clip.
2. Attach and insert the control cable on the rear panel
of the sample changer in the same way.
3. Clip 6.2053.010 cable clamps onto the control cable.
4. Remove splash protection: screw off the 2 side-
mounted Phillips screws and carefully pull off plastic
panel.
5. Screw the titration head into the titration head holder
of the sample arm from below (3 mm Allen key)
6. Lead the beaker detector cable through the cable
holder and through the cable clamps to the rear panel
of the sample changer.
7. Connect the beaker detector cable to remote socket
"Auxiliary 1".
8. Reattach splash protection: set place plastic part in
position and screw on again.