3 equipping the titration head – Metrohm 748 DH Sample Changer User Manual
Page 10
2.3 Equipping the titration head
748 DH Sample Changer
8
2.3 Equipping the titration head
2.722.0020 Rod stirrer
1. Insert stirrer in titration head.
2. Lead stirrer cable through cable holder and through the
cable clamps to the rear panel of the Sample Changer.
3. Connect cable to stirrer socket "Mixer".
4. Push 6.1909.020 stirrer propeller onto the stirrer from
below.
5. The stirrer speed can be set with the rotary switch on the
rear panel of the Sample Changer.
Electrodes (see also page 27
6.1463.000 macro titration head: electrodes with SGJ 14/15
6.1463.010 micro titration head: micro electrodes, 6 mm di-
ameter.
1. Insert electrode into titration head.
2. Screw electrode cable (at least 2 m long) onto electrode
plug head and lead it through the cable holder and the
cable clamps to the rear panel of the Sample Changer.
3. Plug electrode cable into Titrator.
Buret tips
1. Insert buret tips into titration head and screw tight with
M10 screw threads.
2. Screw 6.1805.XXX tubing connection onto the buret tips.
3. Lead tubing through the tubing holder and the tubing
clamps to the rear panel of the Sample Changer.
4. Connect the other end of the tubing to the dosing unit
outlet. Use 6.1808.000 connection piece for connecting
to the dosing tubing if necessary.
Important
The cable and tubing should be led between the ca-
ble/tubing holder and the cable/tubing clamps in a curve so
that they are not subjected to stress when the titration head
is lowered!
Check length of cables and tubings as follows:
•
Open Sample Changer window in the titration part of Ti-
Net.
•
Press button
•
Move to "Home" position and lower the sample arm to
working position.
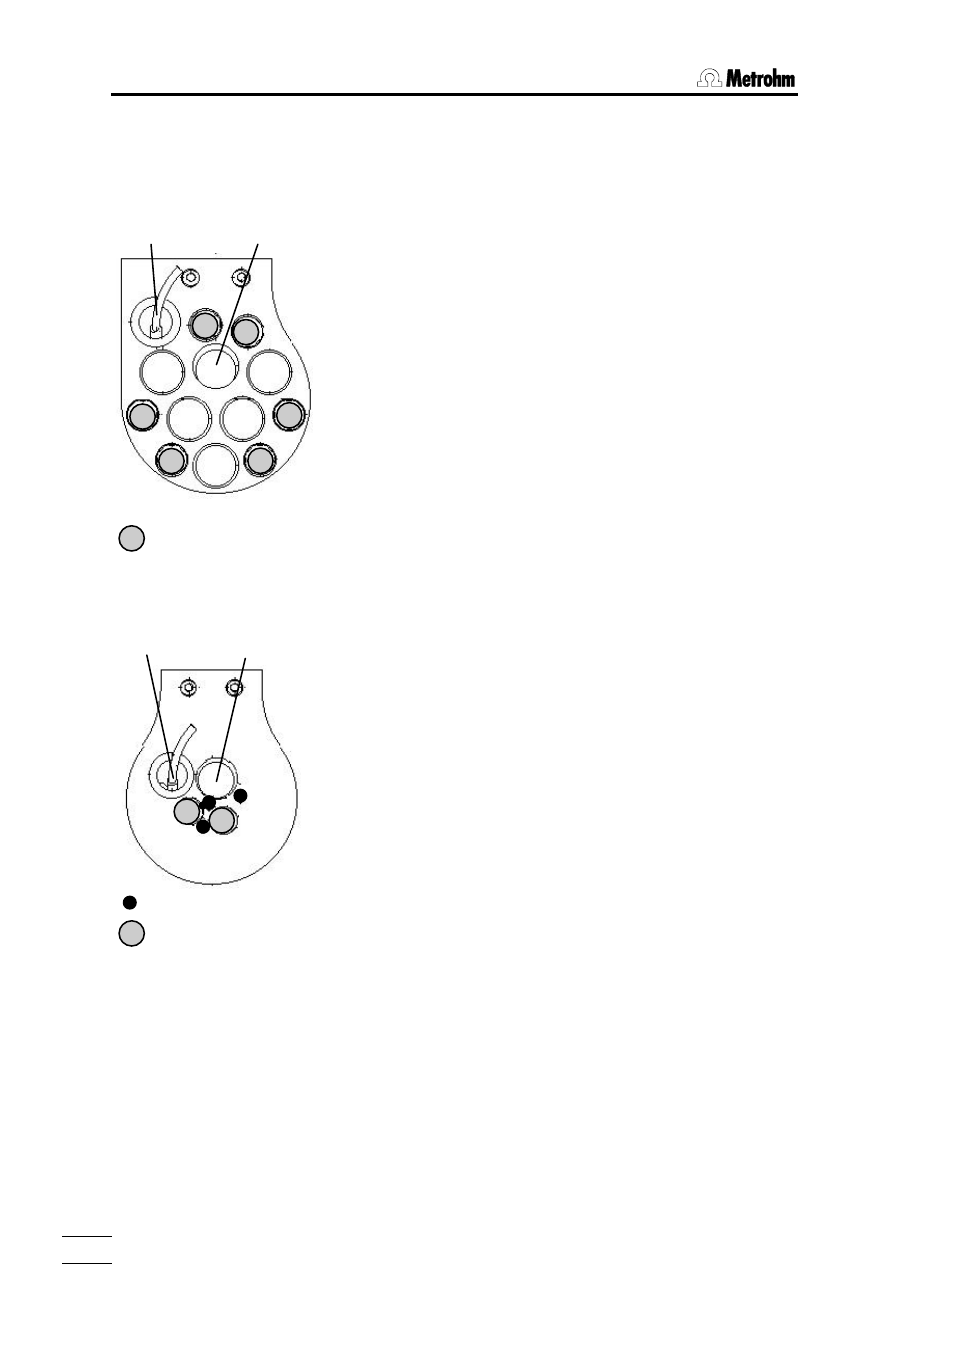
6.1463.000 Macro
titration head:
Beaker detector
Stirrer
M10 screw threads for buret
tips
6.1463.010 Micro
titration head:
Beaker detector
Stirrer
M10 screw threads for
electrodes or further buret
tips
Built-in buret tips