Adjusting your slt system, Maintenance – Bennett Marine SLT Self-Leveling Tabs User Manual
Page 7
Saving the Pin: This allows you to put your SLT tabs in the retracted position when not on
the water. You may wish to do this for beaching, trailering or rack storage. Reinsert the
pin following the reversed method used in Step #11 on page 6.
adjusting your SLt System
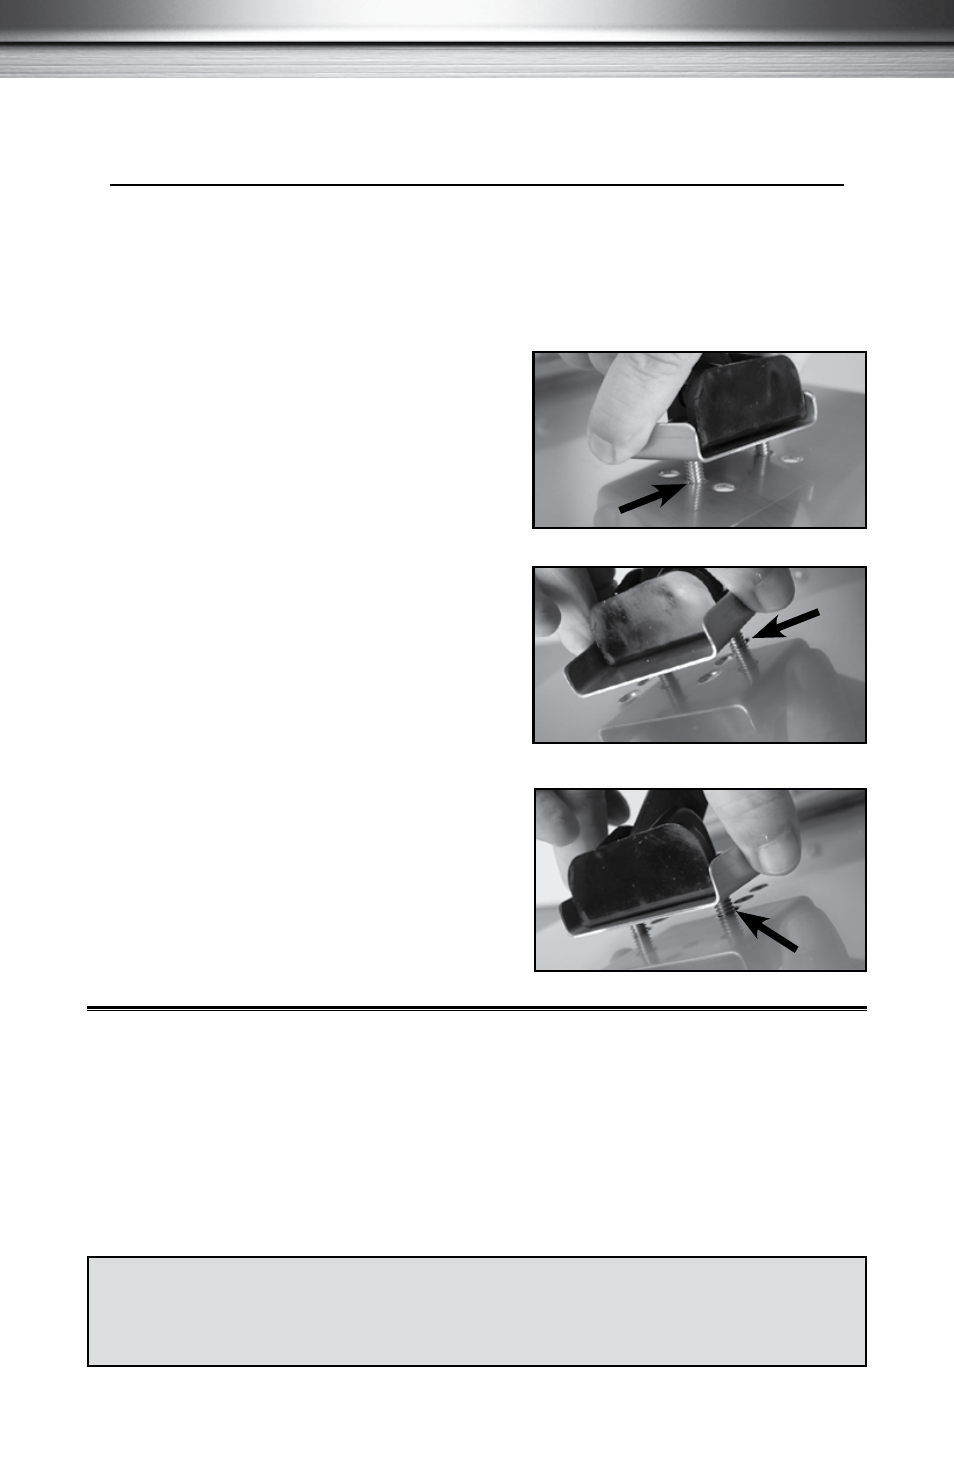
Three Mounting Options to Change Lift:
IMPORTANT: Conduct a sea trial before making any adjustments.
1. Center Set of Holes — Position #2
When you first install your tabs, you will start at
Position #2 (See Step #6 on page 5 and image
to the right.) After the sea trial, you may find
that Position #2 does not provide the optimum
setting for your boat — see below.
2. First Set of Holes (Closest to the
Transom) — Position #1
Position #1 provides more lift. If your boat has
more stern weight, you may wish to increase lift.
Move the actuator forward from Position #2 to
Position #1.
The SLT has three hole positions on the trim tab so that the actuator angle may be
adjusted for optimum lift pressure and performance. The supplied mounting bracket
installed under the actuator lower hinge covers the holes that are not used.
3. Trailing Edge Holes (Farthest from
the Transom) — Position #3
Position #3 provides less lift. If the bow is
too low during the sea trial, you may wish to
decrease lift. Move the actuator back from
Positon #2 to Position #3.
Zincs (If Storing in Saltwater): To deter electrolysis, a zinc anode should be attached
to the top of each tab. Zinc must make direct contact with stainless steel. Do not paint zinc.
Painting: Paint trim tabs to discourage marine growth. 1. Clean surfaces of all grease,
oil and dirt. 2. Apply two coats of epoxy metal primer. 3. Apply two coats of anti-fouling
paint. Actuator, including the piston, may be painted.
Maintenance
7
#2
#1
#3