Slt installation instructions, Getting started - important please read, Tools & supplies needed – Bennett Marine SLT Self-Leveling Tabs User Manual
Page 4
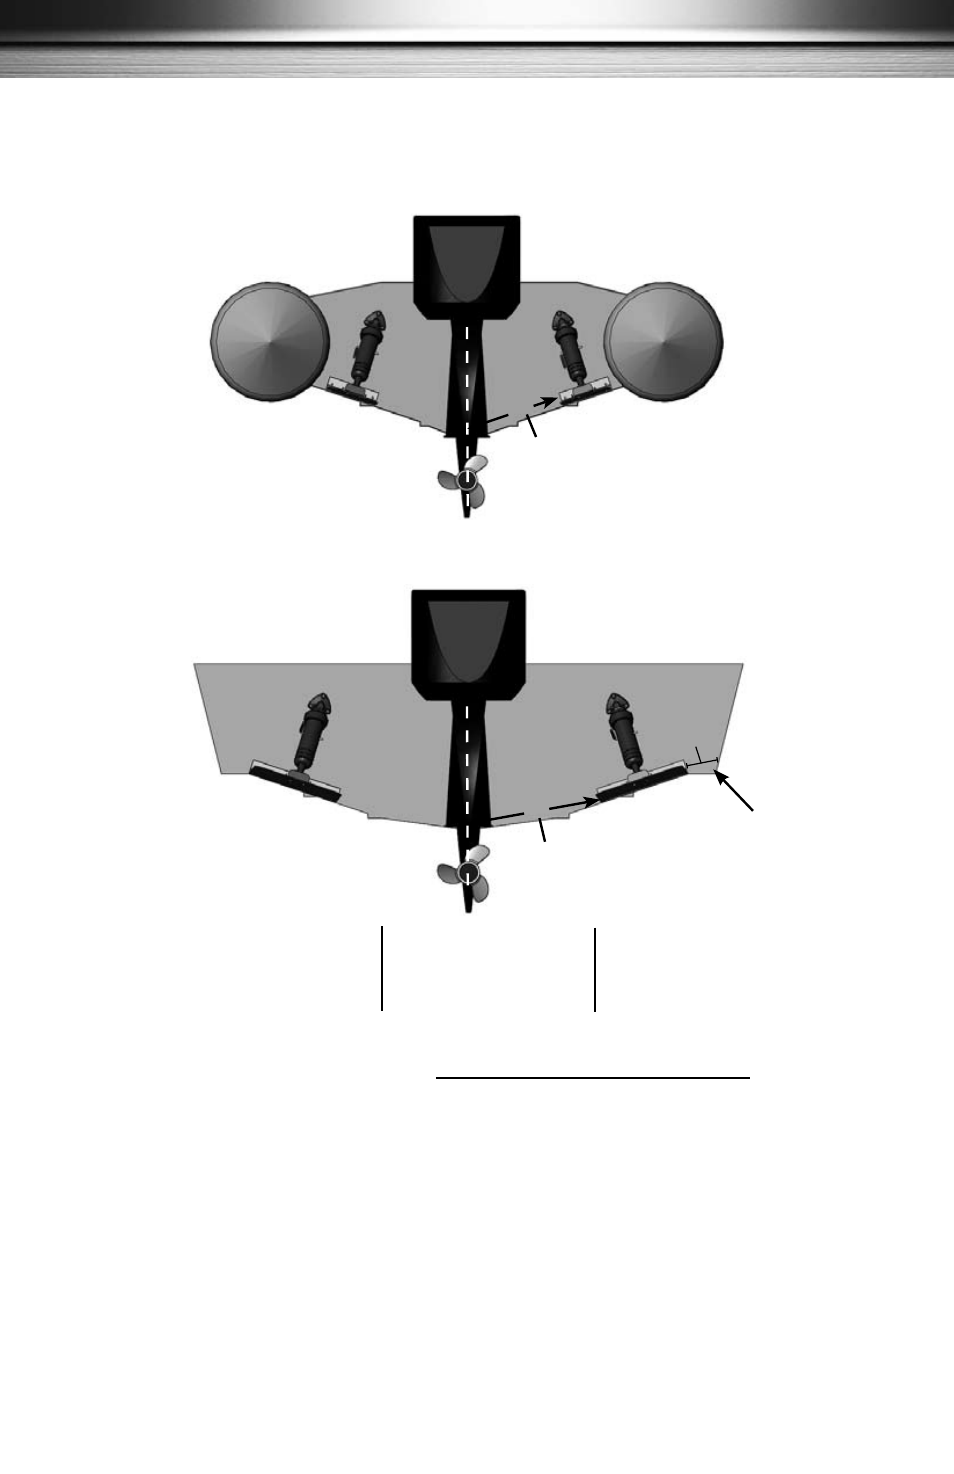
Standard rIB Installation
Standard “V”Hull Installation
4
Getting Started - Important Please read
1.
Checking for Obstructions. Before starting the installation — and drilling any holes
— verify that there are no mounting restrictions inside or outside the transom. Choose a
location about 3-4” from the chine (side of the hull). Hold the tab up to the very bottom of
the transom (flush with hull bottom), and hold the actuator on the trim tab, using the center
set of holes for your starting point. Then set the actuator upper hinge against the transom.
Verify this for both sides so that the actuators will not center on any obstruction. If they do,
reposition tabs slightly inboard or outboard.
Now you are ready to continue your installation, with Steps 2-12 starting on the next page.
SLT Installation Instructions
Tools & Supplies Needed:
Hand drill with 5/32"
•
and 3/16" drill bits
Tape measure
•
Phillips screwdriver
•
Marine grade sealant
•
Straight edge
•
Marking pencil
•
Glove
•
(At lea
st 8" f
rom
centerline of
drive)
8"
(At least 8" fr
om
centerline of drive)
8"
Chine
3"- 4"