Slt installation instructions (cont.) – Bennett Marine SLT Self-Leveling Tabs User Manual
Page 6
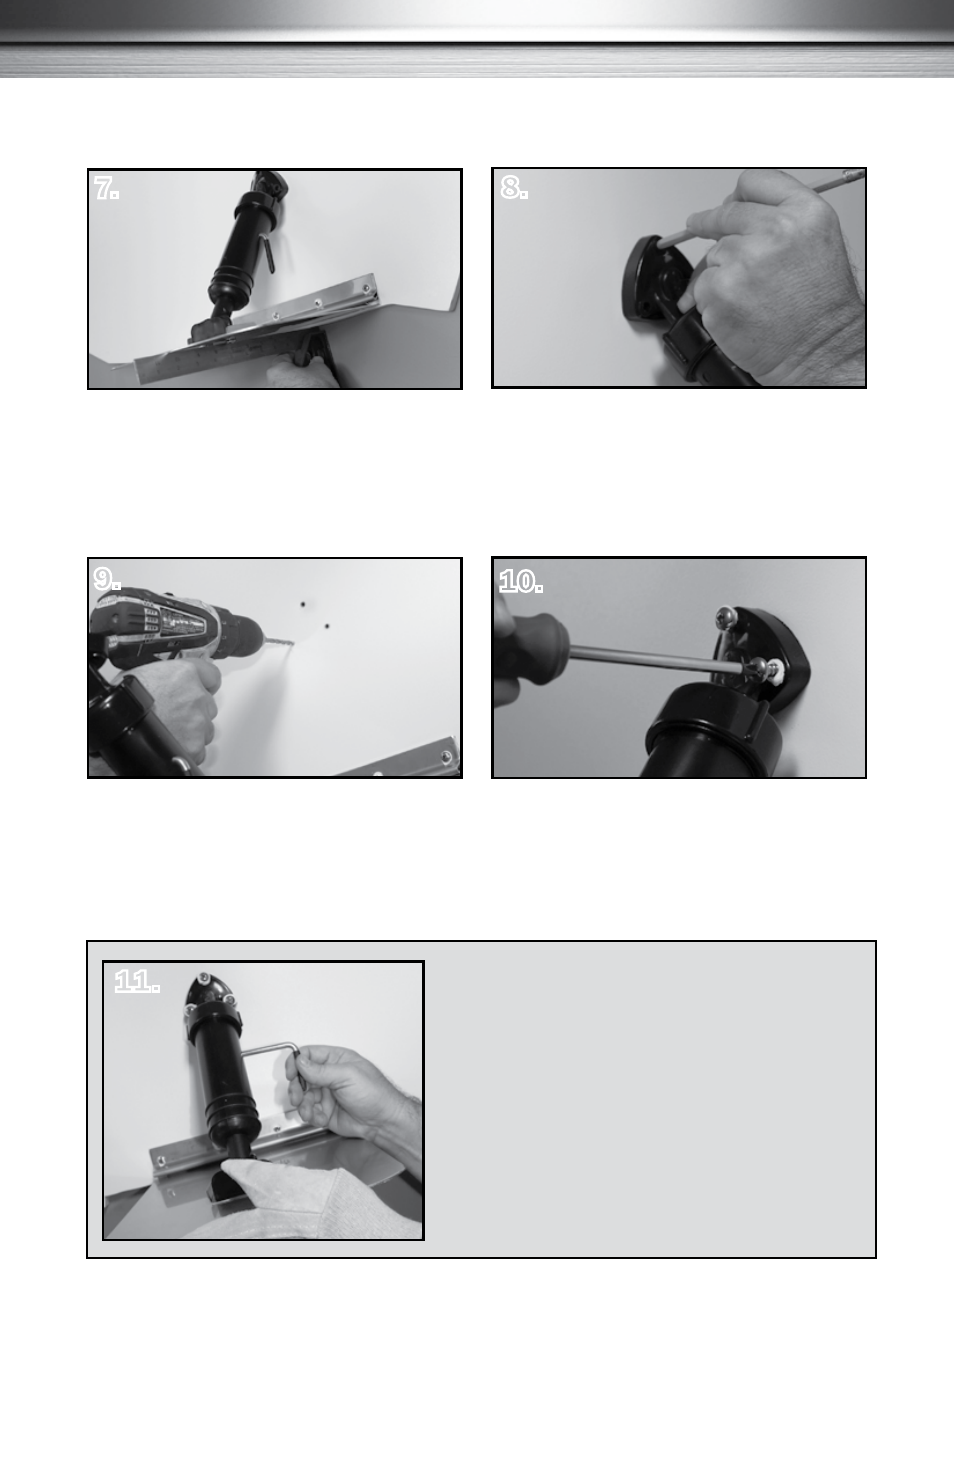
SLT Installation Instructions (cont.)
Mark Actuator Position on Transom.
Set the actuator upper hinge against the
transom. Mark the three upper hinge hole
centers.
8.
Drill Actuator Holes. Use a 3/16" drill
bit to drill the three holes. (For aluminum
boats, use 1/4-20 machine screws of an
appropriate length instead of the screws
supplied.)
11.
Releasing the Pin. Actuator spring is under
tension. Use a glove to first slightly lift up on
the bottom of the tab. Take care not to have any
obstruction under the tab when doing this. Slowly
remove the pin from the actuator. Once the pin
is removed, slowly lower the tab before releasing
your hand from the tab.
7.
Set Final Actuator Position. Use a
straight edge under the trim tab to make
sure the tab is flush with the hull bottom.
This is important to ensure correct actuator
placement.
Mount Actuator to Transom. Apply
marine sealant in and around pilot holes.
Secure upper hinge to transom with #14 x
1 ½" screws.
10.
WARNING: Tab will snap down with
50-90 lbs of force if not held manually.
CONGRATulATIONS, yOuR SelF-levelING TAbS ARe NOW INSTAlleD AND
ReADy FOR yOuR eNJOyMeNT!
6
Repeat Steps 2 - 11 for the opposite side of the boat.
See next page to adjust the tabs after sea trial if needed.
12.
9.