Snmp screen, Update firmware, Snmp screen update firmware – AJA FS1 Version 2.2.2.1 User Manual
Page 112
102
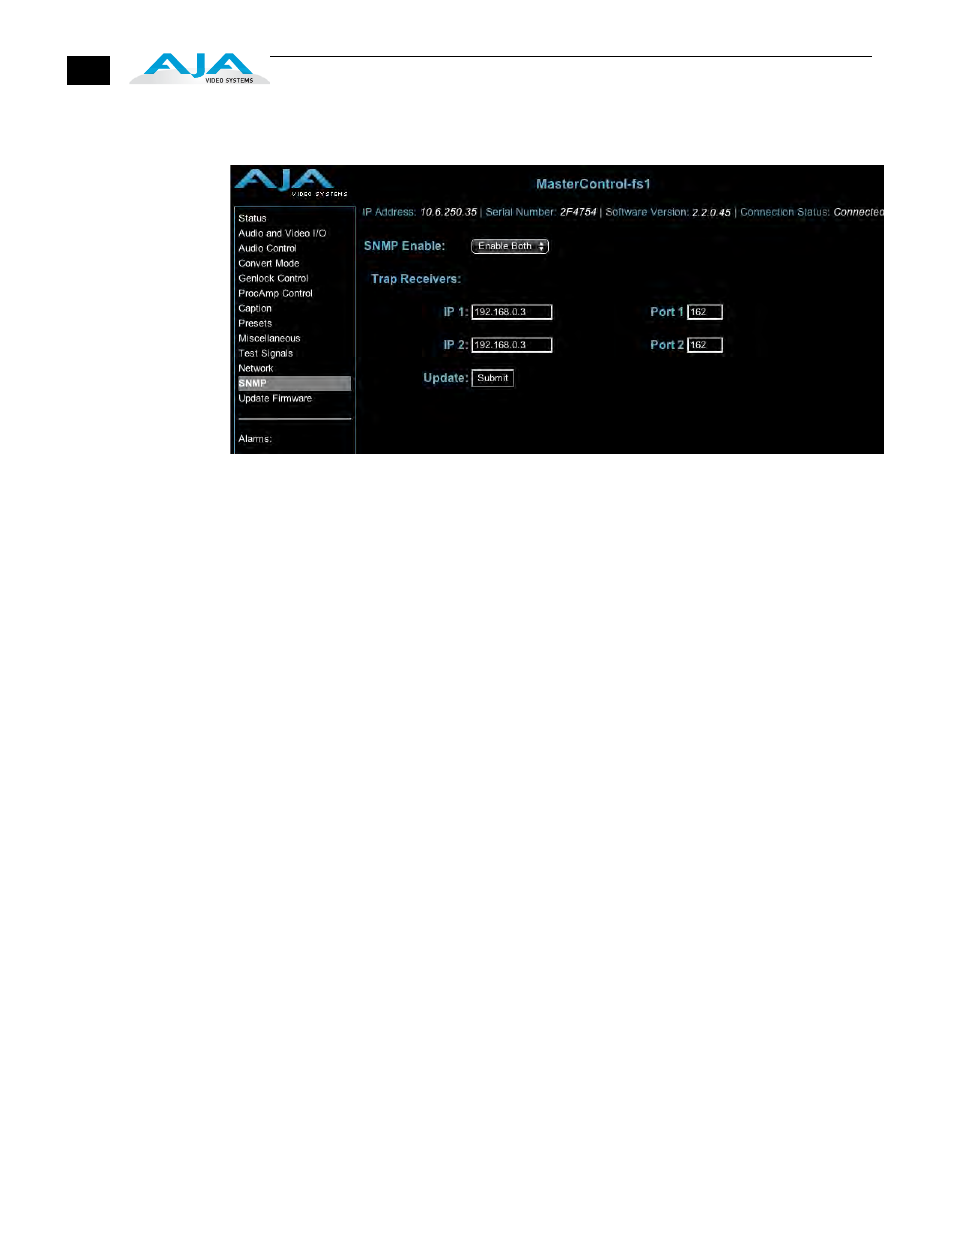
SNMP Screen
This screen contains all of the information required to set up SNMP messaging to the FS1.
FS1 Web Interface, SNMP Screen
SNMP Disabled, Enable 1 or Enable Both (51.1)—Select Enable 1 if you want the FS1 to issue
trap messages to the defined trap 1 destination. To issue trap messages to both Trap
1 and Trap destinations, Select Enable Both. Select Disabled (default) when you don’t
want the FS1 to issue trap messages.
Trap Receivers (51.2 to 51.5)—Enter the IP address of the destination where SNMP
command messages (called “traps”) will be sent (default is 191.168.0.3). This is usually
an SNMP client (“NMS” or Network Management System) somewhere on your LAN.
You must also click the Update submit button to update the FS1 with the IP address
entered here. A Port number for the TCP/IP port to be used for trap messages from
the FS1 to the NMS must also be specified (UDP Port 162 is the default). Two sets of
Trap Destination IP and Port numbers are provided so you can send trap messages in
parallel to two NMS.
Note:
Illegal data, such as out of range addresses or text, entered on the SNMP web
page will generate an error page containing a message similar to the following:
Something is missing or out of range
trap IP 1:192.168.0.4
port 1: 162
trap IP 2: 0.0.0.0
port 2: 162
PRESS YOUR BROWSER’S BACK BUTTON TO CONTINUE
Update (Submit button)—Pressing this button requests the FS1 to update its SNMP
information with that entered on this screen.
Update
Firmware
The Update Firmware screen and the firmware download and installation procedure are
described in Chapter 3 Installation.