Leds – Western Digital My Cloud User Manual User Manual
Page 15
GETTING STARTED
10
WD MY CLOUD PERSONAL CLOUD STORAGE
USER MANUAL
1. Connect one end of the Ethernet cable to the Ethernet port located on the back of the
device. Connect the other end of the Ethernet cable directly into an available router or
network switch port.
2. Connect one end of the adapter into the power supply socket on the back of the device.
Plug the power adapter into a power outlet. The unit powers up automatically.
3. When the LED on the front of your device turns a solid blue, continue with “Getting
Started Using the Online Setup Installer” on page 11 or “Getting Started Without the
Online Setup Installer” on page 21.
LEDs
Checking the Front Panel LED
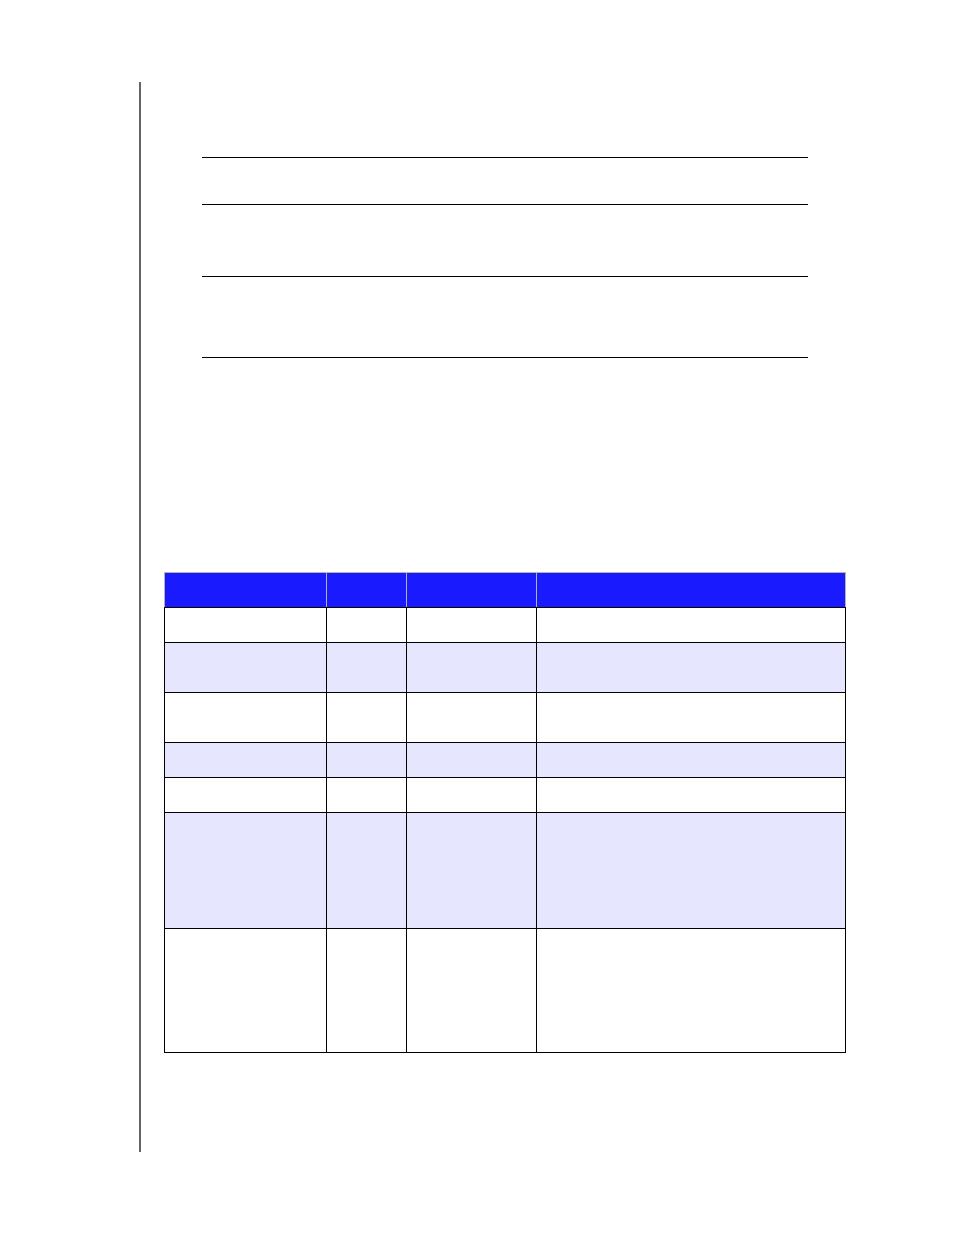
The following table describes the front panel (red/white/yellow/blue) LED behavior.
Important: We recommend that you use the enclosed Ethernet cable for best
performance.
Important: Wait for the WD My Cloud device to finish powering up
(approximately three minutes) before configuring the device. You
will know it is ready when the LED stops flashing and turns solid
blue.
State
Color
Appearance
State Description
Power Off
None
Displays if the device is unplugged.
Power On
White
Flashing
Displays when you first apply power to the
unit.
Initializing
White
Solid
device has begun loading the Operating
System (OS).
Ready
Blue
Solid
The OS is now ready.
Standby
Blue
Pulsing
Unit is in HDD standby mode.
Attention
Yellow
Blink
The following circumstances trigger this
state:
• Disk thermal warning threshold
exceeded (under or over temp)
• Network cable not inserted
Fault/action required
Red
Solid
The following faults trigger this state:
• Disk SMART failure
• Data volume does not exist
• System volume does not exist
• System thermal shutdown (75
°
C)