WarmlyYours Mirror Defogger User Manual
Page 7
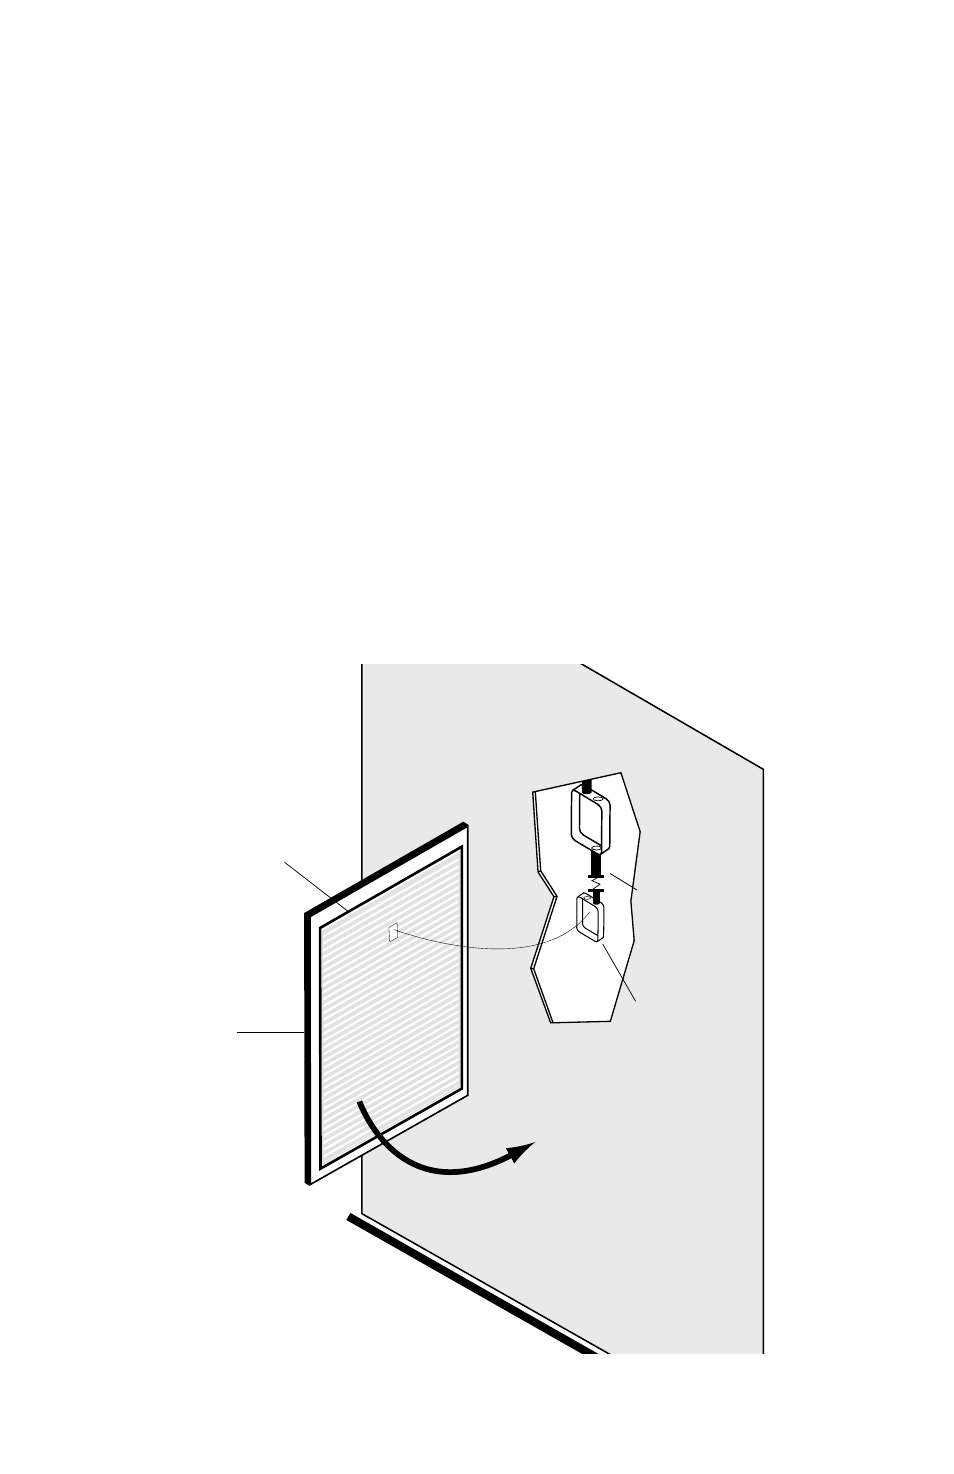
Prepare Electrical Rough-In and Wiring
Step 3
Using the location you determined in Step 2, install a 2” x 3”
remodeler’s electrical junction box inline with the Mirror Defogger’s
lead wires. Refer to
Diagram C.
Note: The location where the wires leave must be entirely within the
area of the new electrical junction box.
Step 4
Run Romex cable from a nearby junction box to the new box.
Typically the most convenient junction box is the one that supplies
power to the lighting above the mirror. This will enable the system
to turn on automatically whenever the bathroom lights are turned
on.
Mirror
Wall
ClearlyYou™ Defogger
Existing
electrical box
for vanity
lighting
New single
gang electrical
box
QuickTime™ and a
TIFF (Uncompressed) decompressor
are needed to see this picture.
Mirror defogger
Remove Protective
Paper
Power Cord
Back of Mirror
Mirror Defogger
leads from Mirror Defogger
to light junction box
Model #
Shape
Width (Inches) Length (Inches) Watts Volts Amps MSRP
FFM-1218 Rectangle
12
18
29 120 0.24 $65.00
FFM-1824 Rectangle
18
24
57 120 0.48 $85.00
FFM-2432 Rectangle
24
32
96 120 0.80 $105.00
FFM-15R Round
15
20 120 0.17 $65.00
FFM-20R Round
20
41 120 0.34 $85.00
FFM-25R Round
25
65 120 0.54 $105.00
FFM-1826OV Oval
18
26
45 120 0.38 $85.00
FFM-2432OV Oval
24
32
76 120 0.63 $105.00
Circle
Circle
Circle
5
Diagram C