Vigo VG06041 User Manual
Page 6
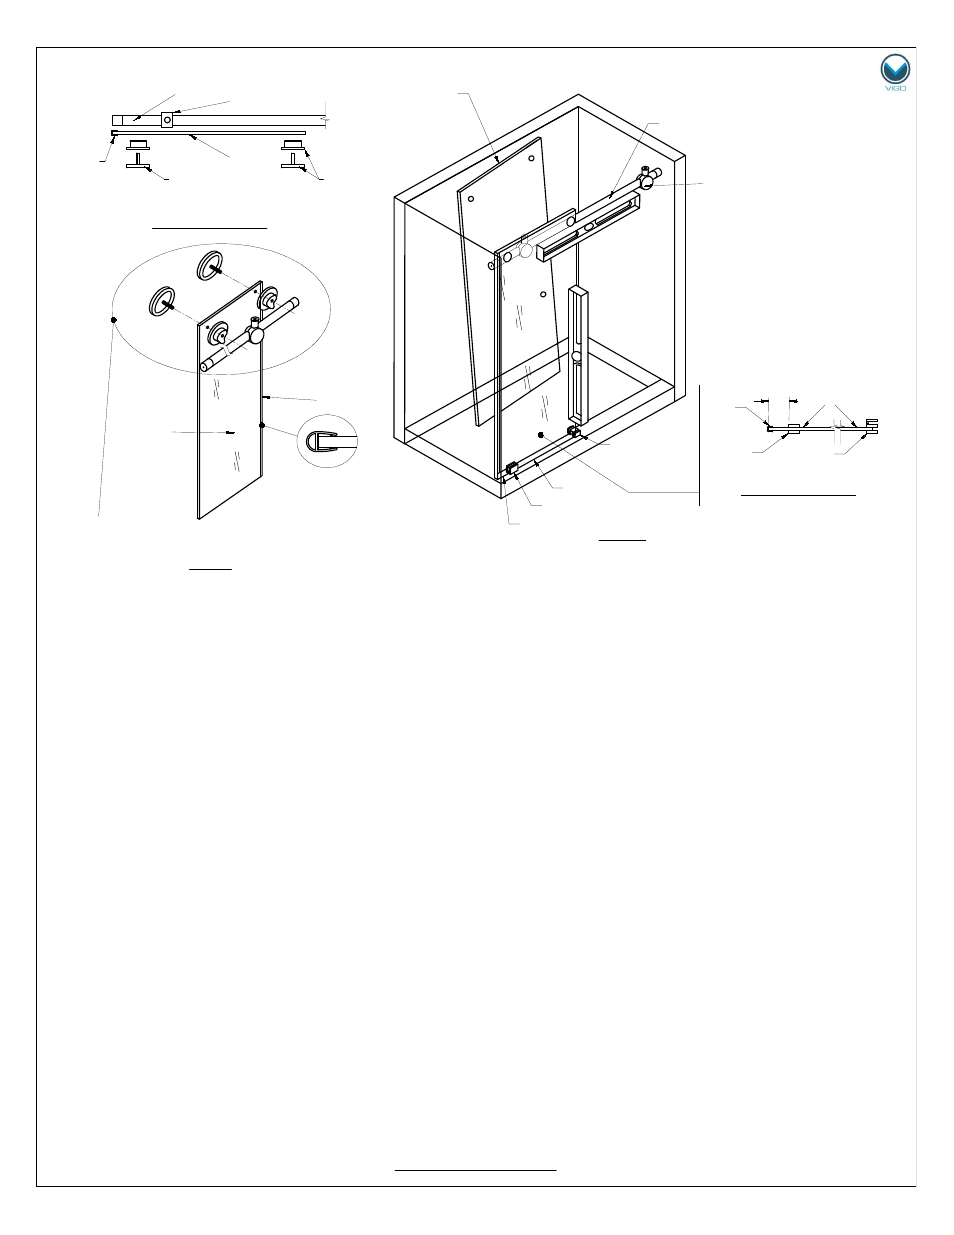
FIG.3
4
4
VIEW FROM TOP
OUTSIDE OF THE SHOWER
OUTSIDE OF THE SHOWER
2
2
11
10
FIG. 4
10
11
12
12
VIEW FROM TOP
INSIDE OF THE SHOWER
OUTSIDE OF THE SHOWER
4
12
7
8
8
14
7
4"
14
B. INSTALLING THE FIXED PANEL
1.
Remove the fixed panel (#4) and structural rail (#11) assembly from the shower door
opening. Find the center of the marked circumference on the wall.
2.
Mark holes on the wall for the mounting screws. Drill holes and place plastic anchors (#17)
inside them. Preferred method of installation negates anchors and has the installation going
right into studs.
3.
Remove the wall mount bracket assembly (#1) from the structural rail assembly. Unscrew
the plate from the bracket assembly body. [SEE FIG.5]
4.
Place plates to the wall opposite to the plastic anchors. Screw plates in with 2" screws (#15).
[SEE FIG.6].
5.
Place the fixed panel bottom clip (#7) and the door bottom guide (#8) to the marked
locations on the floor. Note for applications where screws are not applicable the use of
epoxy can occur. Refer to the type of material you are mounting to for the correct style of
epoxy as it is specific to material (not provided). Epoxy should only be used on the fixed
panel bottom clip and the bottom door guide. Proceed to Step 7 if this is your style of
installation.
6.
Mark holes on the floor for the mounting screws. Drill the holes and place the plastic
anchors (#16) inside them. Screw in the fixed panel bottom clip and the door bottom guide
to the floor with 1 1/8" screws (#18).
7.
Place bracket body back on the rail.
8.
Place the fixed panel with the structural rail assembly in its proper position and thread the
bracket body to the plates.
9.
Tighten the hex screws on the brackets with the hex key (supplied).
MODEL VG06041
6
DOOR PANEL
(#5) INSIDE OF
THE SHOWER