Operation, Using the system – UVP ChemiDoc-It Imaging System User Manual
Page 11
ChemiDoc-It Imaging System
11
Operation
Using the System
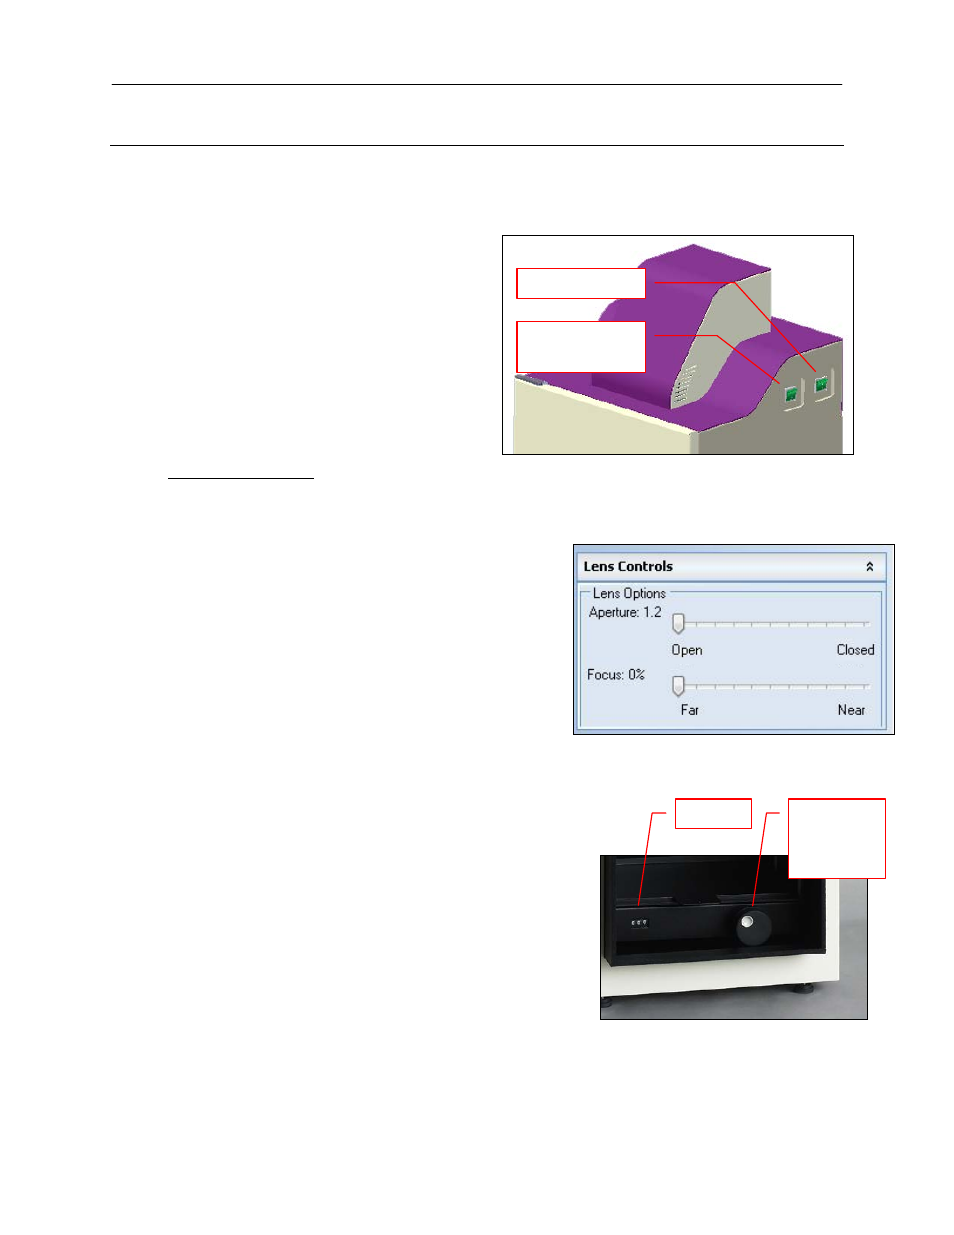
The master power switch is located on the upper right side of the darkroom (see picture below). Connect the
system power as described in Hardware Installation.
1. Turn on the darkroom Main Power
switch.
2. Open VisionWorksLS software.
3. The ChemiDoc-It Imaging System may be
configured with a motorized lens that is
controlled by VisionWorksLS software.
The software has default settings which
can be modified with user-defined
templates.
For additional instructions on using VisionWorksLS
software, refer to the software help files or the
software manual available at
Motorized Lens Control
NOTE: If not using a motorized lens, proceed to the
next section, Adjusting the Platform Tray Height.
The motorized lens is controlled by VisionWorksLS
software. To adjust the lens, click on the Acquisition
Action Tab and then on the Lighting menu button.
The lens is motorized for adjusting aperture or focus
settings.
1. In the lens area, adjust the Aperture by
moving the slider to the left to let more light
into the camera or to the right to decrease
the amount of light into the lens. The f-stop
number is shown next to Aperture.
2. Adjust the Focus slider to control the
near/far focus of the lens. Sliding the control
from right to left will adjust the focus from
near to far.
Adjusting the Platform Tray Height
The platform tray height is adjusted by turning the
platform tray height control knob clockwise or
counterclockwise. The built-in counter displays the
relative height of the tray.
Chemi Tray
Place the flat black Chemi Tray on top of the adjustable platform tray. Place blots in the center of
the Chemi Tray.
Platform
Tray Height
Control
Knob
Counter
Main Power
Epi White Light
(High and Low)
Darkroom and Lighting Power Switches