Click [add – Buffalo Technology PC-P1LAN User Manual
Page 5
5
Mini LinkTheater
User’s Manual
Us
ing
Lin
kT
he
ate
r
Detailed Configuration
Appendix
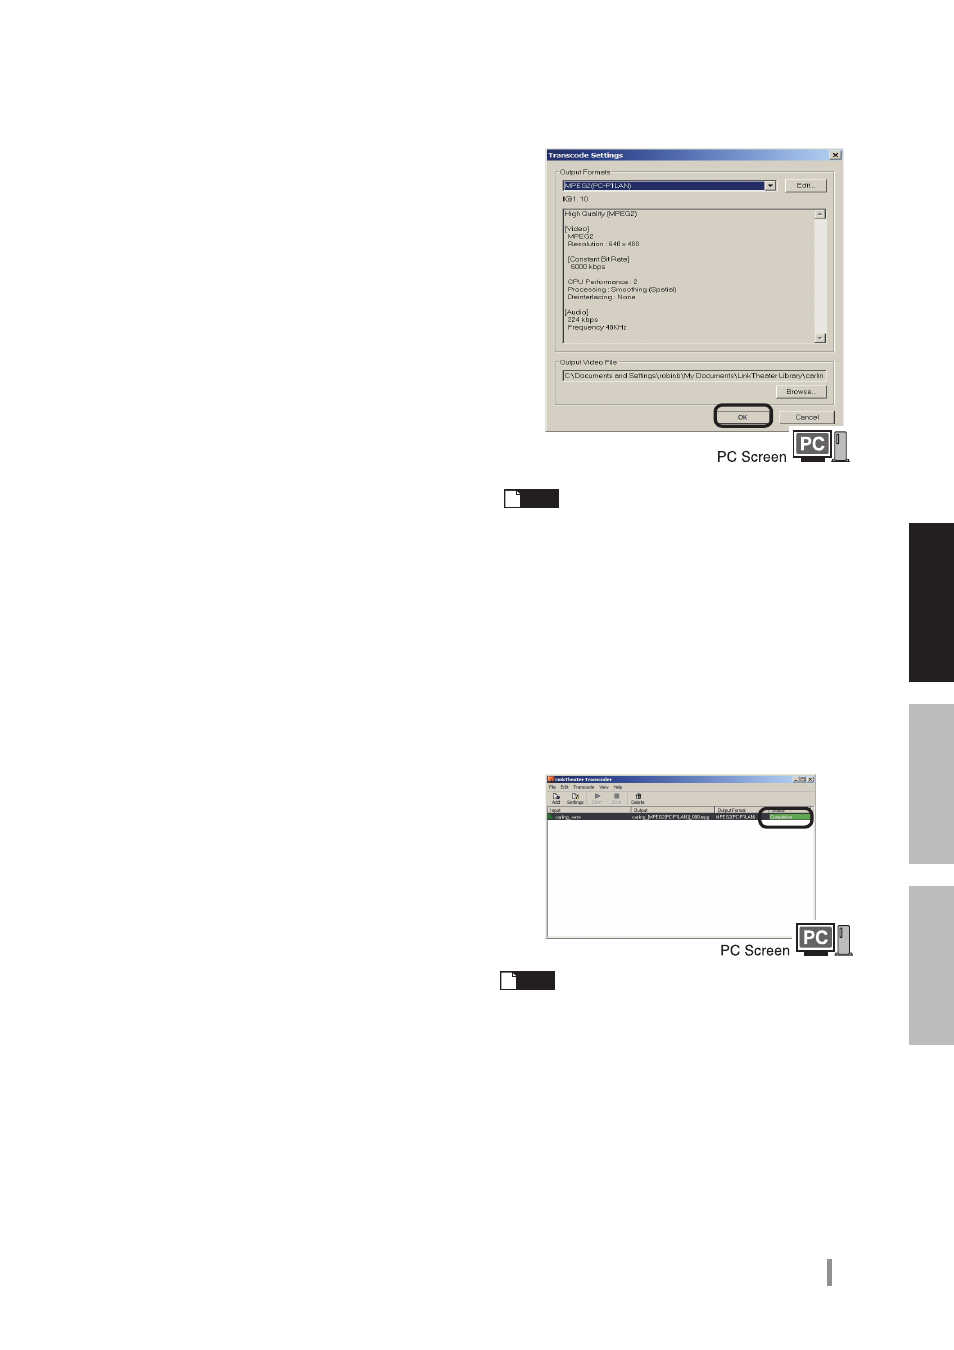
If you wish to configure image quality settings
individually, click [Add] in step 4 on page 4, and
set the details as desired. Individual items can be
selected under [New Profile].
The following items can be set.
Mode
Mode can be selected from constant bitrate (CBR),
variable bitrate (CVBR), and constant quality (CQ).
The features of each mode are explained in the
[Glossary] on page 21. Items that can be set in [Rate
settings] differ depending on the mode selected
here.
Bitrate
The larger the set value, the clearer the image
will be. However, the size of the recorded file also
increases. The possible setting range is 192~8000
(kbps).
If [Variable Bitrate] is selected in adjustment mode,
recording is performed within the range of bitrates
set for maximum bitrate and minimum bitrate. Set
this value so that it falls between the [Maximum
Bitrate] and [Minimum Bitrate] which will be set
below.
Maximum Bitrate
This setting is the maximum bitrate used when
recording. This can only be set when [Variable
Bitrate] is selected in adjustment mode. It is possible
to set a value in the range of the [Bitrate] value in
the item above ~8000 (kbps).
Minimum Bitrate
This setting is the minimum bitrate used when
recording. This can only be set when [Variable
bitrate] is selected in adjustment mode. It is possible
to set a value in the range of the [Bitrate] value in
the item above ~192 (kbps).
DeInterlacing
“Bob” interlacing produces the sharpest image but
may leave noise artifacts. “Median” interlacing
reduces noise but may remove image detail.
CPU processing speed
Image quality improves with a larger value, but the
strain placed on the CPU (computer) also increases.
Use higher numbers if you have a fast computer.
Normally, a value in the range of
0~2 is used.
Audio bitrate
A high bitrate provides higher sound quality, but it
also increases the size of the file.
5
Click [Add].
Note
You can specify the save destination
and name of the file after conversion by
clicking [Output file]-[Browse]. By default,
the converted file is added and saved
to the same location as the conversion
source file, and [MPEG2 (PC-P1LAN)]_000
is added to the end of the file name (the
000 number counts up when the same
name file is converted a number of times).
6
[Status] displays [Awaiting
conversion] → [Converting] →
[Conversion completed].
Note
To stop the conversion process, click
[Stop]. Click [Start] to restart a stopped
file.