Installation – Regency Plateau PTO60 Outdoor Gas Burner User Manual
Page 17
Regency Plateau™ PTO30 Outdoor Gas Fireplace
17
INSTALLATION
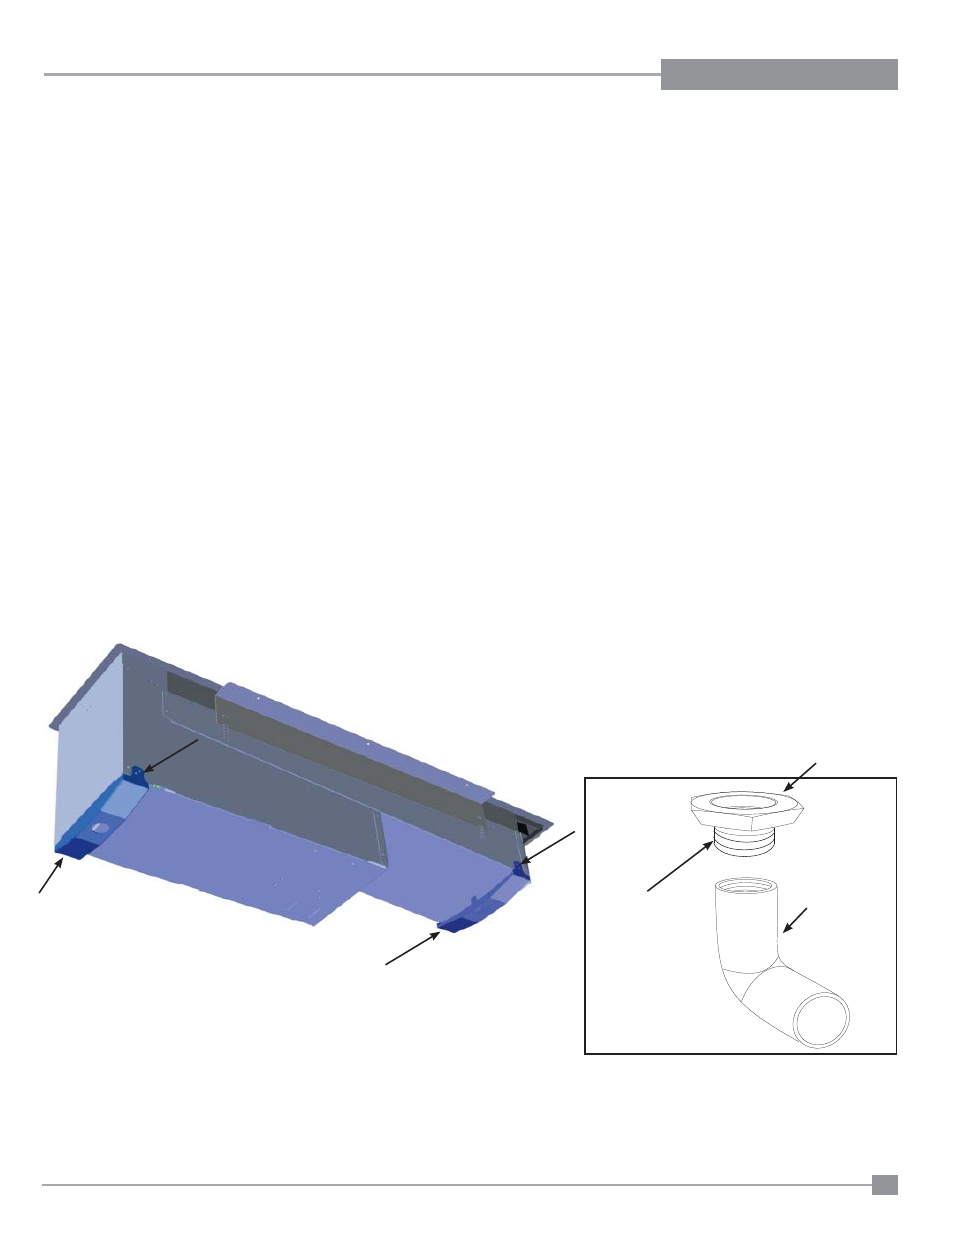
PTO30/PT060 DRAIN INSTALLATION (RECOMMENDED)
Although this decorative gas appliance is designed to operate outdoors safely, rain and other sources of moisture may enter the burner area, which will
cause water to collect inside the base of the unit.
NOTE: The PT060 requires installation of 4 drains (two per PT030).
To prevent excessive water collection, the installer should provide a way to drain the water from the base of the unit by building or installing a
water collector before positioning the decorative gas appliance in its location.
INSTALLATION INSTRUCTIONS
1.
Remove 4 screws (2 each side) to remove the bracket from the bottom of the burner.
2. On the exposed drain hole (see location below), install a PVC 3/4" threaded coupling reducer going from the top of the pan, down through the hole.
Apply a silicone-based sealant around the base and threads before installation. Cut notches into the top of the coupling reducer to prevent water
pooling.
3.
Holding the reducer coupling with a wrench, thread a 90° PVC elbow (from the underside of the unit) to the reducer until it is tight to the metal.
4.
Reinstall bracket from Step 1.
5.
Repeat steps 1-4 on bracket at other end of burner.
6.
Apply a silicone based sealant to the bracket (along all edges).
Note: To assure proper drainage, the decorative gas appliance must be installed on a leveled surface
7.
Add additional piping to route the drain to an appropriate location.
NOTE: Install two drains on both burners for the PTO60 (four total).
Threaded
Reducer
(PVC)
Threaded
Elbow
@ 90°
(PVC)
Reducer and elbow can be purchased from your local
hardware store.
Cut notches into the top
of the coupling reducer to
prevent water pooling.
View from under-
side of unit.