Installation, Topview, Nailing strips – Regency Bellavista B36XTCE Medium Gas Fireplace User Manual
Page 16
16
Regency B36XTCE Gas Fireplace
INSTALLATION
UNIT ASSEMBLY PRIOR TO INSTALLATION
BEFORE YOU START
The Top Nailing Support, the Side Nailing Strips, the 2 Top Standoffs and the Flue Collar must be correctly positioned and attached before the fi replace
is moved into position.
TOP STANDOFF ASSEMBLY
The top standoffs are shipped in a fl at position and must be folded into shape and
attached.
1) Take each standoff and bend into the correct shape. Bend up at the bend lines
until the tab in the standoff and the pre-punched slots on the fi replace top line
up. Be sure to use correct slots, they are marked.
B36XT/
B36XTE/
B36XTCE
STANDOFF SLOT LOCATION
B36XT/
B36XTE/
B36XTCE
TopView
B36X
B36X
Nailing strip for
Tile Finish (set
back 1/2")
Nailing strip for
Clean Finish (set
fl ush with unit)
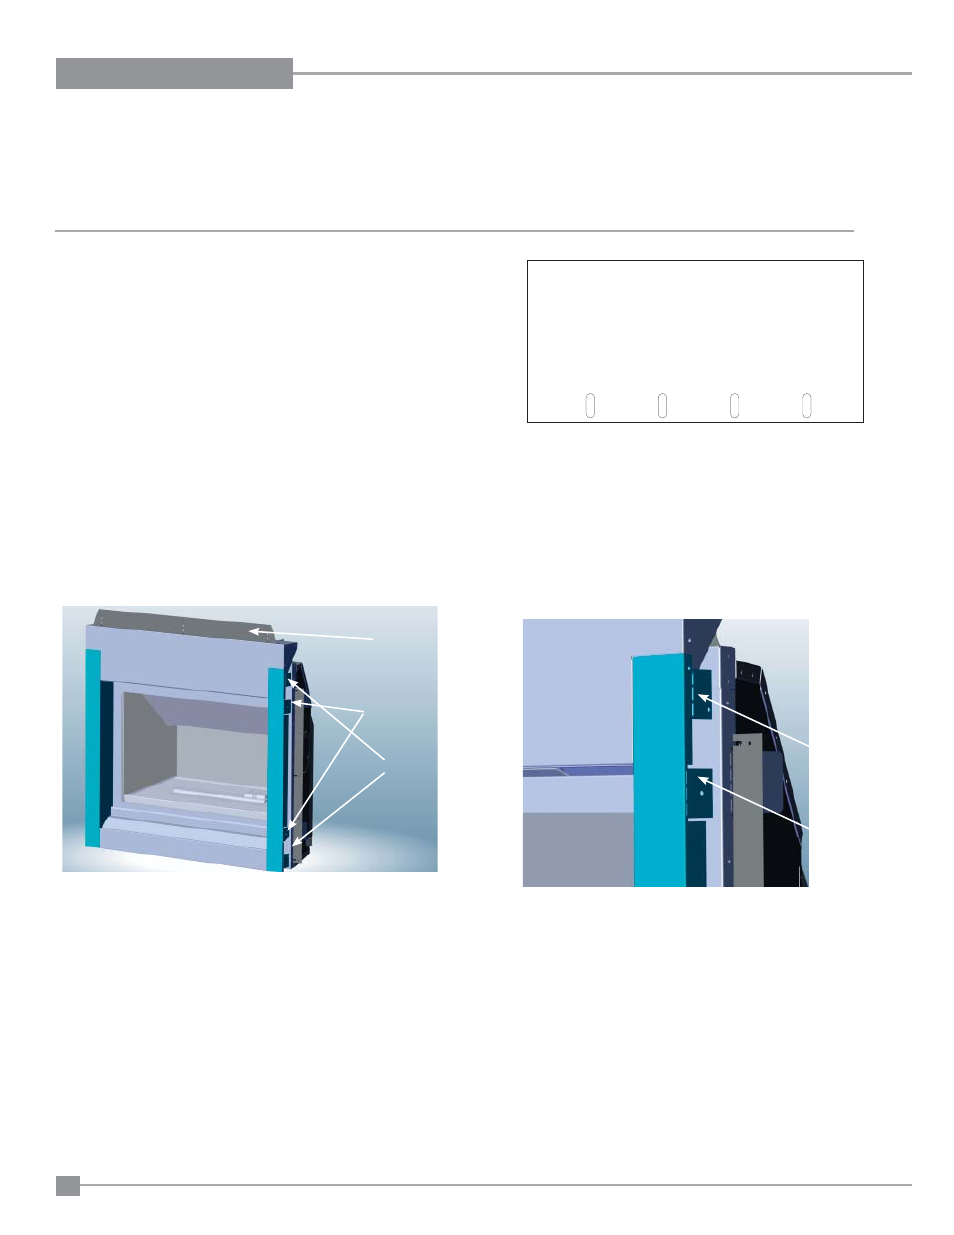
1. There are 8 (eight) side nailing strips and one top nailing strip available on the unit. One set of four (4) are for a clean fi nish installation, the other set are
for a tile fi nish installation as they are set back 1/2" (13mm). The top nailing strip is adjustable to 1/2" (13mm).
2. Bend the required four (4) nailing strips to 90º.
3. Attach top nailing strip with one (1) screw (located at the back of the nailing strip). Adjust to required position, flush or back 1/2" and tighten screw.
Nailing strip for
Tile Finish (set
back 1/2")
Nailing strip for
Clean Finish (set
fl ush with unit)
Adjustable Top
Nailing Strip
NAILING STRIPS