Stack-On IWC-11 User Manual
Page 2
40114-1204
2 15
3
Filler block
Bottom
Support
16"
2
Filler block
Bottom
Support
16"
1
Filler block
Bottom
Support
16"
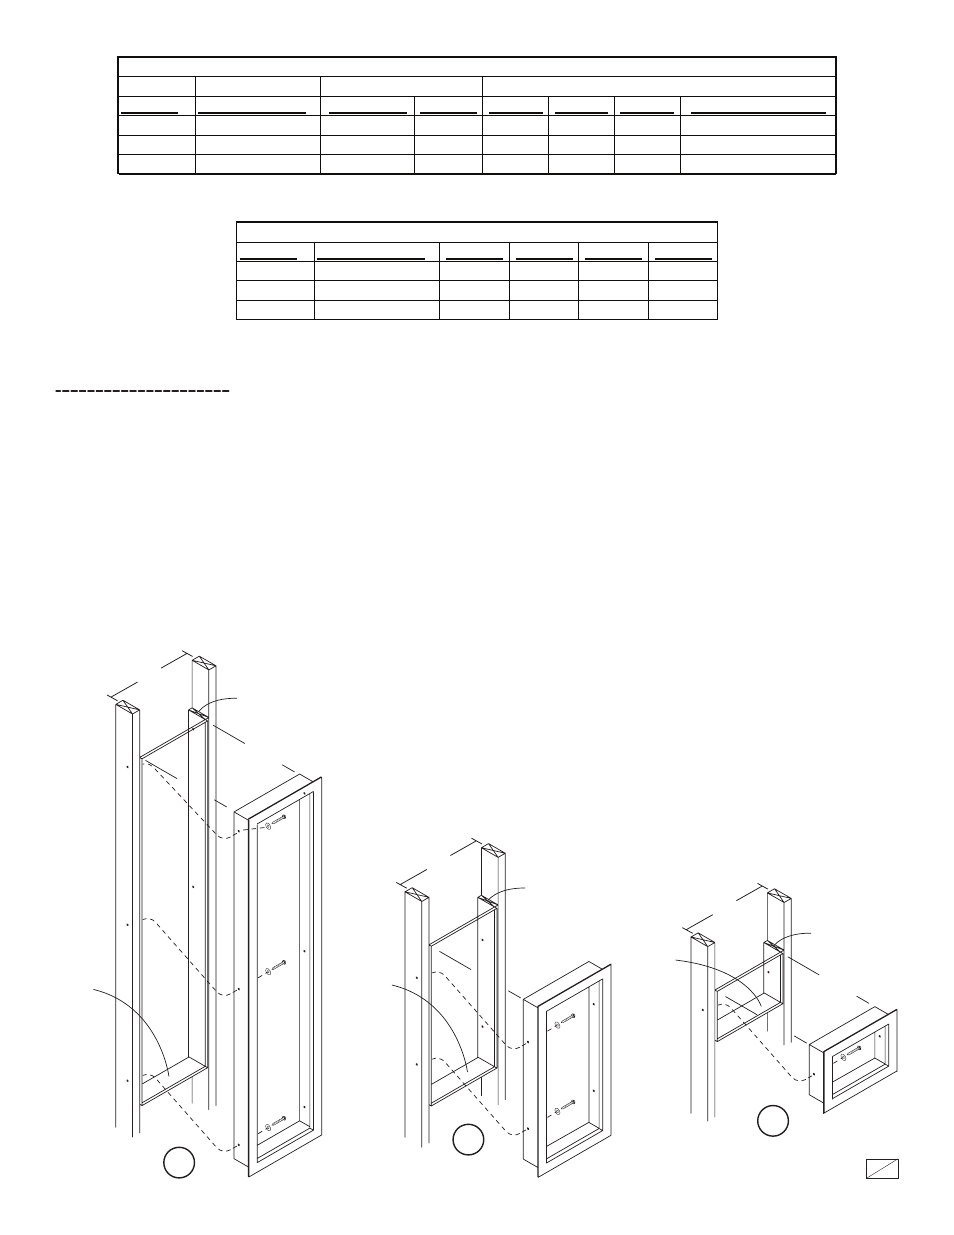
INSTALLING THE SAFE
Figures 1, 2 and 3 show the installation of the safe in a wood framed wall (16" centers) covered with wall board. Your situation may vary from this but in
general the safe should be attached to the internal structure of a wall with the frame of the safe flush to the wall surface.
The door can open to the left or to the right by simply flipping the cabinet over.
Refer to diagrams 1, 2 & 3 for mounting your safe into the stud walls. Cut a hole in the wall the same size as the back of the safe. Use filler blocks and
a bottom support as required. Mount the safe to the studs from the inside as shown.
For the Large In-Wall Cabinet (IWC-55) refer to Figure 1.
For the Mid-Sized In-Wall Cabinet (IWC-22) refer to Figure 2.
For the Small In-Wall Cabinet (IWC-11) refer to Figure 3.
Cabinet
Model Number
Foam A Foam B Foam C Foam X
Large
IWC-55
0
3
1
1
Mid-Size IWC-22
0
2
0
1
Small
IWC-11
1
0
0
1
TABLE 2: FOAM INCLUDED WITH KIT
Cabinet
Model Number
Lag Screw Washer Shelf A Shelf B Tray C
Sheetmetal Screw
Large
IWC-55
6
6
0
3
1
8
Mid-Size IWC-22
4
4
0
2
0
4
Small
IWC-11
2
2
1
0
0
2
Cabinet Mounting
Shelf Mounting
TABLE 1: PART QUANTITIES INCLUDED WITH KIT