Care and maintenance – Schroth Racing AutoControl III User Manual
Page 16
16
• As a constant reminder, the enclosed transparent sticker
must be attached to the rear side window in a prominent
place. The sticker cannot be removed without damage to
chromate tinted glass. On such vehicles, you may affix the
transparent sticker at a different, prominent location so that
it will serve as a constant reminder.
9
Stowing the belts when not in use
If you use the stock 3-point belt instead of the SCHROTH
harnessbelt, be sure to properly stow the harness belt.
Buckle the lap belt in the space between the backrest and the
seat. This prevents the belt from being pinched by the door,
the seat tracks or backrest adjustment mechanism and also
helps prevent the belt from being soiled. Open the separation
buckle on the tail strap at harness belt system and stow the
shoulder straps as well in the space between the backrest and
the seat.
CARE and MAINTENANCE
1 Inspection
Check the safety belt once a month for any damage. Cuts,
tears and other damage to the belt will greatly reduce its
effectiveness. Replace the belt or damaged parts immediately
with original Spare Parts (see page 20, Spare Parts). Never
use a damaged harness belt, use the standard 3-point belts
which remain available for use.
Make sure the buckles are free of any obstruction and lock
securely.
Modified belts or such belts that have been resewn are not
strong enough and are dangerous in an accident.
Never modify, disassemble or repair the belts yourself.
For parts that can be replaced, use only original SCHROTH
Spare Parts.
Only original SCHROTH Accessories may be used with the
harness belt system.
Use of non-authorized parts and Accessories can reduce
the effectiveness of the harness belt system.
• Any changes made to the belt will automatically void the
warranty.
2 Troubleshooting
In the event problems arise which have been caused by
incorrect installation or the vehicle’s electrical system, we have
prepared a Troubleshooting Diagram (see page 18), which will
assist you in finding and eliminating the cause. Be sure to
choose the specific diagram that describes your problem and
carefully follow the instructions.
Never use any restraint system that does not function
properly.
If questions arise, immediately contact your importer or
the manufacturer!
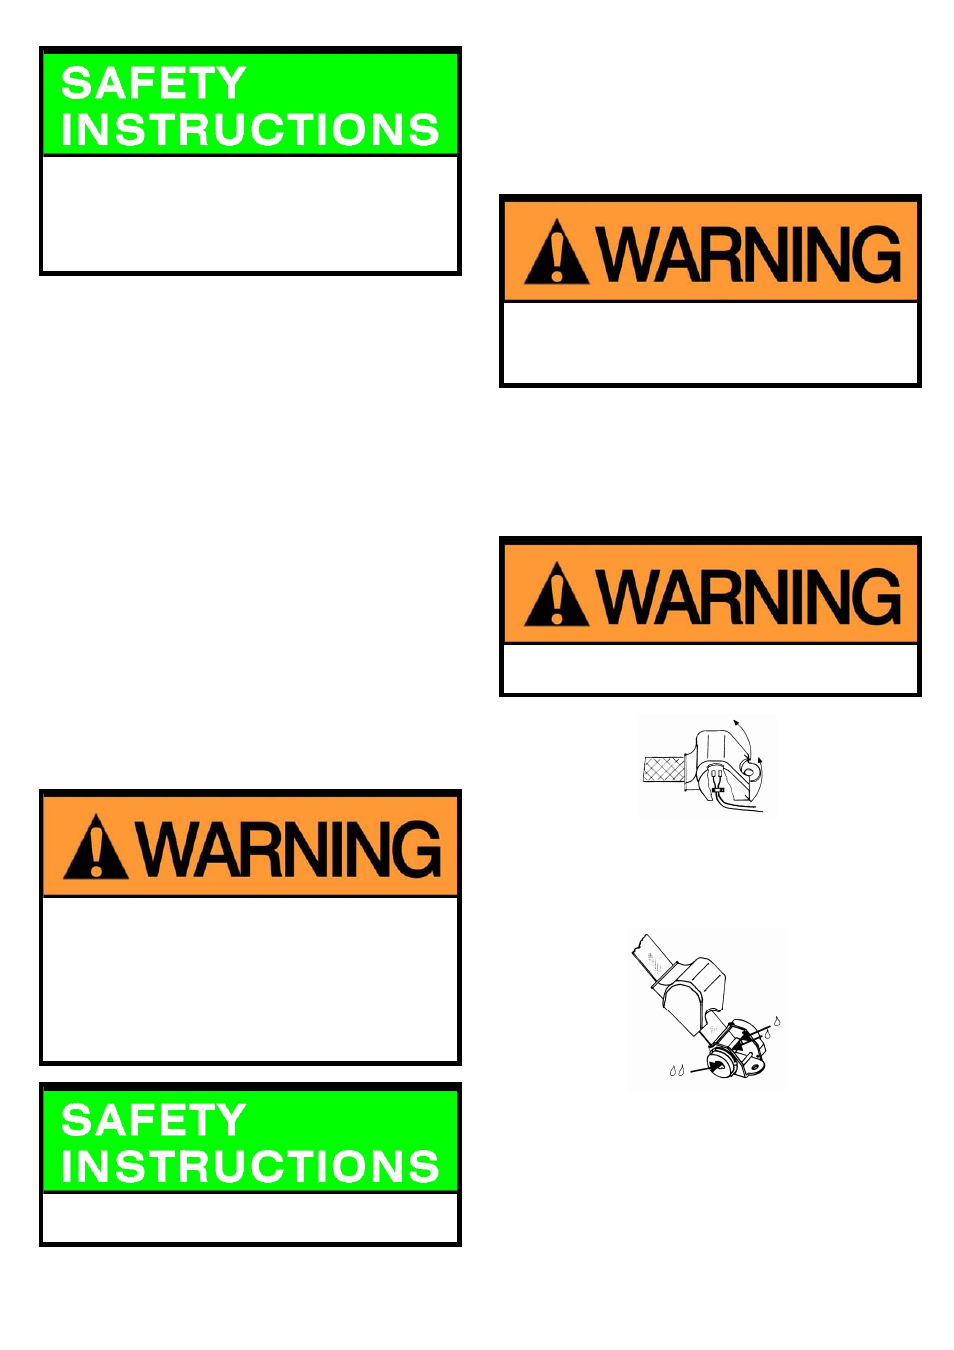
3
Maintenance of the retractor
If the retractor is very noisy when unreeling or retracting the tail
strap or you note reduced tension at the tail strap, follow
Program 1 in the Troubleshooting Diagram (see page 18).
When removing and replacing the rubber cover be careful
not to damage the wiring of the retractor.
Turn the ignition on and pull the strap out completely. Turn the
ignition off to lock the belt at full extension. Put one drop of a
resin free oil (sewing machine oil) onto the bearing of the axle.
Also put 2 or 3 drops through the hole of the plastic cover to
the spring. Replace the rubber cover carefully.