S&S Cycle 2006-Up Gear Drive Cams for Harley-Davidson Twin Cam 88 Engines User Manual
Page 5
5
Failure to remove and install the bolts accordingly to the correct procedures may result in parts damaged not covered under warranty.
L-
Carefully remove the cam support plate from the assembly.
NOTE: If grinding is to be done all gear case components must be removed and all holes taped off with duct tape to avoid contamination of the engine
with chips.
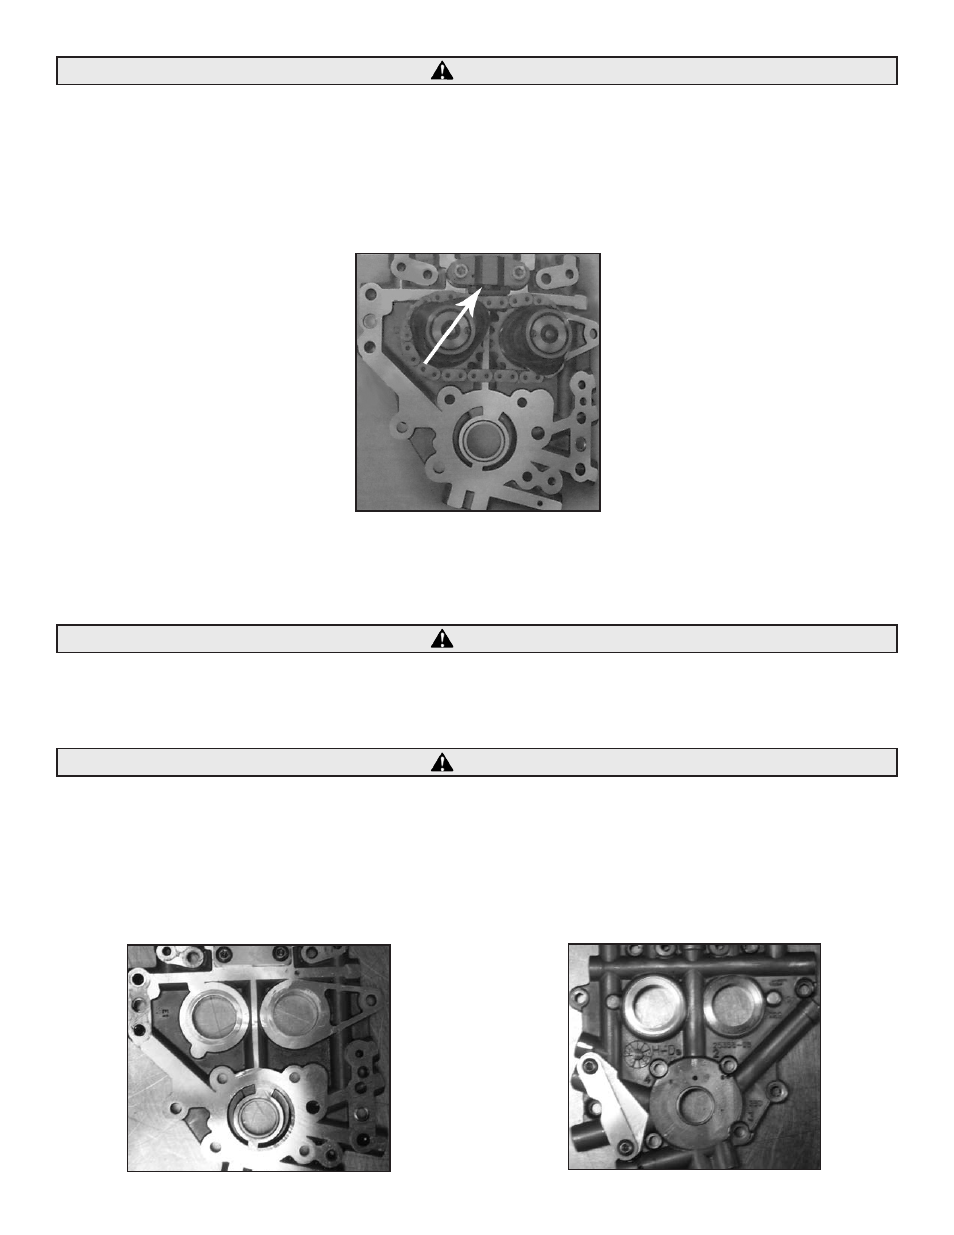
M- Remove the rear hydraulic chain tensioner assembly. See Picture 4.
CAUTION
Picture 4
N-
Remove the loaded retaining clip and the thrust washer from the front cam.
O-
Slide both cams from the cam support plate.
P-
Carefully remove the camshaft needle bearings from the crankcase with H-D® camshaft needle bearing remover/installer H-D# 42325-A.
CAUTION
Using existing needle bearings may cause engine or cam damage due to increased tolerances from wear and higher loading of cams.
Always replace cam bearings with the ones provided in this kit or another source.
2- Installing the Cam Gear Drive
Check pinion shaft runout. Indicate end of pinion shaft at cam support plate bushing surface and rotate engine; reading must be .003” or
less total indicated reading (TIR). If reading is greater than .003” TIR the crankshaft must be repaired or replaced to correct excess runout
before installing gear drive cams. Failure to correct excess runout may lead to engine damage not covered under S&S warranty.
A- Install new needle bearings provided with the S&S® Camshaft installation kit 33-5240 or with bearings from another source. Cam bearings
must be Torrington B-168 full complement bearing or equivalent.
B- Install the new hydraulic block off plates where the front and rear chain tensioners were located, tighten fasteners to 100-120 in lbs. See
Picture 5 & 6.
Picture 5
Picture 6
CAUTION