Daw-500s — maintenance – Multiquip DAW500S User Manual
Page 32
PAGE 32 —DAW-500S WELDER/A.C. GENERATOR— PARTS & OPERATION MANUAL — REV. #0 (07/19/01)
DAW-500S — MAINTENANCE
General Inspection
Prior to each use, the generator should be cleaned and
inspected for deficiencies. Check for loose, missing or
damaged nuts, bolts or other fasteners. Also check for fuel,
oil, and coolant leaks.
Engine Side (Refer to the Engine Instruction Manual)
Service Daily
If the engine is operating in very dusty or dry grass
conditions, a clogged air cleaner will result. This can lead to
a loss of power, excessive carbon buildup in the combustion
chamber in high fuel consumption.
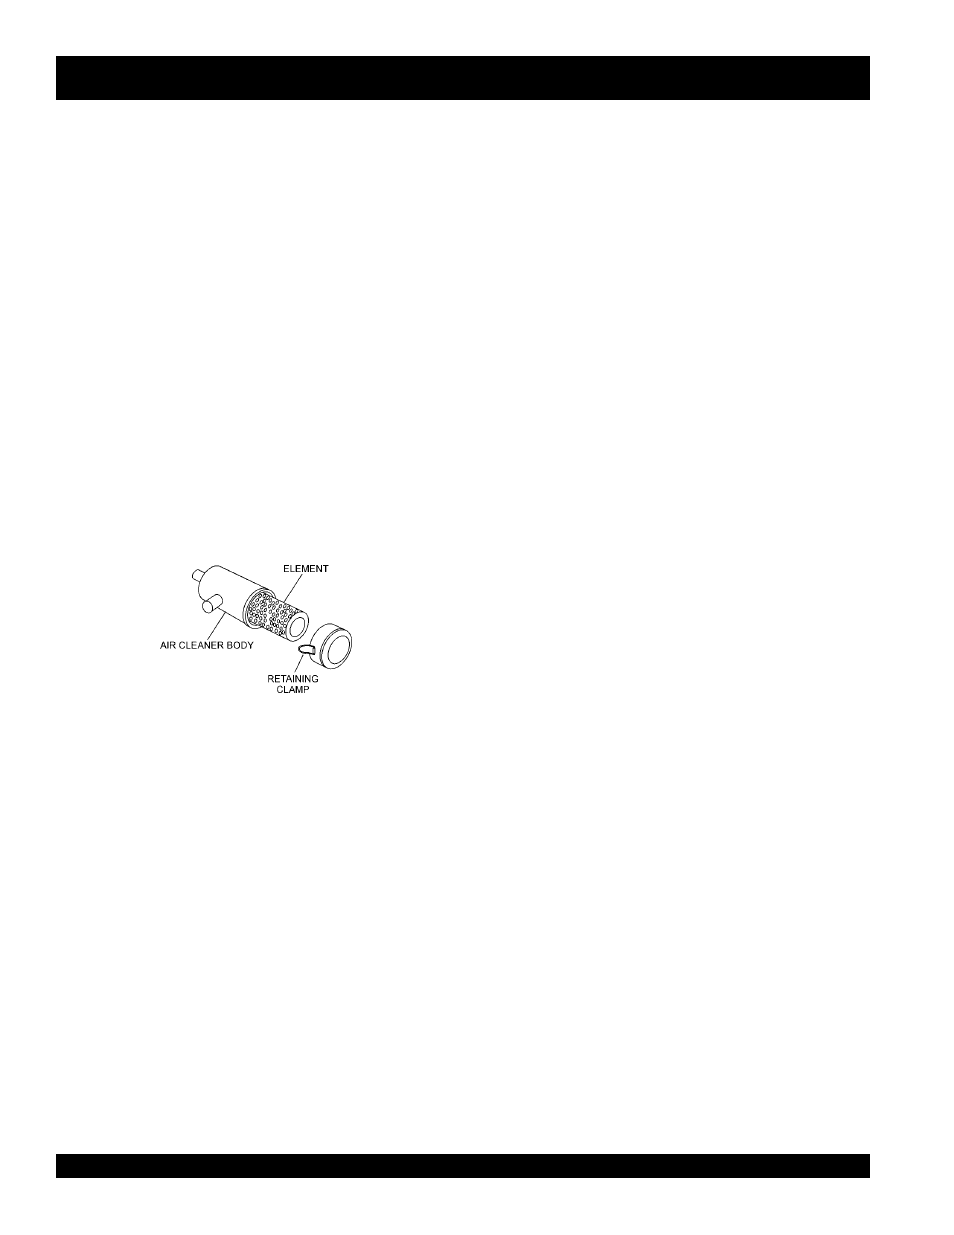
Air Cleaner
Every 100 hours: The air cleaner used on this unit is a dry
type. NEVER apply oil to the air cleaner. If welder/AC
generator has been used in extreme dusty area, service air
cleaner more frequently.
Release the air cleaner retaining clamps (Figure 12) and
remove the air cleaner element.
Cleaning the Fuel Strainer
Clean the fuel mesh strainer located under fuel capif it
contains dust or water. Remove dust or water in the strainer
cap and wash it in gasoline. Securely fasten the fuel strainer
cap so that fuel will not leak. Check the fuel strainer every
200 hours of operation or once a month. If damaged, replace
with P/N 1552143160.
Check Oil Level
Check the crankcase oil level prior to each use, or when the
fuel tank is filled. Insufficient oil may cause severe damage
to the engine. Make sure the generator is level. The oil level
must be between the two notches on the dipstick as shown
in Figure 31, page 39.
Replacing Oil Filter
! Drain oil from engine. Use recyclable container to hold
used oil. Replace cartridge with P/N 700032091.
! Detach the oil filter cartridge with a filter wrench.
! Apply a film of oil to the gasket for the cartridge.
! Screw in the cartridge by hand. When the gasket is in
contact with the seal surface, tighten the cartridge one
or two more times by hand.
! After the oil cartridge has been replaced, add oil
according to recommended motor oil (Table 6, page 22).
Run the engine for a while and check for leaks before
adding more oil if needed. Clean excessive oil from
engine.
Replacing Fuel Filter
! Replace the fuel filter cartridge with new one every 200
hours or so. Use P/N 1707643010.
Wipe the inside of the air cleaner with a damp cloth and
remove all dust and debris that have accumulated inside
the air cleaner body.
Used compressed air to clean air filter element. DO NOT
use more than 99 psi. Blow compressed air from the inside
while turning the element.
If damaged, replace with P/N 7000011081.
Fuel Addition
Add diesel fuel (the grade may vary according to season
and locations). Always pour through the mesh filter.
Removing Condensation from the Fuel Tank
After prolonged use, condensation and other impurities
accumulate in the bottom of the tank. Occasionally remove
the drain cock and drain the contents. During cold weather,
the more empty volume inside the tank, the easier it is for
water to condense. This can be reduced by keeping the
tank full as much as possible.
Air Removal
If air enters the fuel injection system of a diesel engine,
starting becomes impossible. After running out of fuel, or
after disassembling the fuel system, bleed the system
according to the following procedure.
To restart after running out of fuel, turn the switch to the
“ON” position for 15-30 seconds. Try again, if needed. This
unit is equipped with an automatic air bleeding system.
Figure 12. Air Cleaner Element