Meade Instruments LX80 User Manual
Page 28
Note: Different objects may be displayed on a tour list
on any given night.
Press ENTER to display information about the object.
Press GoTo to move the telescope to the object.
5. Press MODE to return to the Tour list. Press
the Scroll keys to scroll through the list. Press
ENTER when you fi nd the next object you wish to
observe.
6. Press and hold down MODE for two seconds to
leave the Guided Tour menu.
Equatorial Mode
Once the LX80 is fully assembled and AudioStar
initialized (See Page 24 for Initializing AudioStar),
you will need to set the telescope into the polar home
position, and perform an alignment on the night sky
in order for the LX80 to successfully locate and track
celestial objects. Performing the “Easy Alignment”
routine is the ideal way to get started.
Setting the Polar Home Position
1. Notice that there is an “N” mark printed on the front
of the base near the Azimuth lock (Page 11, Fig
5, 36). Lift the whole telescope assembly so that
this arrow points to “True” north (or South in the
Southern Hemisphere). Locate Polaris, the North
Star, if necessary, to use as an accurate reference
for due North (or Sigma Octantis in the Southern
Hemisphere). See Locating THE CELESTIAL
POLE, Page 62.
2. Level the mount, if necessary, by adjusting
the length of the three tripod legs. Use the
bubble level built-in to the base to assist you
(Page 10, Fig 4, 32). The fi
ne leg levelers
at the top of each tripod leg will allow you to
make small adjustments to the tripod level
(Page 11, Fig 6, 47).
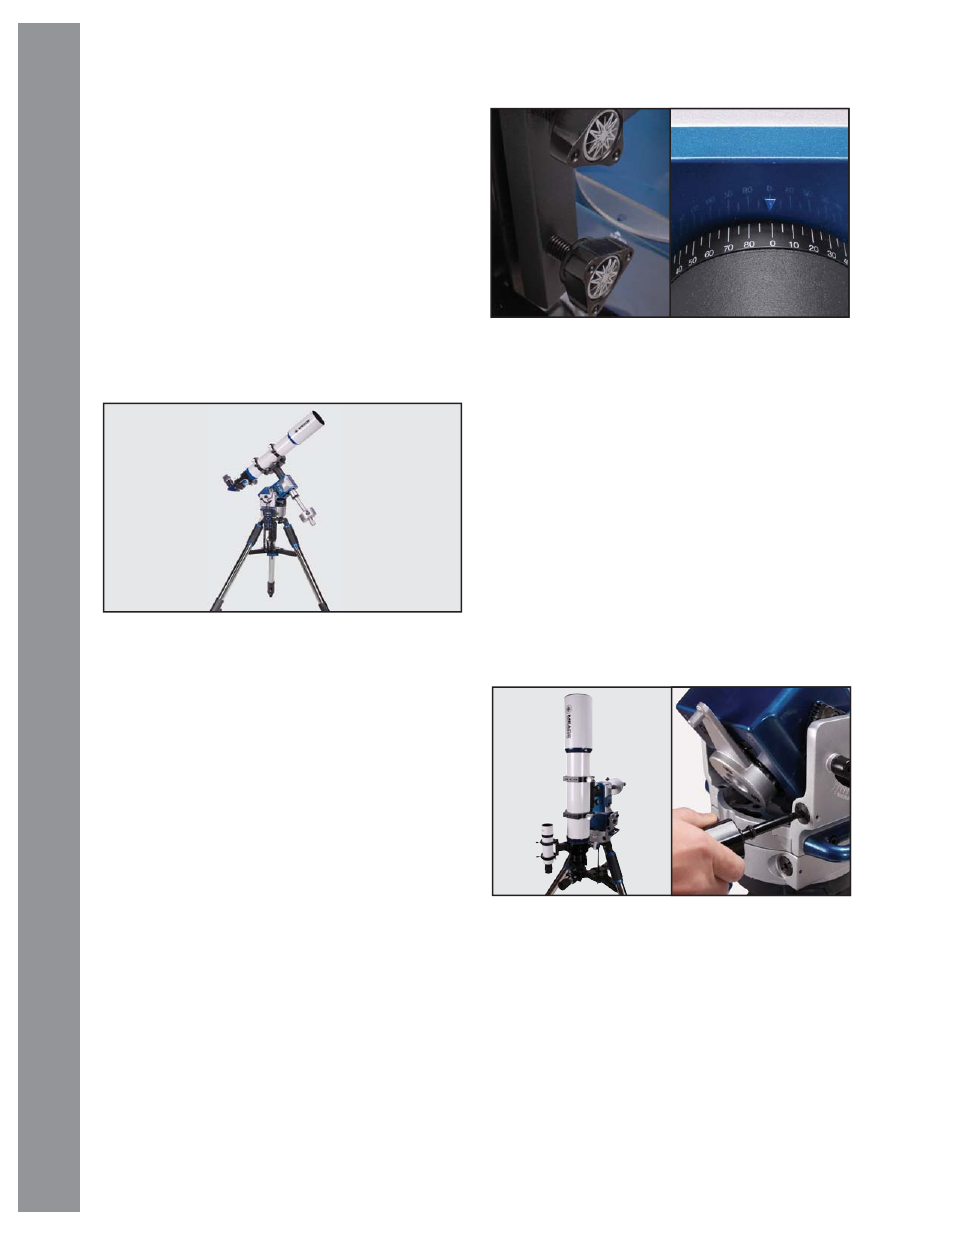
2. Loosen the DEC Lock (Page 8, Fig 1, 30) so that
the OTA rotates freely. Rotate the OTA to so that
“0” degree mark on the DEC axis lines up with the
reference arrow that is cast into the mount (Fig.
34). Retighten the DEC lock.
3. Release the RA lock (Page 8, Fig 1, 29) and rotate
the telescope so that the “EQ” mark and the “AZ/
EQ” mark are aligned (Fig. 34). Retighten the RA
lock.
4. If you have not already done so, determine the
latitude of your observing location. See APPENDIX
E: LATITUDE CHART, Page 65, for a list of
latitudes of major cities around the world.
5. Set the latitude: Setting the latitude is easier if
it is set before you attach the optical tube to the
assembly. Locate the latitude dial (Page 9, Fig 2,
28); note that there is a triangular pointer above
the dial located on the mount. The latitude pointer
Fig 33: Equatorial Mode
Fig 34: Align “EQ” with “AZ/EQ” mark. Set OTA at “0”
mark
Fig 35: Tilt the mount head using hex head tool
AudioStar #497 HANDBO
X
The LX80 Multi-Mount System
28