Getting started – Meade Instruments LX80 User Manual
Page 15
Unpacking your telescope:
The LX80 is shipped in two or four boxes:
Box #1: LX80 Multi-mount (with components)
Box #2: LX80 Field Tripod
Box #3: (if ordered): Optional Optical Tube Assembly
Box #4: (if required): Additional Counterweight
As you unpack your telescope, carefully note the
following parts.
• LX80 Multi-Mount with computer control
panel, dovetail adapter, and dedicated LX80
adjustment tool.
•
Counterweight and sectional counterweight shaft
with safety nut.
•
Secondary dovetail adapter with bubble level
•
AudioStar handbox with detachable coil cord.
•
Heavy duty, adjustable stainless steel tripod, six
tripod leg lock knobs (pre-installed), three captive
mount locking knobs that connect the tripod head
and mount (pre-installed), and one large three
point spreader bar.
•
Software DVD and Bubble Level Compass.
• Optional Meade Optical Tube Assembly with
accessories (if purchased).
How to Assemble Your Telescope
The LX80 telescope can be confi gured in three (3)
modes of operation (alt-azimuth, equatorial or dual
mode). The following assembly procedure will be
common for all modes up to the step “Balancing the
Telescope”. At that point you will have the opportunity
to choose a specifi c confi guration and continue with
set-up and operation.
1. Remove the components from the boxes. Refer
to Figures 1 through 11 for images of the parts
and the overall assembly of your telescope.
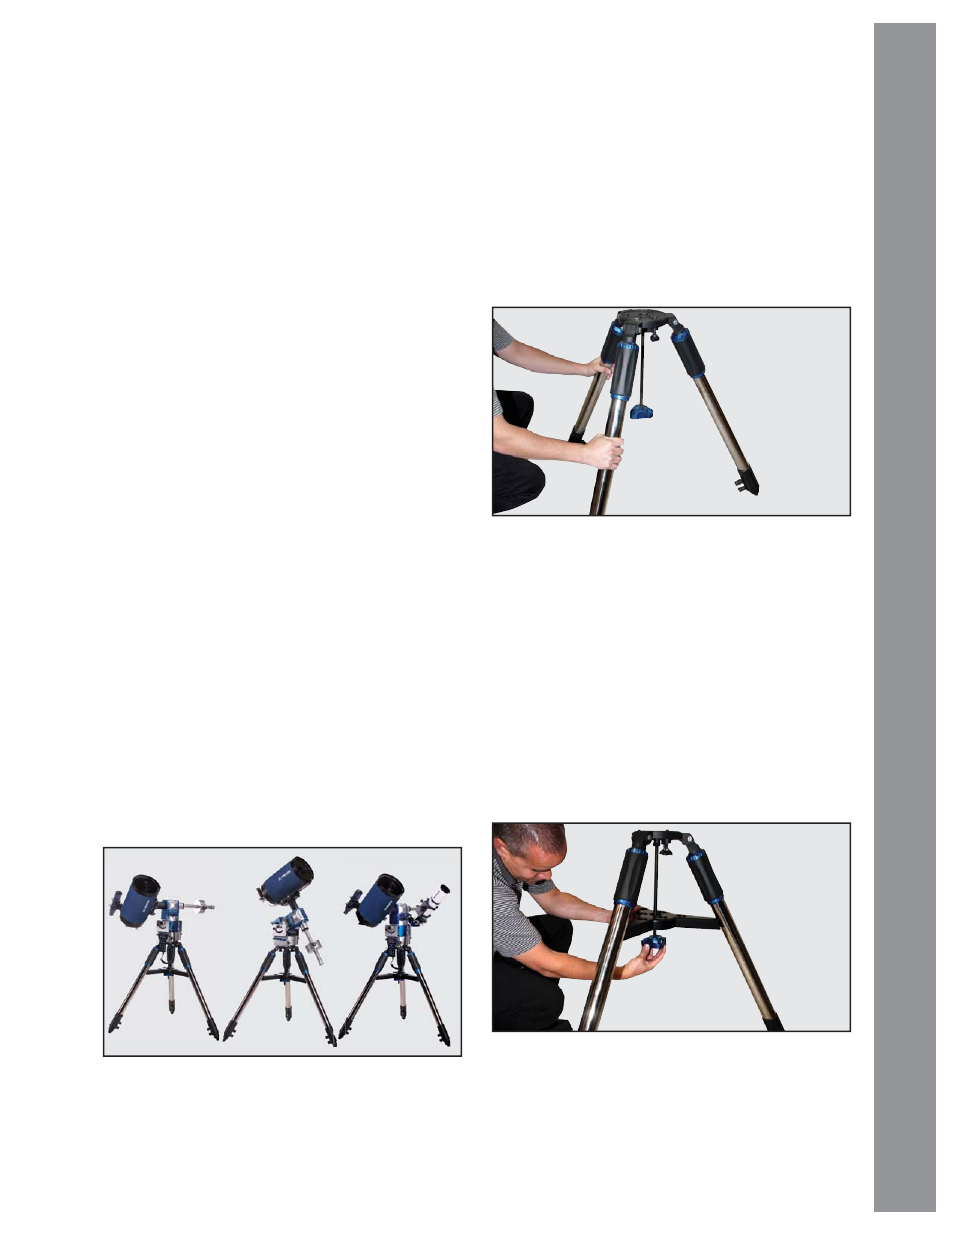
2. Adjust the tripod legs. Spread the tripod legs
as far as they will open. See Fig. 13. Point any
one of the three tripod legs towards “true” north
(south if you are using the telescope in the
Southern Hemisphere).
3. Attach the spreader bar to the spreader shaft.
Thread the tension knob onto the spreader shaft
so the spreader is fi rmly seated against each tripod
leg (See Fig. 14). Roughly level the tripod head
by extending/shortening the tripod leg extensions.
Secure the extension by tightening the two leg lock
knobs on each leg securely. Note that included on
the tripod head is a convenient bubble level to guide
you. A “rough” state of levelness is suffi cient at
this point.
Fig 13: Spread the tripod legs
Fig 14: Attach spreader bar and thread on
tension knob
Fig 12: Alt-Azimuth, Equatorial and Dual Modes
Getting Started
15
Getting Started