Cabling, Led indicators, Input selection – Intelix ASW-WP Quickstart Guide User Manual
Page 2: Edid modes, Other functions
ASW-WP Quick Start Guide
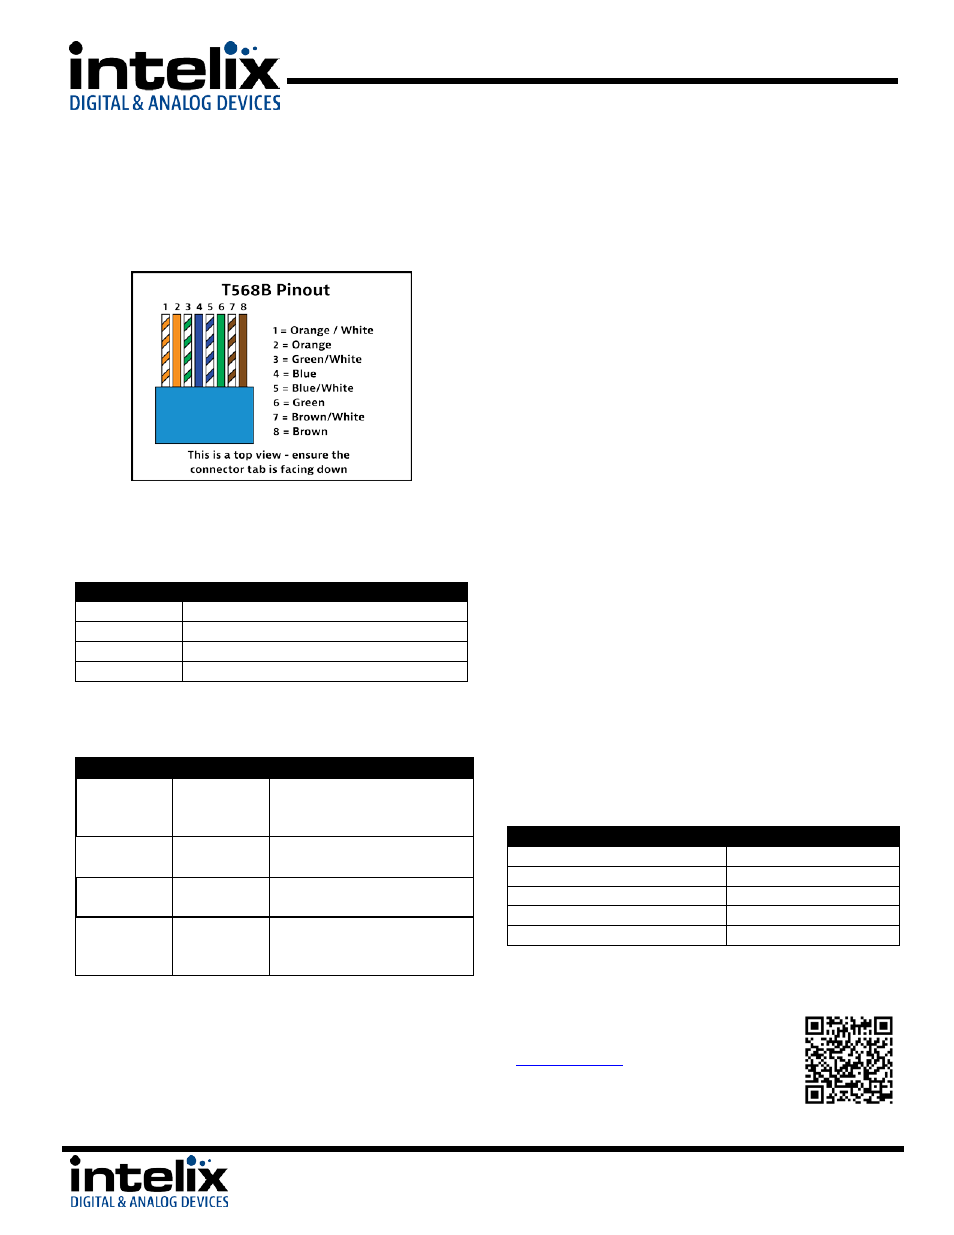
Cabling
Twisted Pair Wiring - Use T568B wiring for Cat5e/6
connection between send and receive units. If using
shielded cable, be sure to use shielded connectors, and
terminate the cable drain wire to the connector shell.
LED Indicators
Front LEDs - The ASW-WP has [2] bi-color LEDs to provide
switching status.
Mode
Status
OFF (both)
Unit is in low-power standby mode
Violet (both)
Unit is on – no signal detected
Blue
Input has active video, input not selected
Amber
Input has active video, input selected
Rear LEDs – The ASW-WP has [3] SMD indicators to
provide operation status.
Color
Indicates
Status
Green (fast
flashing or
solid)
HDMI
Video is being transmitted by
the ASW-WP
Amber
(solid)
HDBaseT
Link
Connection to RX is stable.
Blue (slow
flash)
Heartbeat
HDBaseT chip is running
None
Low or no
power
Unit may be in standby
mode, or unit may not be
receiving power
Input Selection
Auto - The ASW-WP is shipped in “Auto Switch” mode,
with the “Auto” terminal shorted to the “Ground”
terminal. The unit will detect when an active video signal
is applied to either input. The unit will automatically
switch to that input. If both inputs are active, the “last in”
will be selected. If both inputs are active, and the selected
input is removed, the unit will automatically switch to the
other active input. To disable “Auto” mode, remove the
jumper between the “Auto” and “Ground” terminals.
Contact Closure -
There are [3] dry contact closure inputs provided on the
back of the ASW-WP (HDMI, PC, Auto). This will allow
simple mechanical switches to provide manual input
switching. Use SPST Momentary switches for best results
(normally open) with the HDMI and PC inputs. By
momentarily shorting the associated terminal to the
ground terminal (or activating a switch that is connected
between the associated terminal and the Ground
terminal), you may manually switch between HDMI and PC
inputs. To disable auto-switching, remove the jumper
from the Auto terminal.
RS232 –
You may control the ASW-WP or have the ASW-WP control
your display via RS232. Please download the full user
manual from the Intelix website for information about
these features.
EDID Modes
The ASW-WP has [5] EDID modes that can be used to
simplify operation for the end user. There are [3] DIP
switches on the back of the unit for this function. EDID
pass through mode will allow the native resolution of the
connected display to be passed through the inputs; the
other modes are presets, which will limit the possible
resolutions you can choose for your source. To change
EDID modes, remove HDMI and VGA input cables, change
DIP switches, and reconnect HDMI and VGA input cables.
Setting
Off, Off, Off (Left, Left, Left)
EDID Pass-through
On, Off, Off (Right, Left, Left)
1080p, 2ch audio
On, On, On (Right, Right, Right) 1920x1200, 2ch audio
On, Off, On (Right, Left, Right)
1280x800, 2ch audio
On, On, Off (Right, Right, Left)
1024x768, 2ch audio
Other Functions
To learn about the many other functions, features, and
operating procedures of this device, please
visit the ASW-WP product page at
to download the full user
manual and software. Or use your
smartphone to scan this QR code.
8001 Terrace Ave.
Suite #201
Middleton, WI 53562
Phone: 608-831-0880
Toll-Free: 866-4-MATMIX
Fax: 608-831-1833