Intelix ASW-WP Quickstart Guide User Manual
Instructions
ASW-WP Quick Start Guide
ASW-WP Quick Start Guide
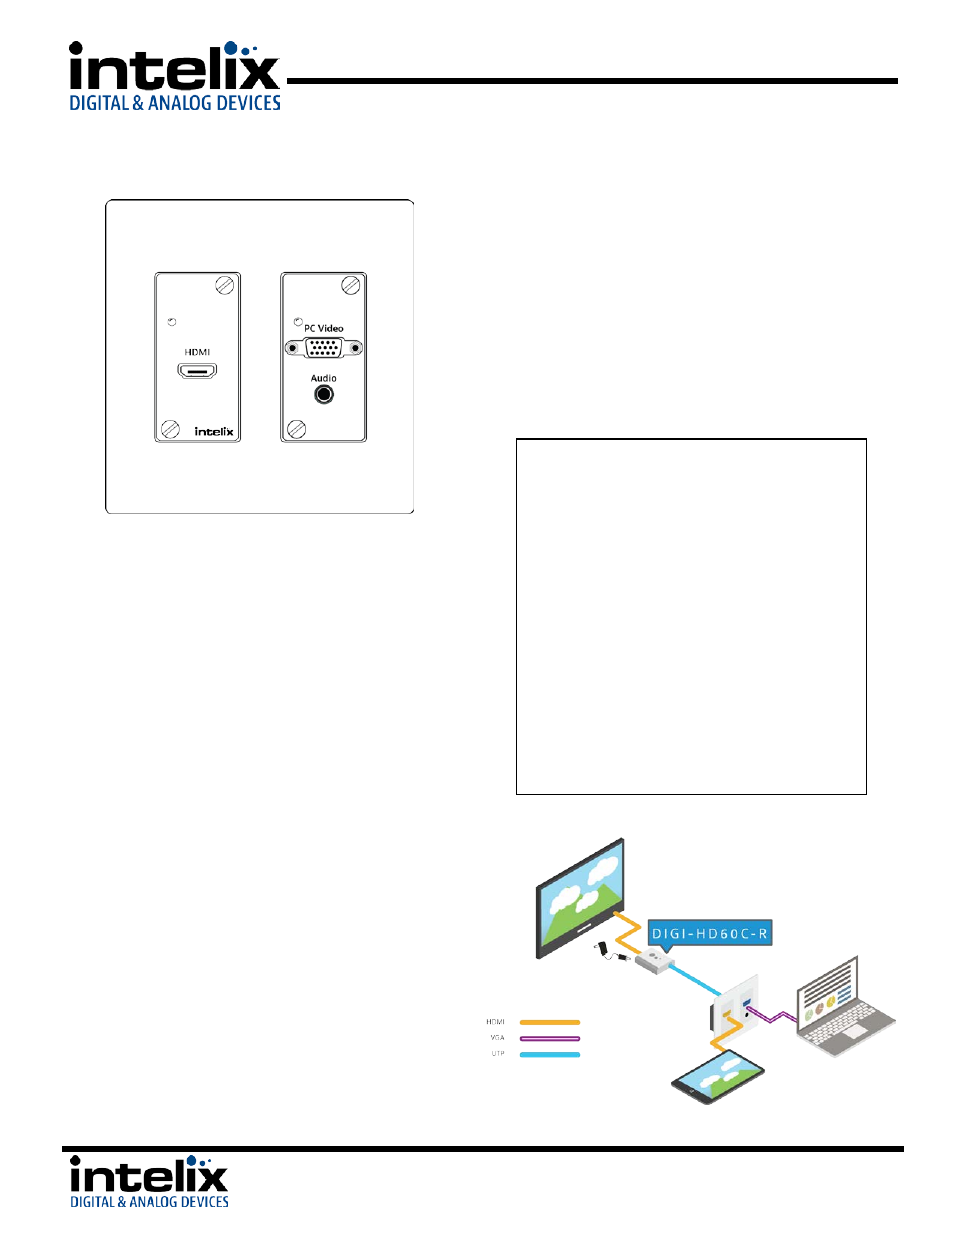
The Intelix
ASW-WP
is a two-gang, Decora-style wall
plate designed to be the primary PC interface for
classrooms, boardrooms, and conference centers. It
features VGA + Audio to HDMI conversion and an
HDMI input. The unit will detect which input has an
active video input, and switch to that input – if both
inputs are active, the last in will be selected. There
are additional contact closure inputs provided on the
rear of the unit to allow third party control. RS232
control of the
ASW-WP
can be accomplished by
connecting to the RS232 port on a compatible
receiver.
The
ASW-WP
utilizes HDBaseT technology to extend
the digital output up to 60 meters away using
standard Cat5e cable. This transmitter device is
compatible with several Intelix HDBaseT receivers,
but is designed to work primarily with the DIGI-
HD60C-R. The unit features multiple EDID modes to
eliminate user confusion, and incompatible video
formats.
The
ASW-WP
can be powered from the rear panel by
using the Intelix power supply (PS-5D-20TL), or by
Power over Ethernet (PoE). Built-in surge protection
and diagnostic LEDs ensure hassle-free and robust
installations. The Auto-Switching Wall Plate also
features a customizable power management system,
which will put the unit into a low power state after
no video for 30 minutes or being inactive for 3 hours
by default.
The
ASW-WP
can be programmed to control the
connected display. The display manufacturer’s RS232
commands can be entered into the
ASW-WP
with the
use of Intelix Display Control software. This allows
display power and input to be automatically
controlled based on video activity, eliminating the
need for a third party control system in many
installations.
Instructions
1. Turn off power and disconnect the
audio/video equipment by following the
manufacturer’s instructions.
2. Connect twisted pair cable between the
transmitter (ASW-WP) and the receiver (DIGI-
HD60C-R). Ensure T568B straight-thru wiring.
3. Connect HDMI cables between the display
and the receiver (DIGI-HD60C-R).
4. Connect the power supply (PS-24D-25) to the
receiver. Connect the power supply to an AC
outlet.
5. Power on attached audio/video devices.
6. Connect HDMI or VGA /Audio sources.
8001 Terrace Ave.
Suite #201
Middleton, WI 53562
Phone: 608-831-0880
Toll-Free: 866-4-MATMIX
Fax: 608-831-1833