Mounting the violin, Mounting the heatsink, Mounting on the pc board – ElmoMC SimplIQ Analog Servo Amplifiers-Violin Installation User Manual
Page 12: 4 mounting the violin, 1 mounting the heatsink, 2 mounting on the pc board
Violin Installation Guide Installation
MAN-VIOIG (Ver. 2.3)
3-3
3.4
Mounting the Violin
3.4.1 Mounting the Heatsink
The Violin dissipates its heat by natural convection, up to loads of 500 W. For higher
output loads, the amplifier should be mounted on an additional heatsink or cooled by
fan. There are two 4.5 mm holes in the base plate for mounting an additional heatsink
(see
3.4.2 Mounting on the PC Board
When mounting the Violin on a PC board, four screws (in addition to the solder pins)
may be installed to provide a mechanical connection. It is important to provide a spacer if
any components are located above the amplifier. Failure to do so can warp the PC board
or puncture the amplifier case. When selecting screws, the following specifications
should be used. If a spacer has been added, the screw length must be calculated to
penetrate the case by no more than 2.6 mm.
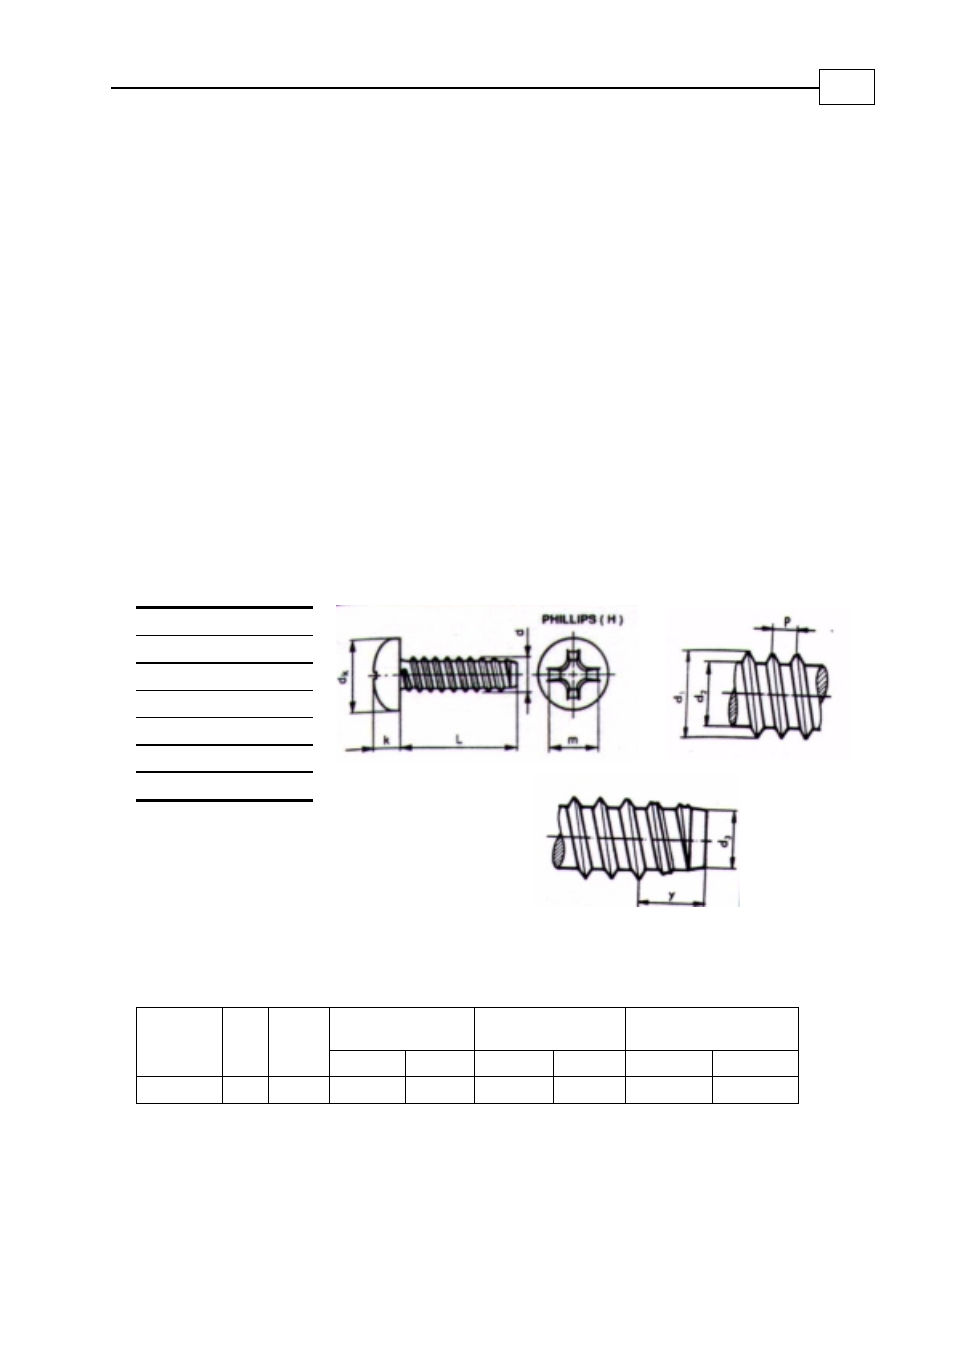
Screw Type: Phillips Pan Head Self-tapping (for plastic) screw – Nickel-plated Steel.
Meets standards ISO 1478, EN 21478, or DIN 7970.
d ST2.2
L 4.5*
P 0.8
d
k
4.2
k 1.8
m
≈ 2.6
Phillips size 1
*4.5 mm is typical for mounting on a
PC board assembly without spacers.
Table 3-1: Dimensions in Millimeters
Main Diameter Minor Diameter Flat End Diameter
Basic
Diameter
ISO
Nr.
Pitch
P
D
1max
D
1min
D
2max
D
2min
D
3max
D
3min
ST2.2 2 0.8 2.24 2.1 1.63 1.52 1.47 1.37
Table 3-2: Size Limits for Tapping Screw Thread