Elkhart Brass Sidewinder Quick Attack Pkg 1 Install Guide User Manual
Monitor nozzle, Quick attack pkg 1 install guide
Quick Attack Pkg 1 Install Guide:
Monitor & Nozzle
MONITOR
NOZZLE
1
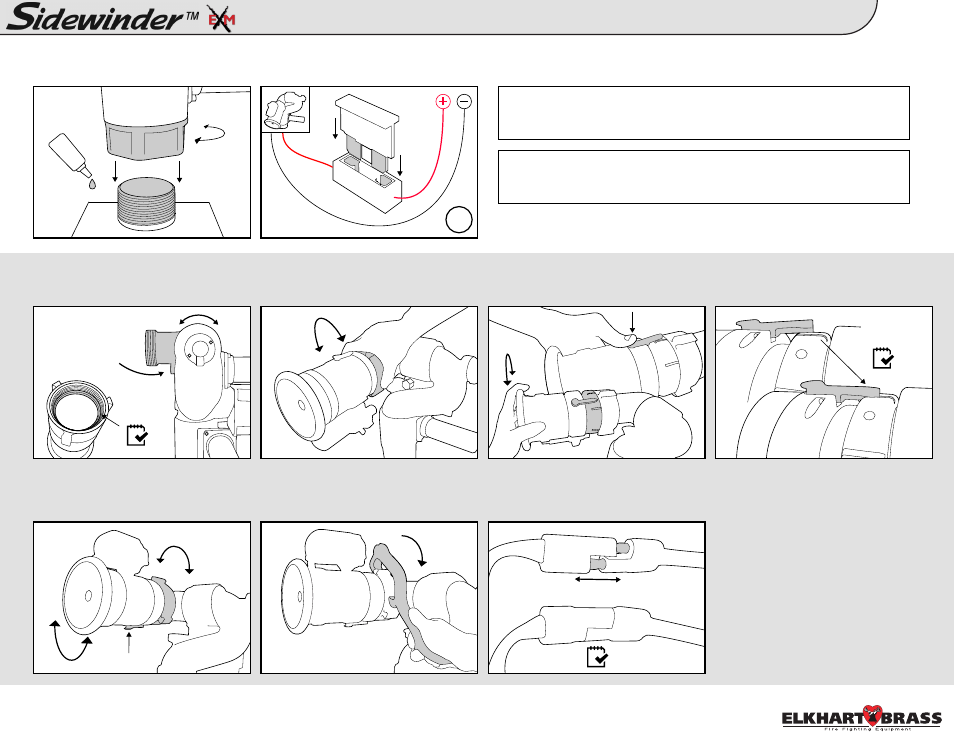
1.
2.
A. Tighten Sidewinder EXM monitor to
base or Quick Connect using Loctite 592
thread sealant or equivalent.
B. Add a 20A(12VDC)* fuse between
RED controller lead and positive power
lead.
NOTE: We recommend using 16 AWG for monitor power and ground. See
Sidewinder EXM monitor installation guide on page 8 of the manual for
length to gauge recommendations.
A. Position monitor discharge elbow
parallel to ground. Ensure gasket is
inside nozzle swivel.
B. Hand tighten nozzle to monitor using
swivel end piece.
C. Adjust flow by pressing down on
locking lever and rotating nozzle to
desired flow setting.
*10A(24VDC)
D. Confirm that locking lever is snapped
securely into position.
E. Loosen swivel and reposition nozzle
so the locking lever is on the very
bottom; 6 o’clock position.
F. Tighten swivel using a spanner
wrench to ensure a secure connection.
G. Connect nozzle and monitor two-way
connectors.
3.
Confirm that all connections are tight and all electrical connections have been reconnected. If installing additional components,
such as controllers, you may choose to double check the connections after everything has been installed.
NOTE: If a Quick Connect is being installed, please refer to the Quick
Connect Install Guide. Guide can be found under the Sidewinder EXM
manual section at www.elkhartbrass.com.
90°
16g
98326010 Rev. A