3 function setting, 1 black mark setting, 1 black mark specification – Dascom DM-220 User Guide User Manual
Page 25: 2 run setting tool, 1 black mark specification 3.1.2 run setting tool
Tally Dascom DM-210/220
13
3 Function Setting
3.1 Black Mark Setting
This section describes how to set up printers with black mark sensor. You can execute self-test to check whether
your printer configure with black mark function or not. The self-test page will display black mark is enabled or
disabled. If your printer configure with black mark, you can follow the operation guide as below.
3.1.1 Black Mark Specification
Dimensions
Hight: 5mm; Width: 12mm
Reflectivity
Black mark: <10%; Others: >75%
Black mark detection position
Default: at the front right side of receipt.
(It can be set at the front left side of receipt according to order
requirement.)
Black mark to printing home
position
-27mm ~ (the distance between two adjacent black marks - 27) mm
Black mark to cutting/tear position
-43mm ~ (the distance between two adjacent black marks - 43)mm.
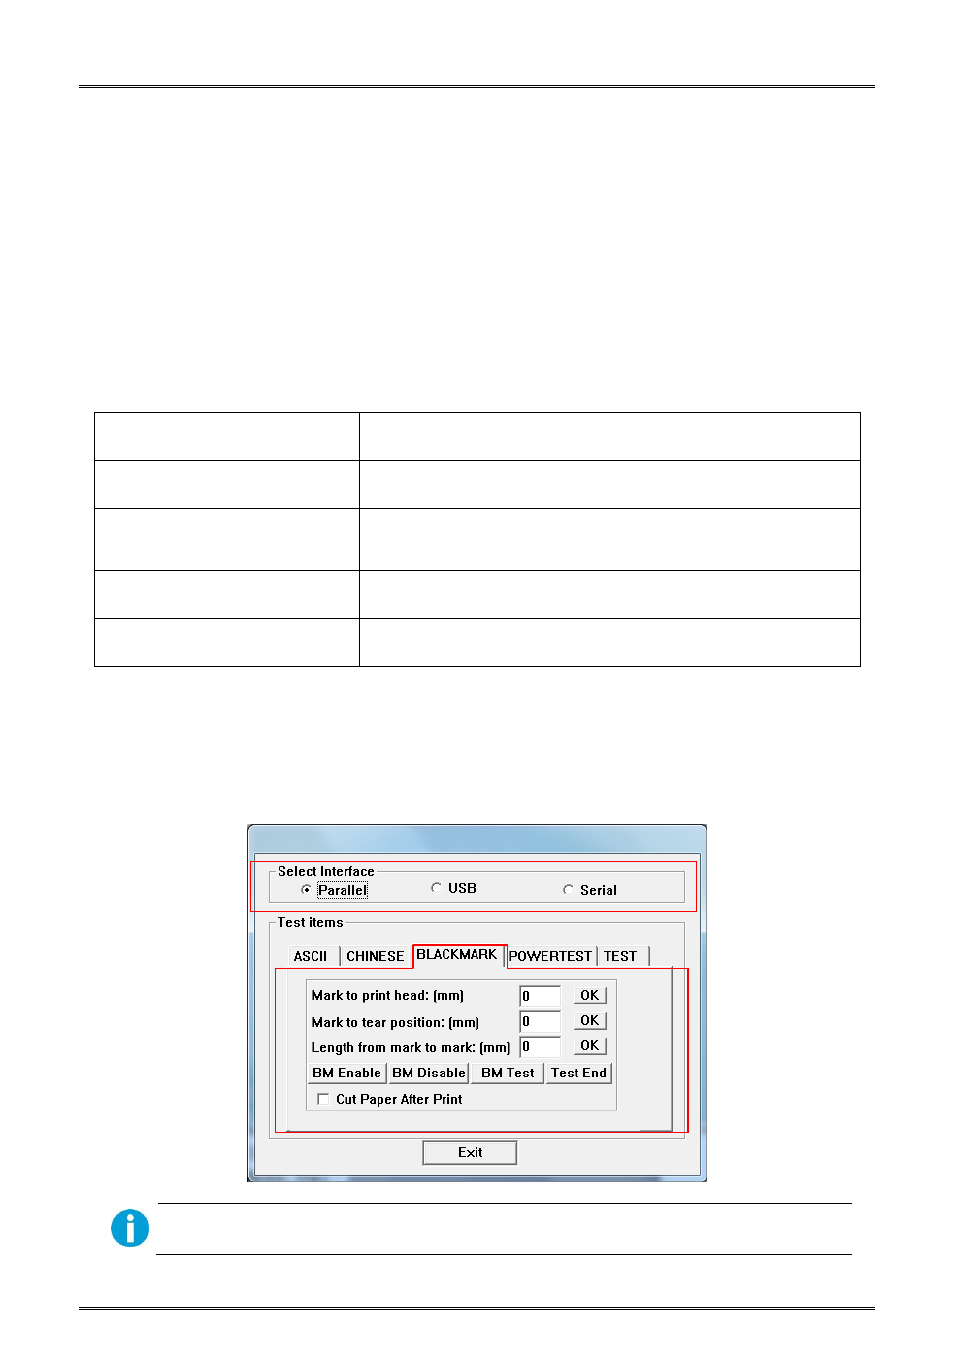
3.1.2 Run Setting Tool
First of all, run “dmpro.exe” which is in the CD disk, you will see the following window for setting. Select your
current interface and select “BLACK MARK” option under “Test items”.
See www.dascom.com for newest version of DMPro Utility.