Condux Hand Held Micro Fiber Optic Blower User Manual
Page 13
13
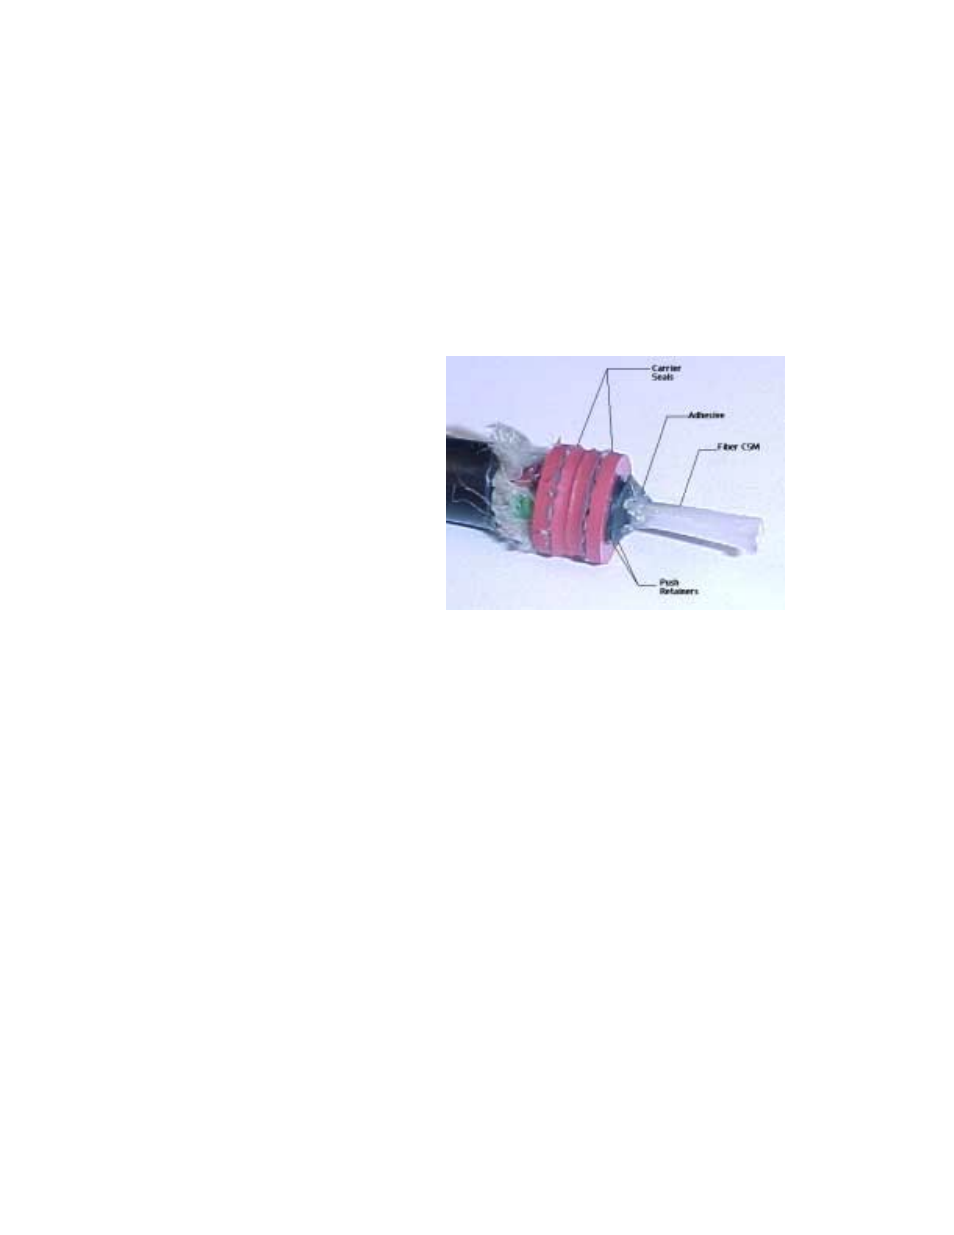
4. Slide two (2) Carrier Seals onto the CSM followed by two (2) Push
Retainers. The seals should be relatively loose on the fiber but retained
on the CSM with the Push Retainers.
Note: Notice the direction of how the Push Retainers need to be assembled
to the fiber. The cone portion of the retainer faces the end of the CSM. They
should fit very tight onto the fiber.
5. Apply a tug on the Carrier Seals toward the end of the fiber to ensure the
Push Retainers do not come off.
6. Apply adhesive to the front of the retainers where they interface with the
fiber. Allow for the adhesive to setup (See Figure 23)
7. Check that Microcable slides smoothly in the Microduct.
8. The Microcable CSM may be trimmed back and/or wrapped with tape to
create a “bullet” configuration to prevent any jamming in the duct.
9. Push the Cable Assembly, into the conduit.
10. Add the rest of the lubricant to Conduit behind the Cable Assembly.
11. Choose the correct cable seals and install on cable. Grooved side of
Cable Seal faces conduit. Place Cable Seals into Ventrui, Split side down
12. Close handheld blower and secure, tighten speedball handle securely, but
do not over tighten.
Figure 23: Assembly of Carriers onto the CSM of Micro Fiber Optic
Cable.