Condux Hand Held Micro Fiber Optic Blower User Manual
Page 10
10
6. Close the Handheld Blower and secure (See Figure 16) Tighten speedball
handle securely, but do not over tighten.
7. Prove Conduit integrity and spread lubricant through Conduit.
a. Re-connect the air hose to the Handheld Blower and attach all
safety clips.
b. Open the air compressor air control valve.
c. Slowly
open
Air Control Valve by turning to the 6 o’clock
position. (See Figure 17)
d. Blow foam through conduit to spread lubricant and check for
blockage. Follow all safety precautions.
e. After the foam exits, close Air Control Valve by turning it to the 3
o’clock position.
Note: Foam must exit in a reasonable time, allow approximately 10
seconds per 1,000 feet (300 m) or conduit may be contaminated or
blocked.
8. Ensure
Handheld Blower is depressurized. Shut off the air from the
compressor, decompress the air in the hose and disconnect the hoses from
the handheld blower.
9. Remove
Seal Disk and install Ventrui (See Figure 18). Use the provided
2.5 mm hex wrench.
Note: The venturi with the groove
goes into the bottom and gets
screwed into place while the top
half has the protrusion and sets
into the groove.
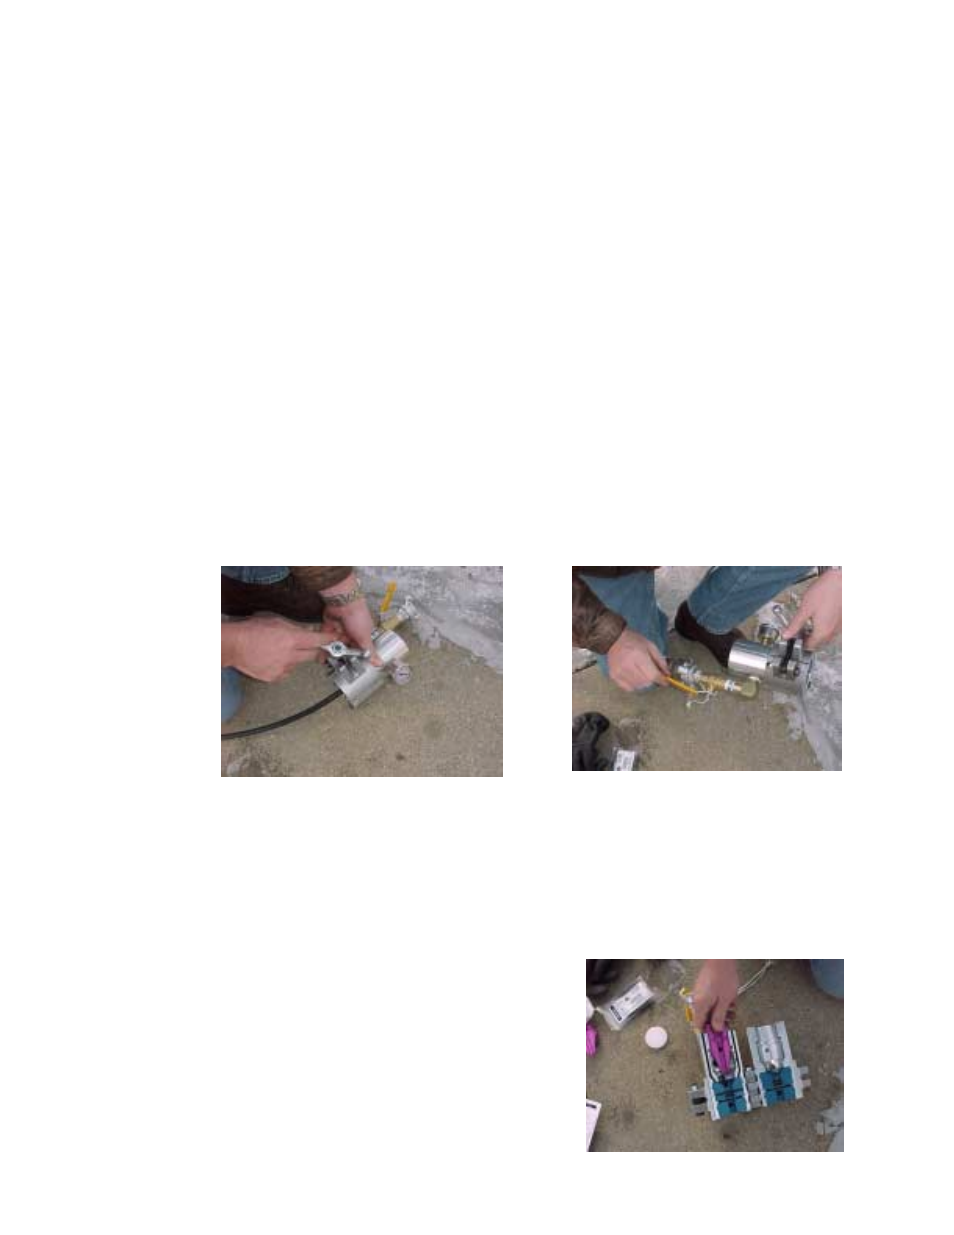
Figure 16 close and tighten handle
Figure 17 Slowly open the air
control valve
Figure 18 Insert ventrui