Barranca Diamond GP6-6 Wheel Cab Maker User Manual
Page 18
18
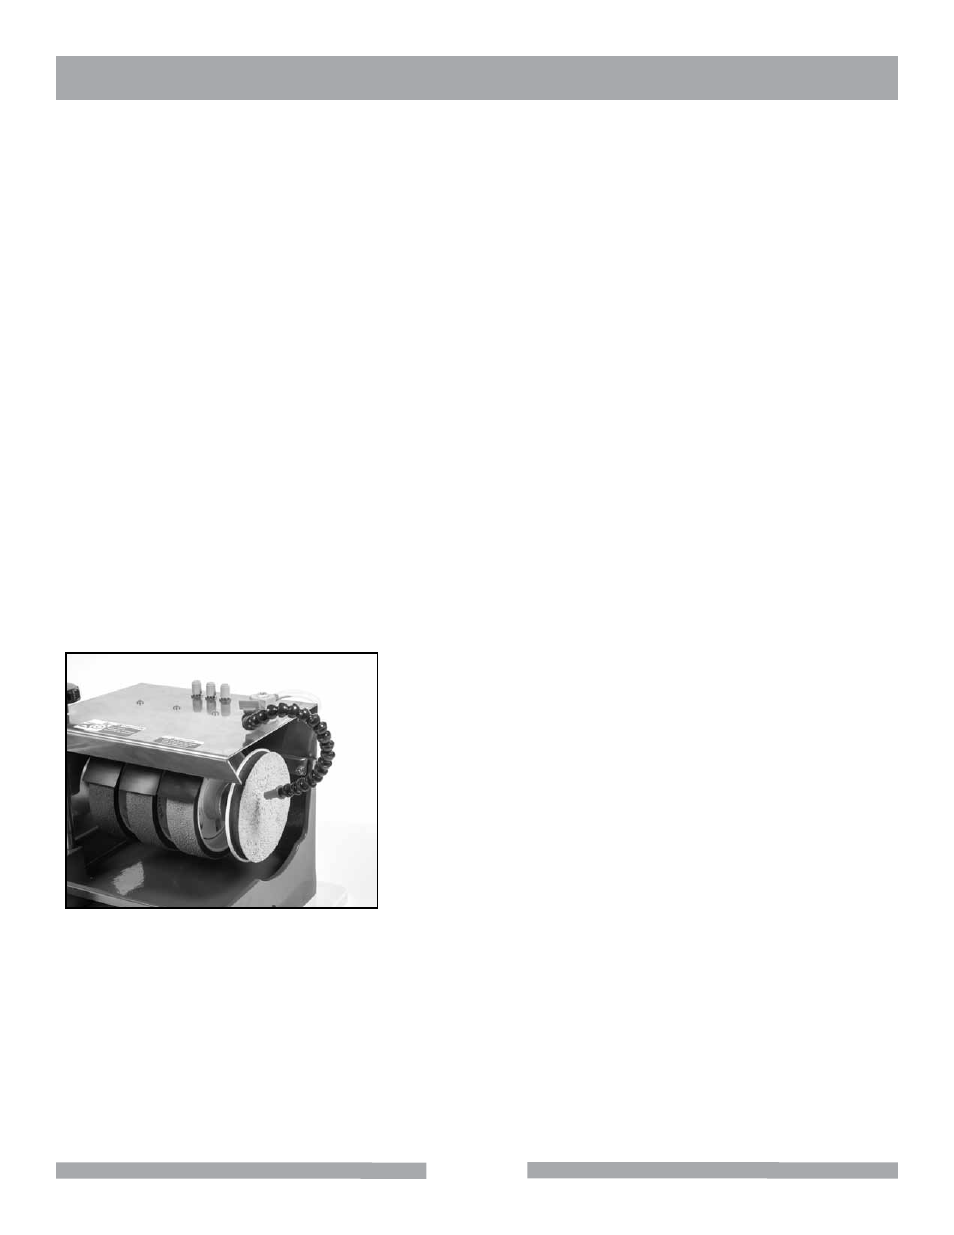
USE OF 6" RESIN DIAMOND PAD
The 6" resin 14,000 grit diamond pad is positioned on the right end of the shaft, adjust the Loc Line
nozzle tip to the center of the resin diamond pad (Fig 19). This will allow the water stream/drip to flow
over the pad while turning to cool and flush gemstone grindings during use.
Always pump clean, clear water through the Loc Line manifold and discard dirty water and grindings
from the collection container periodically. Do not recirculate water as contaminants may scratch the
gemstone material. The resin diamond pads should never be used dry or they will likely be prema-
turely worn out or permanently damaged. A small amount of water directed at the center of the resin
diamond pads is required to flush the gemstone grindings and keep the pad cool. Excess water flow
directed to the pad is not necessary and will only make a mess of your work area. The 6" resin dia-
mond pads can be used with both flat and domed material, the user should rock and rotate the domed
gemstone material during polishing, but for flat polishing the user needs to move the material flat face
across the pad to fully polish the face uniformly. Gemstone material should be held firmly by the user’s
finger tips while rotating and or moving the material over the face of the 5" resin diamond pads. Do
not hold the gemstone material too close to the bottom edge of the resin pad or the material may jam
the users finger against the reservoir base. In some cases, the user may polish gemstones after
grinding/sanding with the 80 and 170 mesh brazed diamond wheels and four Nova diamond wheels
and 14,000 grit end disc without the use the Polytex 6" pads with diamond paste. Final polishing buff-
ing can be performed with the Polytex pads (if desired, to 50,000 grit) and leather cowhide mounted to
the polishing foam disc.
GP6-6 WHEEL CAB MAKER
MAINTENANCE
Fig 19 Loc-Line nozzle placement -