Barranca Diamond GP6-6 Wheel Cab Maker User Manual
Page 13
13
PUMP SET-UP (continued)
Keep the water hose away from the electric motor to prevent damage from moving parts and electric
shock hazard. The pump should always be used with clear, clean water so as to avoid grit/abrasive
material, mud or rock fragments from scratching the gemstones during polishing or clogging the pump
valves. The Water Valve (Fig 9) at the back of the motor, directs the water to either the right or left-
hand station. Position the valve with the handle pointing toward the side you want to use, to direct the
water there.
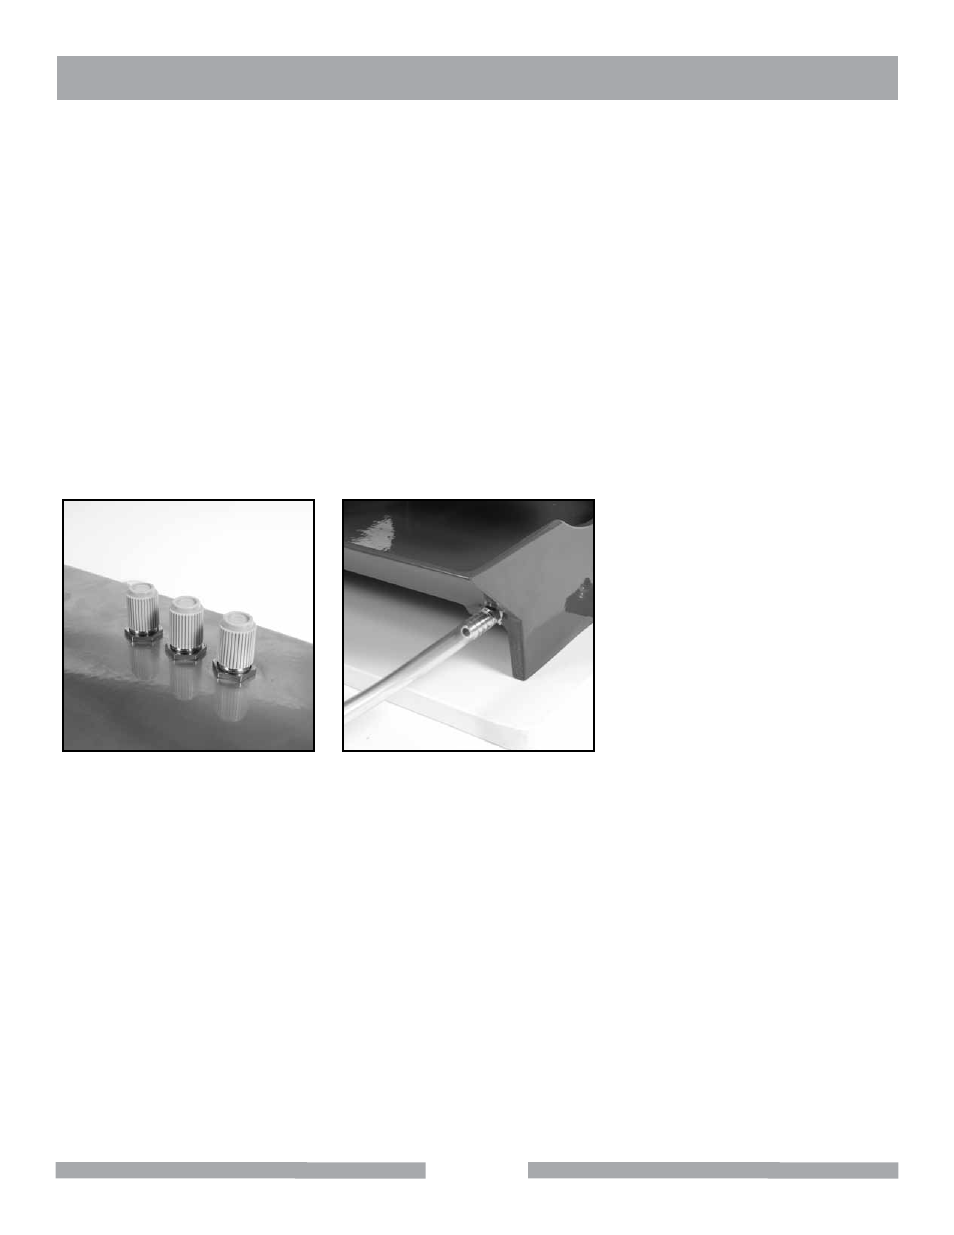
NEEDLE VALVES
The stainless needle valves (Fig 11) are for fine control of water to each of the six grinding and polish-
ing stations. For best results, close the valves to the stations not in use. To shut off flow to a needle
valve, simply turn the grey ribbed knob clockwise until it closes to a firm stop (do not over-tighten).
To open maximum flow to a needle valve, simply turn the grey ribbed knob counterclockwise until the
valve stops. It may take up to 30 seconds for water flow rate to change to a specific station.
Fig 11 - Stainless needle valves
Fig 12 - Drain with hose installed
DRAIN FITTINGS
A length of 3/8" ID tubing is provided for drainage of excess water from the front base of the reservoir
where a drain is located at the base of the reservoir (Fig 12).
To drain off the excess build-up of cooling water from the diamond wheels, connect 3/8" ID clear tub-
ing to the drain and route it into a 5 gallon collection bucket or drain for dirty water. Discard dirty water
appropriately once collection bucket fills up.
Do not recycle dirty water from the collection bucket as the contaminants (rock grit, mud, slurry and
abrasive particles) will likely scratch the gemstone material being worked and possibly clog the stain-
less steel water control valves or submersible pump.
GP6-6 WHEEL CAB MAKER
OPERATION AND ADJUSTMENT