Figure 16, Figure 17 figure 18, Attach the headgear to the helmet – ArcOne Clean Air Flow User Manual
Page 22
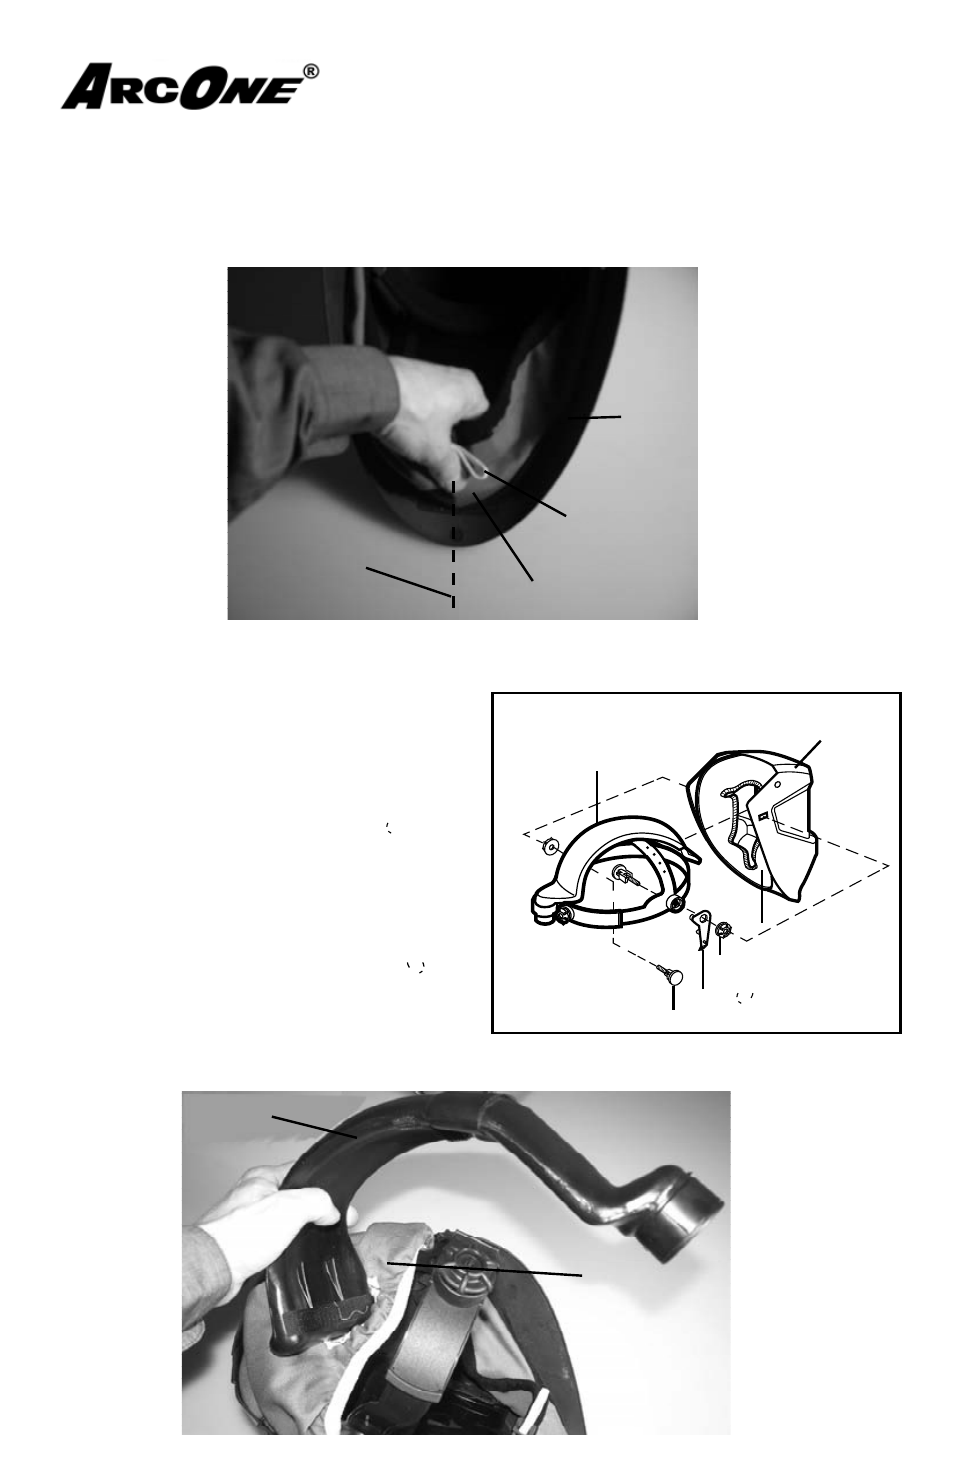
Faceseal Replacement: Viper continued...
Installation:
1. Line up the bottom seam of the Faceseal to the centerline of the Helmet (fi g. 16)
2. Attach the Velcro together along the Faceseal Edge securing the Faceseal to
the Helmet (fi g. 16).
Helmet
Figure 16
Adjustment
Cord
Faceseal
Centerline
4. Insert the Airduct into the hole on the Faceseal as shown (fi g. 18).
Faceseal
Airduct
Step 1-3 refer to Figure 9 insets
1. Place the Pivot Stop inside the Face Seal
on the right side by pushing the pin of the
Pivot Stop into one of the holes on the
helmet.
2. Place the Airduct Headgear Assembly
inside the Face Seal and over the Pivot
Stop boss.
3. Insert the Airduct Headgear Assembly
Bolt through the Airduct Headgear
Assembly lining up all three rectangles
(Bolt, Face Seal, and Welding Helmet
Shell).
4. Screw the Knob onto the Bolt.
5. Repeat on the left side. NOTE: there is no
Pivot Stop on the left side.
Welding
Helmet Shell
Figure 10
Airduct Headgear Assembly
(CA-HGA-01)
Face Seal
(CA-COL-XX)
Knob
Pivot Stop
Bolt
3. Attach the headgear to the helmet:
Refer to Figure 17
Figure 17
Figure 18