ArcOne Carrera, N America User Manual
Preparations for use, Technical information / use, Ffccf f
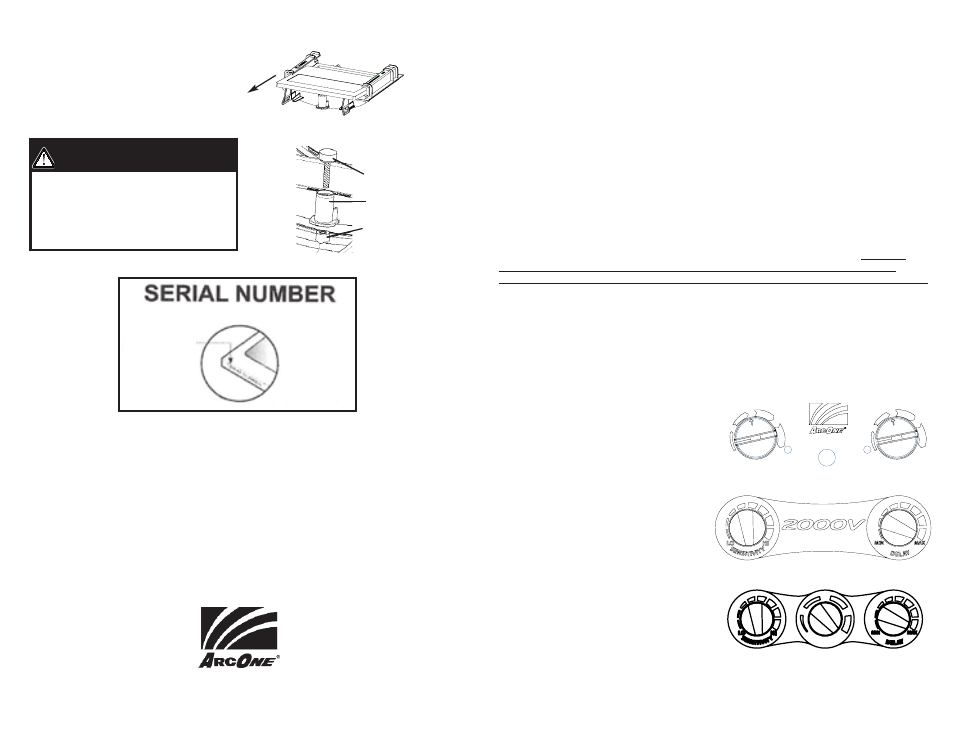
Filter Removal Instructions
Warranty and Service Information
Limited Warranty
85 Independence Drive, Taunton, MA 02780
(800) 223-4685
ArcOne
®
warrants all auto-darkening filters covered by this manual for two (2) years from the date of pur-
chase against manufacturing defects resulting from materials or workmanship. Proof of purchase estab-
lishing the date of sale and filter serial number must be provided, should a warranty claim be
submitted. The purchaser’s only remedy under this limited warranty shall be limited to
ArcOne’s sole op-
tion to repair, replace or refund (not to exceed the purchase price). This limited warranty is void in the case
of unauthorized modification, tampering, and damage due to misuse, abuse, inadequate maintenance or
improper storage. This limited warranty is not transferable from the original purchaser to a secondary owner.
ArcOne
®
shall in no event be liable or responsible for any injury, damage or loss
resulting either directly or indirectly from the use or misuse of this product. This limited warranty is
exclusive and is in lieu of any other warranty implied either oral or written. Please read the instruction man-
ual carefully to avoid certain situations which may void this limited warranty.
Troubleshooting or Return Authorization, call (800) 223-4685 or visit www.arc1weld-
safe.com
Figure 7
USER INSTRUCTION MANUAL
CARRERA HELMET WITH
AUTO-DARKENING FILTER
Preparations for Use
Filters:
Before you begin welding always inspect your filter to ensure it is not damaged.
WARNING, never begin welding without first checking to see if the correct front
protection plate is in place, the filter is secured properly in the filter holder, and the
filter holder secured in the helmet. Failure to protect the welding filter or install the
filter / filter holder correctly may cause damage and become a safety hazard should
the UV/IR protection be compromised from spatter or cracks from impact. DAMAGE
CAUSED BY ABUSE SUCH AS EXCESSIVE TEMPERATURES, CRACKS FROM IMPACT,
AND PITTING FROM SPATTER CAUSED BY POOR MAINTENANCE WILL VOID WARRANTY.
Welding Helmets:
WARNING, other safety precautions such as protective clothing, adequate ventilation,
breathing protection, such as a Clean Air Flow
TM
or equal, fire extinguisher, and
protection for co-workers, should also be considered.
Technical Information / Use
Filters:
Warning: Severe burns are possible with a
damaged lens (cracks, pits, holes, etc.).
Do not use damaged lens. Optical radiation
can possibly enter in from behind the
helmet from other welders welding in the
immediate area.
Filter Specific Features
1000FcF (See Figure 1): Shade and Sensitivity are
adjusted using the knobs on the back of the filter.
Change the Delay by quickly pressing and releas-
ing the Delay/Grind button. The red delay LED will
turn on for Delay. Press and release the
Delay/Grind button again to turn off. To activate
the grind mode, press and hold down the
Delay/Grind button until the red Grind LED turns
on. Deactivate Grind mode by quickly pressing
and releasing the Delay/Grind button again. Grind
LED turns off.
2000V: Shade knob is on the outside of the hel-
met. Sensitivity and Delay are adjusted using the
knobs on the back of the filter (See Figure 2). This model does not have Grind mode.
2500V: Same as 2000V with the addition of shade to the back. (See Figure 3)
DELAY / GRIND
LO
HI
99
1100
1111
1122
1133
1000
SENSITIVITY
SHADE
GRIND
DELAY
F
FccF
F
Figure 1
CARRERA-02-UI REV C
Thumb Screw
Filter Holder Boss
Centering Pin with
Threaded Insert
Figure 6
Removable Filter Holder
1. Grab filter by top and bottom edge
2. Pull up on bottom edge of filter and slide out
of the bottom of the filter holder (Fig. 6)
Critical Installation Warning!
Helmet impact rating Z87+ with Thumb
Screw installed. Helmet rating Z87 without
thumb screw. For Z87+ make sure Filter
Holder Center Tab is secured to the Welding
Helmet Centering Pin with Thumb Screw (See
Figure 7). Do not over tighten
Figure 2
Slide
Located along filter
edge or back
9
10
11
12
13
SHADE
Figure 3
Printing:
1. Rotate Page 2
2. Print as 2-sided Letter, black
and white