Step 6, Drilling holes for brass anchors, Locating/setting brass anchors & rubber ties – Anchor CLASSIC SOLID SAFETY POOL COVER User Manual
Page 8
8
STEP 6
:
LOCATING/SETTING BRASS ANCHORS & RUBBER TIES
1) Brass anchors are placed approximately 11” from pool cover edge.
1a) Rectangular Pool Covers: Start with center strap of pool’s length. See *NOTE below.
Mark for brass anchor location (use chalk). Drill hole and set anchor, see
FIG. 1. Attach end of
rubber
tie,
see Fig. 2A. Repeat on opposite end. Go to center grommets of the pools width and
repeat the same procedure. Now work from center straps (width and length) toward corners alter-
nating side to side
(do not begin with corner straps). Once you have set brass anchors and
fastened rubber ties, go to corners and set brass anchors. Brass anchors should be over 1” from
90º
corner,
see FIG. 3.
1b) Shaped Pool Covers: Start with center strap of pool’s length. See *NOTE below. Mark for
brass anchor location (use chalk). Drill hole and set brass anchor,
see FIG. 1. Attach rubber tie
to brass anchor,
see FIG. 2A. Repeat on opposite end with center strap. Go to center grommet
of the pool width and repeat the same procedure. Now start working around your cover.
Remember to set brass anchor and fasten strap across from each other as you work around the
cover.
*NOTE: Before setting any brass anchors, check to see if there are obstruc-
tions such as diving boards, rocks, etc. at center web location. If there is
obstruction at center web, start with nearest web on either side.
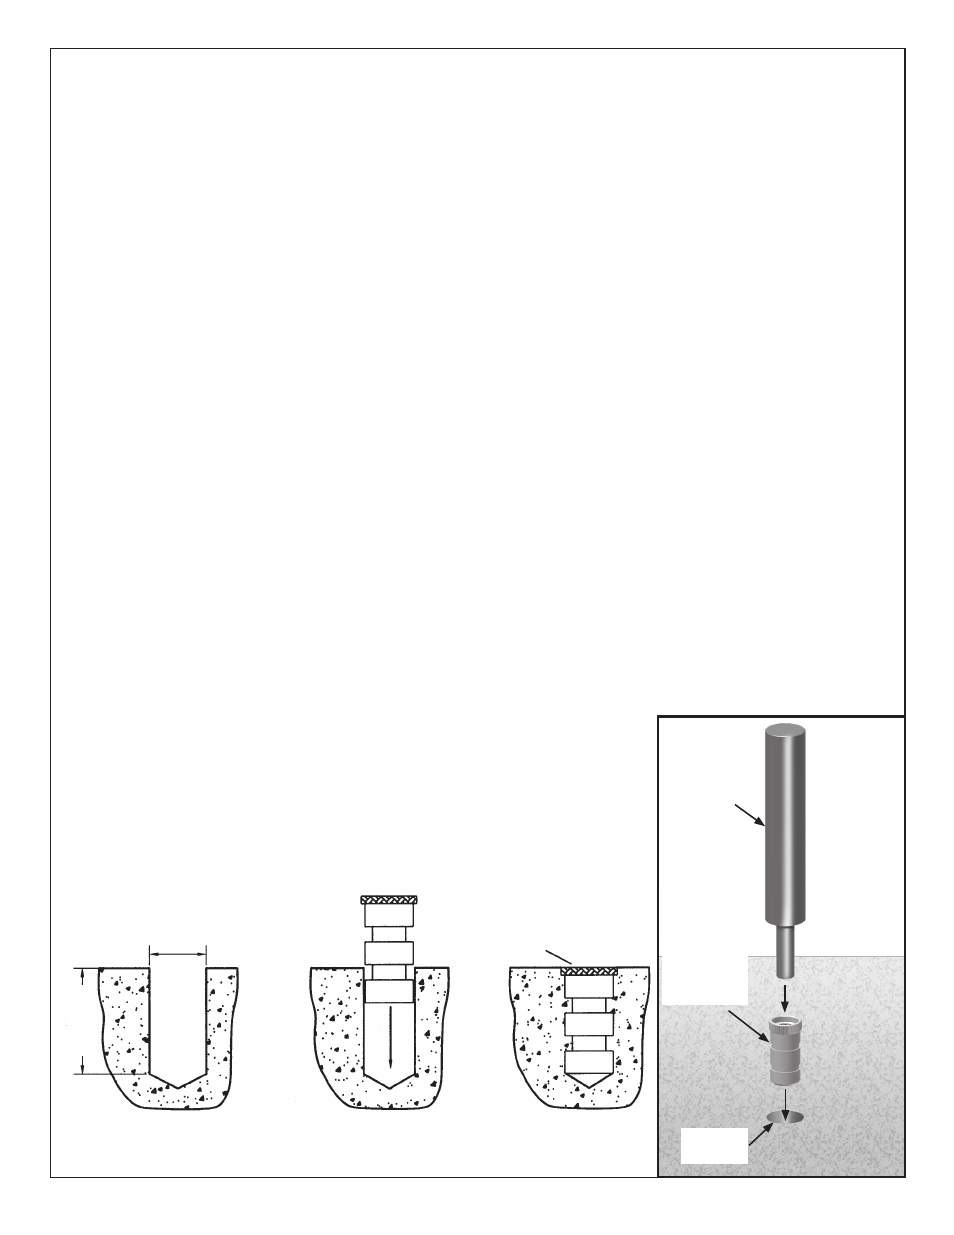
DRILLING HOLES FOR BRASS ANCHORS
1) Drill holes no more than the depth of the brass anchor (1 5/8”). **Do not over-ream the diameter of the
hole. If this does happen, apply a masonry anchor adhesive to the brass anchor before setting into hole.
(Note: clean hole out before setting brass anchor).
2) With screw removed, place brass anchor into hole. With a hammer and setting tool, firmly tap brass
anchor into hole.
3) Brass anchor should be flush with deck.
**NOTE: For best results, use a sharp masonry bit and a high-
speed rotary hammer drill to reduce chipping. If chipping still
occurs, use flanges with brass anchors (available on request)
to cover these areas.
SCREW
REMOVED
3/4”
1 5/8”
FIG. 1
Setting
Tool
Brass
Anchor
(without
screw)
Drilled
hole