Optional cable assembly installation, Hardware – Anchor CLASSIC SOLID SAFETY POOL COVER User Manual
Page 14
14
OPTIONAL CABLE ASSEMBLY INSTALLATION
1)
Install 3/8” drop-in anchor with 3/8” eyebolt on one end of cable area. Install 3/8” drop in anchors at the
opposite end of the cable area and approximately 18” apart for the 3/8” cable anchor bolts.
See FIG. 4
2) When installing the cable anchor bolt to the cable area, align the hole in the anchor bolt in the direc-
tion of the cable.
see FIG. 5A. Run the cable through the in-line holes. see FIG. 5B. Run one end of
the cable through the cable anchor at one end of cable area and loop. Attach (2) cable clamps and tightly
secure cable,
see FIG. 5A. Run other end of cable through eyebolt on turnbuckle, make loop and attach
(1) cable clamp for now. With turnbuckle fully extended out, attach hook end of turnbuckle to the eyebolt at
the end of the cable area. Loosen the (1) cable clamp and pull cable as taut as possible. Tighten (1) cable
clamp and add second cable clamp now. Be sure all cable clamps are tight to secure the cable. Rotate
mid-section of turnbuckle to tighten cable further,
see FIG. 5C.
3) Attach the snaps located under pool cover in cable area onto cable. See FIG. 5D.
NOTE: This application of cable is for a standard straight wall installation. A
custom cable area may require special installation and hardware. If you have
any questions call your Anchor Representative to assist you.
Install cable hardware at the same level as the rest of the cover!
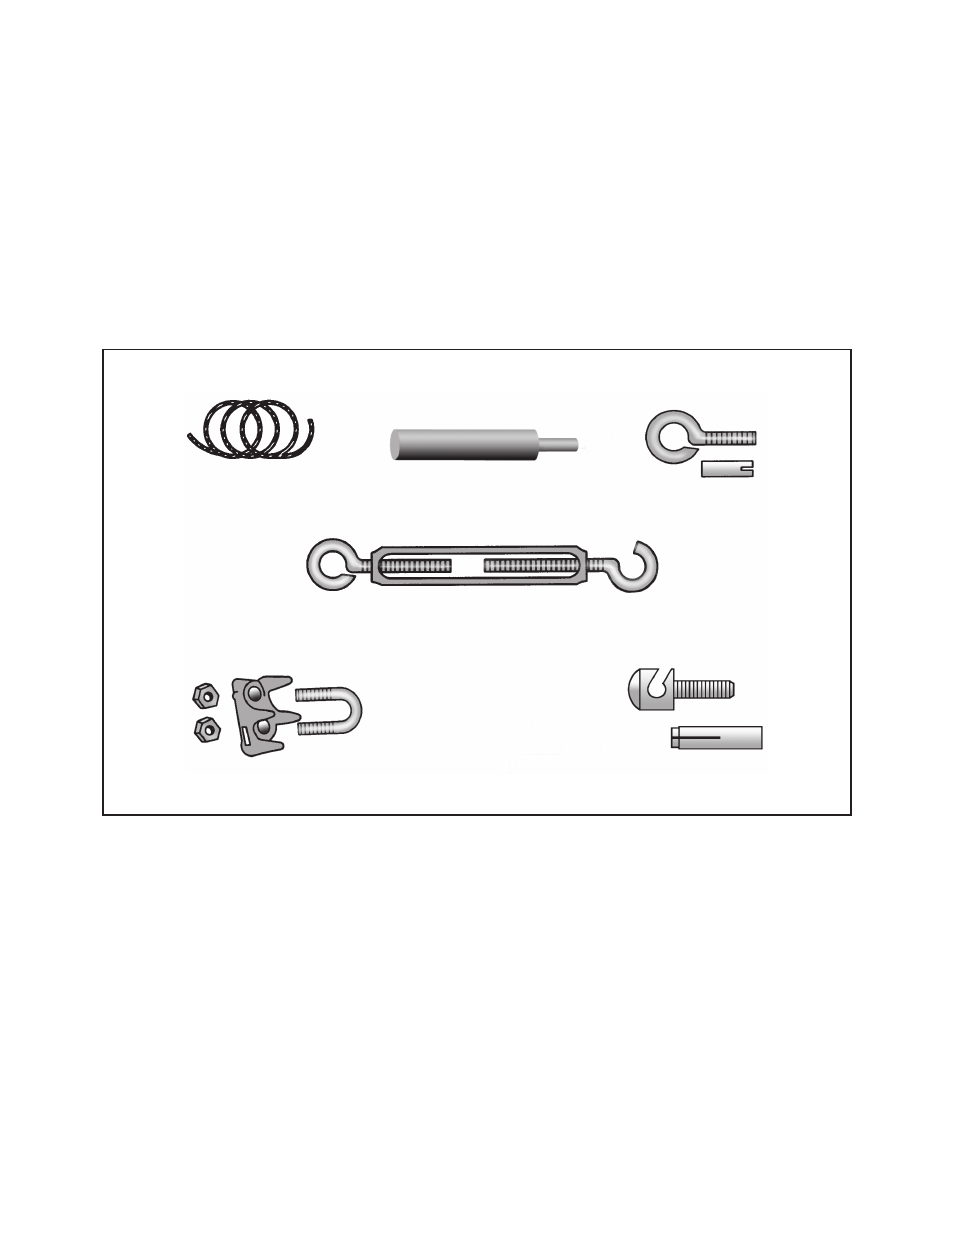
3/16” STAINLESS
STEEL CABLE
TURNBUCKLE
CABLE CLAMP
3/8” SLOTTED CABLE
ANCHOR BOLT -DROP IN
ANCHOR
3/8” MACHINE THREADED
EYEBOLT AND DROP-IN
ANCHOR
SETTING TOOL
HARDWARE