Removing a mono input pcb assembly – Allen&Heath ML5000 SERVICE MANUAL User Manual
Page 31
30
ML5000 Service Manual
Removing a Mono Input PCB assembly
Before beginning any service work, remove all power to the unit and disconnect any signal cables
where necessary. Ensure adequate lighting and use the correct tools.
1)
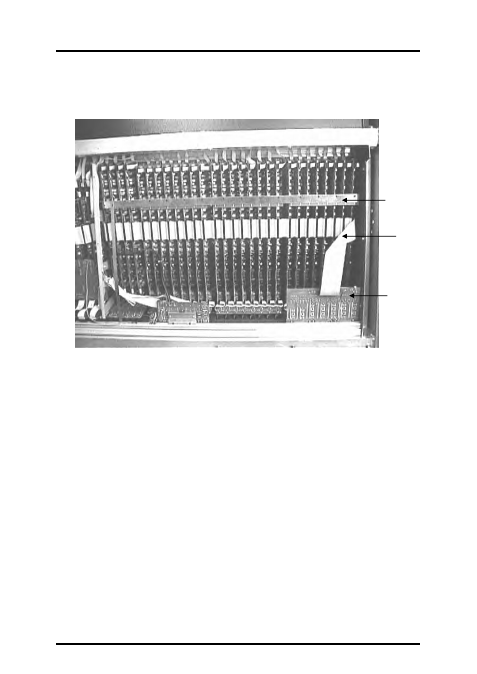
Remove the screws attaching the relevant Earth Strip running the length of the Mono section
(see fig.6, right hand section only shown) then lift away the Earth Strip.
2)
Carefully detach the 50way IDC wireform from the
Mono Input PCBs and the SYS-LINK II
Input PCB as far as the relevant Mono Input PCB. Note: There are two different 50way IDC
wireforms on either side of the Master section. Remove the relevant IDC wireform according
to the side on which the particular
Mono Input PCB lies.
3)
Remove all the knob and switch caps from the required
Mono Input PCB, then remove the
pot nuts underneath using an 11mm nutdriver.
4) The
required
Mono Input PCB can now be removed from the console.
5)
To refit a
Mono Input PCB assembly, follow the above procedure in reverse order. Make
sure all harnesses are correctly aligned and plugged on. Test for correct operation.
fig.6
SYS-LINK II
PCB
Earth Strip
50 way
IDC
wireform