5 feed roller control bar, 7 feed roller lift control, 6 feed roller speed control – Echo 7812086 Owners Manual v.2 User Manual
Page 15: 4 raise/lower the rotor cover
Bear Cat Owners Manual
11
OPERATION
4.5 FEED ROLLER CONTROL BAR
The feed roller control bar is used to manually control the rotation
of the feed roller.
FORWARD (F) rotation is used to move material into the feed
chute towards the chipper blades.
REVERSE (R) rotation is used to push material out of the feed
chute away from the chipper blades.
STOP is used to halt the rotation of the feed roller.
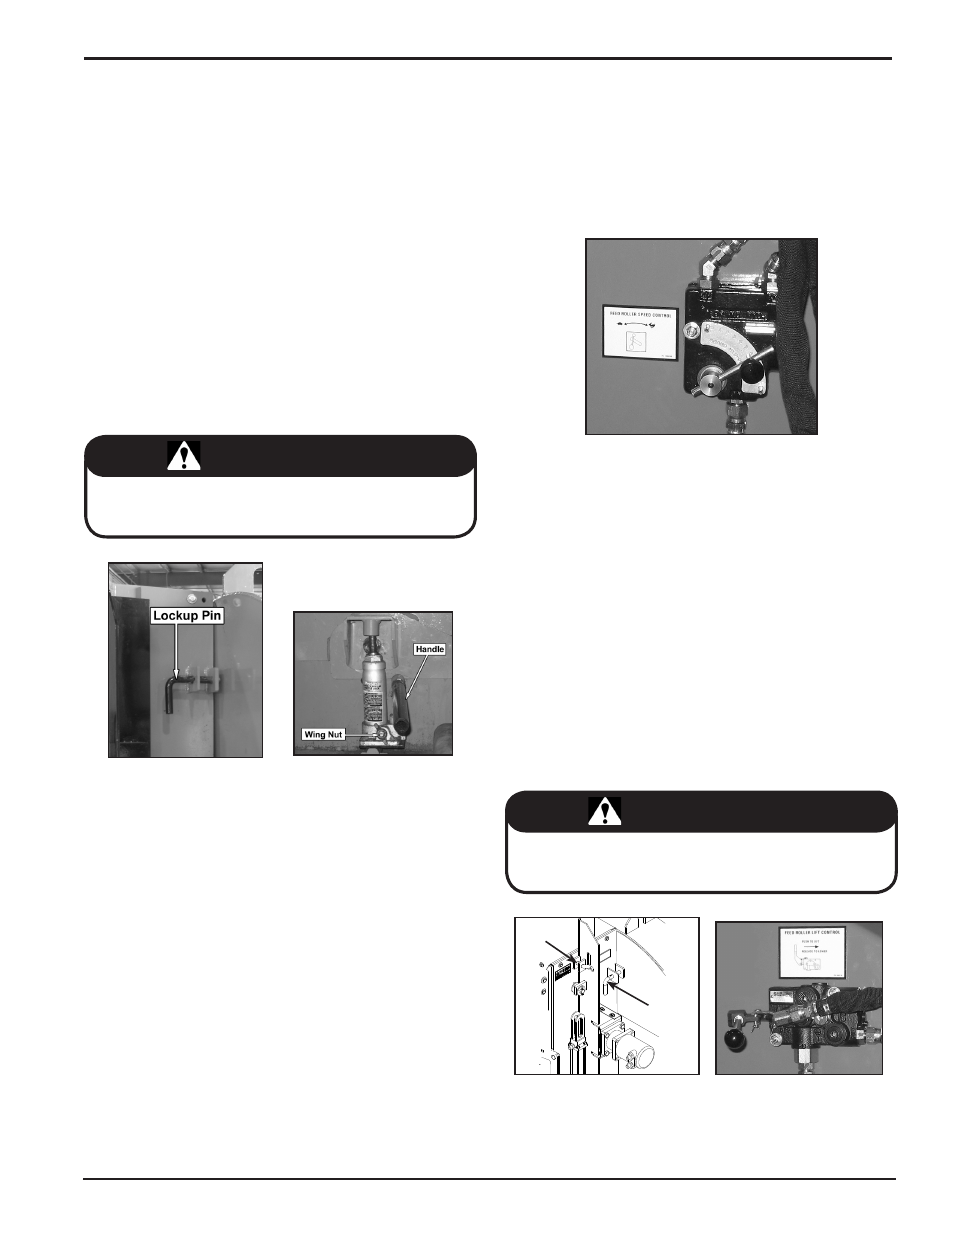
4.7 FEED ROLLER LIFT CONTROL
The feed roller lift control is used to raise the feed roller during
operation for better feeding of larger branches into the chipper
and during servicing of the machine. The belt does not have to
be engaged to use the feed roller lift.
To raise the feed roller, push and hold the feed roller control
until the feed roller is fully raised and secure using the lockup
pin located on the roller slide (Figures 4.5 and 4.6). Release
the feed roller control.
To lower the feed roller, push and hold the feed roller control
until the feed roller is fully raised. Remove the lockup pin,
then release the feed roller control.
1.
2.
4.6 FEED ROLLER SPEED CONTROL
The feed roller speed control is used to control the speed of the
feed roller allowing the operator to have better control of material
being fed into the chipper (Figure 4.4).
For optimum chipping, it is recommended that the feed roller
operate at a faster rate for smaller branches and at a slower rate
for larger branches.
4.4 RAISE/LOWER THE ROTOR COVER
Rotate the discharge chute toward the roadside.
Remove the two 1/2" x 1-1/4" bolts, nuts and washers secur-
ing the rotor cover to the chipper housing.
Lift the engine hood and locate the rotor cover jack inside
the chipper housing next to the hydraulic fluid reservoir
(Figure 4.3).
To raise the rotor cover, turn the wing nut located on the
bottom of the jack to the right and pump the handle. Secure
the rotor cover using the lockup pin located on the outside
of the chipper housing (Figure 4.2).
To lower the rotor cover, remove the lockup pin and turn
the wing nut located on the jack to the left to release the
hydraulic pressure.
After lowering the rotor cover, secure the rotor cover to
the chipper housing using two 1/2" x 1-14" bolts, nuts and
washers.
1.
2.
3.
4.
5.
6.
Figure 4.3
Rotor Cover Jack
Figure 4.2
Rotor Cover Lock Up Pin
Figure 4.4 - Feed Roller Speed Control
Figure 4.6
Feed Roller Lift Control
Figure 4.5
Feed Roller Lift Control
ROTOR COVER �
LOCK UP PIN
FEED ROLLER
LOCK UP PIN
NOTE
When closing the rotor cover, make sure the bolts are
securely tightened. If they are not, the safety switch may
respond as though the battery is dead.
NOTE
Using the feed roller lift makes feeding larger logs (8" and
above) easier and prevents the banging and slamming to
the top that can occur.