2 assembly ce compliant (cont.), 3 optional configuration – Echo CH4400 Owners Manual v.2 User Manual
Page 12
4 INCH CHIPPER
8
ASSEMBLY
This model can be reconfigured so the axle is under the
engine and the discharge is right above the hitch. This
configuration is convenient for:
• Lightening the weight over the hitch or
• Directing discharged materials into a truck bed
using the optional Elevated Discharge Tube Kit
(PN 74634-00). See Figure 2.11.
2.3 OPTIONAL CONFIGURATION
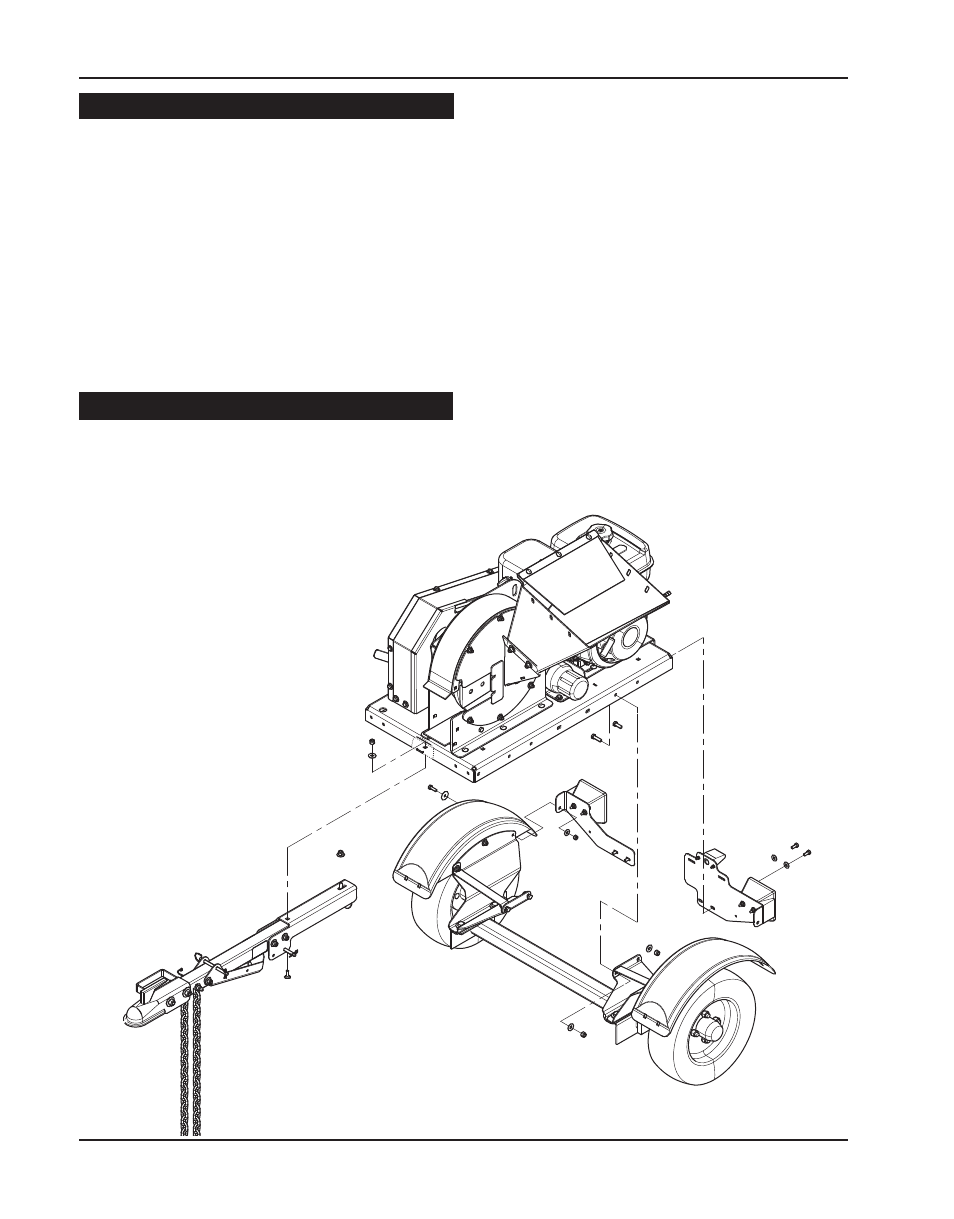
Figure 2.8. Detaching light brackets, axle, and hitch
5. Place hitch plates(20) over the axle and secure to the
hitch pole using two 1/2 x 3 1/4" bolts(13), four 1/2 flat
washers(10) and two centerlock nuts(11).
6. Attach safety chains(4) to the 3rd hole from the coupler
end of the hitch pole using a 3/8 x 3 1/2" bolt(8), two
3/8 washers(9) and 3/8 nylock nut(15).
7. Mount the 50mm coupler(2) to the hitch pole using two
1/2 x 3 1/4" bolts(13), 1/2 flat washers, and centerlock
nuts.
8. Apply reflectors(2) to the hitch pole assembly as
shown.
9. Follow assembly steps 4-7, as detailed in Section 2.1,
to complete the assembly process.
2.2 ASSEMBLY CE COMPLIANT (CONT.)
FOLLOW THESE STEPS TO RECONFIGURE THE
CH4400:
1. Disconnect the axle brackets from trailer by removing
the two bolts running through the trailer. Remove the
two bolts that hold left hand trailer light bracket to the
trailer.
2. Disconnect the hitch from the trailer.
3. Remove the bolts connecting the right hand trailer light
bracket to the trailer.
4. Hoist the trailer up and turn it 180 degrees.
5. Locate the holes on the sides of the trailer
closest to
the engine. Align these holes with the top holes on the
axle support brackets located on the axle. Attach with
one 3/8 x 1" bolt and one 3/8 x 1-1/4" bolt on each
side.
6. Reattach the hitch and light brackets to the trailer.
7. Test the blinker and brake lights to ensure the wiring is
properly connected.