Aries Automotive 5058-2 User Manual
Page 2
GRILLE GUARD
09-2013 RAM 1500
Page 1 of 6
6/4/12 (DP)
PARTS LIST:
Qty Description
Qty Description
1
Grille Guard
8
12-1.75mm x 35mm Hex Bolts
2
Upper Frame Mounting Brackets (for trucks
without tow hooks only)
22
12mm x 32mm OD x 3mm Flat Washers
1
Driver/Left Lower Frame Mounting Bracket
14
12mm Lock Washers
1
Passenger/Right Lower Frame Mounting
Bracket
12 12-1.75mm
Hex
Nuts
1
Driver/Left Upper Support Bracket
4
8mm x 20mm Button Head Allen Bolts
1
Passenger/Right Upper Support Bracket
4
8mm x 22mm OD x 2mm Flat Washers
1
Driver/Left Lower Support Bracket
4
8mm Lock Washers
1
Passenger/Right Lower Support Bracket
2
5-.8mm x 15mm Button Head Allen Bolt
2
12-1.5mm x 30mm Special Fine Thread Hex
Bolt (for trucks without tow hooks only)
4
5mm x 10mm OD x 1mm Flat Washers
1 Wrench
2
5mm Nylon Lock Nuts
PROCEDURE:
1. REMOVE CONTENTS FROM BOX. VERIFY ALL PARTS ARE PRESENT. READ INSTRUCTIONS
CAREFULLY BEFORE STARTING INSTALLATION. CUTTING IS REQUIRED. ASSISTANCE IS
RECOMMENDED.
2. Starting at the underside of the front bumper, carefully remove the plastic splash guard. NOTE: Depending
on the model of truck, the splash guard may be attached to the bottom of the truck with hex bolts and
several two-piece plastic push-in clips. Remove all hex bolts then locate the clips behind the bumper cover,
(Figure 1A). Pry up on the center pin of the clip with a small flat blade screwdriver and remove the entire
clip, (Figure 1B). Pay close attention to the type and location of all factory hardware for reinstallation. The
splash guard may also be attached to the bumper cover with rivets at the corners. Use wire cutters to
remove the rivets. Once all fasteners have been removed, move splash guard to a clean stable work area.
3. Next, determine if the truck is equipped with tow hooks.
For models without tow hooks:
a. Remove the hex nuts from the two lower factory bumper bolts, (Figure 2).
b. Select (1) Frame Bracket, (will fit left or right-without tow hooks only), and the driver side Mounting
Bracket, (Figure 3). Bolt the two Brackets together with (2) 12mm Flat Washers, (2) 12mm Lock
Washers and (2) 12mm Hex Nuts. Snug the hardware but do not tighten at this time.
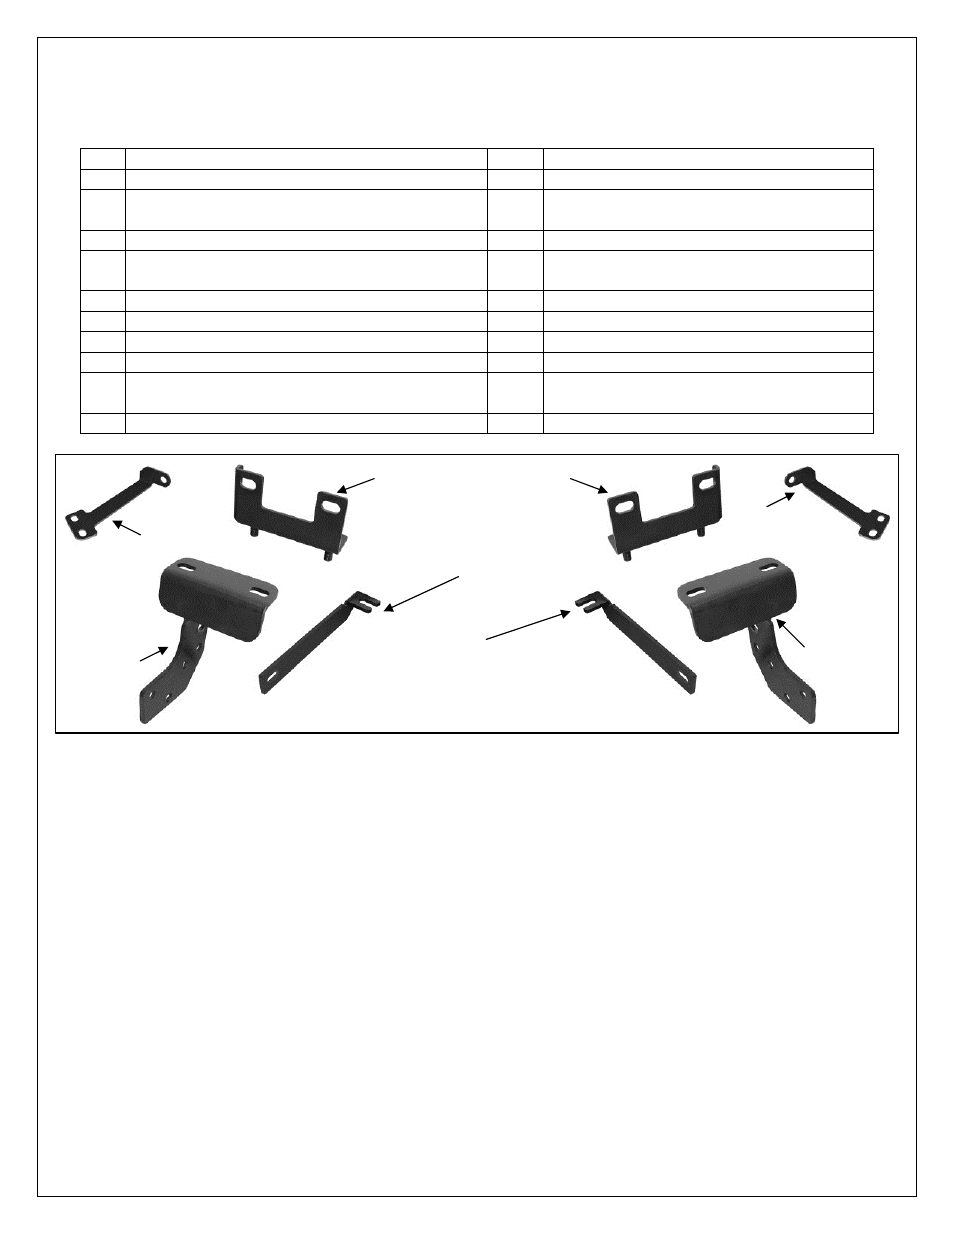
Passenger/
Right Lower
Mounting
Bracket
Driver/Left
Lower
Mounting
Bracket
Passenger/Right
Support Bracket
(2) Upper Frame Bracket
(will fit left or right)
Driver/Left Support Bracket (Support
Brackets pictured in position for
installation on tow hook equipped
vehicles. Reverse direction for vehicles
without tow hooks)
Passenger/
Right Top
Bracket
Driver/Left
Top Bracket