Lock-n-load, Case feeder overview, Assembling the 2-pc square tubing – Hornady Lock-N-Load Case Feeder User Manual
Page 3: Assembl y
Lock-N-Load
®
AP
™
Case Feeder
OVERVIEW
Your new AP
™
Case Feeder has been packaged to insure minimal vibration and damage during transportation.
Remove all the parts from the packing box (see page 2) and spread them out over a large flat surface.
Refer to the Lock-N-Load
®
Case Feeder
parts list and exploded view on the next two pages to make sure all necessary parts are identified.
The manual provides step-by-step instructions and suggestions that make set-up and operation easy and understandable.
NOTE: Everything is designed and machined to fit easily together without modification. If you find that it is necessary to force parts together, stop
and check the instructions and illustrations we have provided.
List of needed hand tools:
• 3/8" wrench
• 7/16" wrench
• 9/16" wrench
• 1/8" Allen wrench
• 5/32" Allen wrench
• 3/16" Allen wrench
• Pliers or vise grips
• Small hammer
2
1
2
1
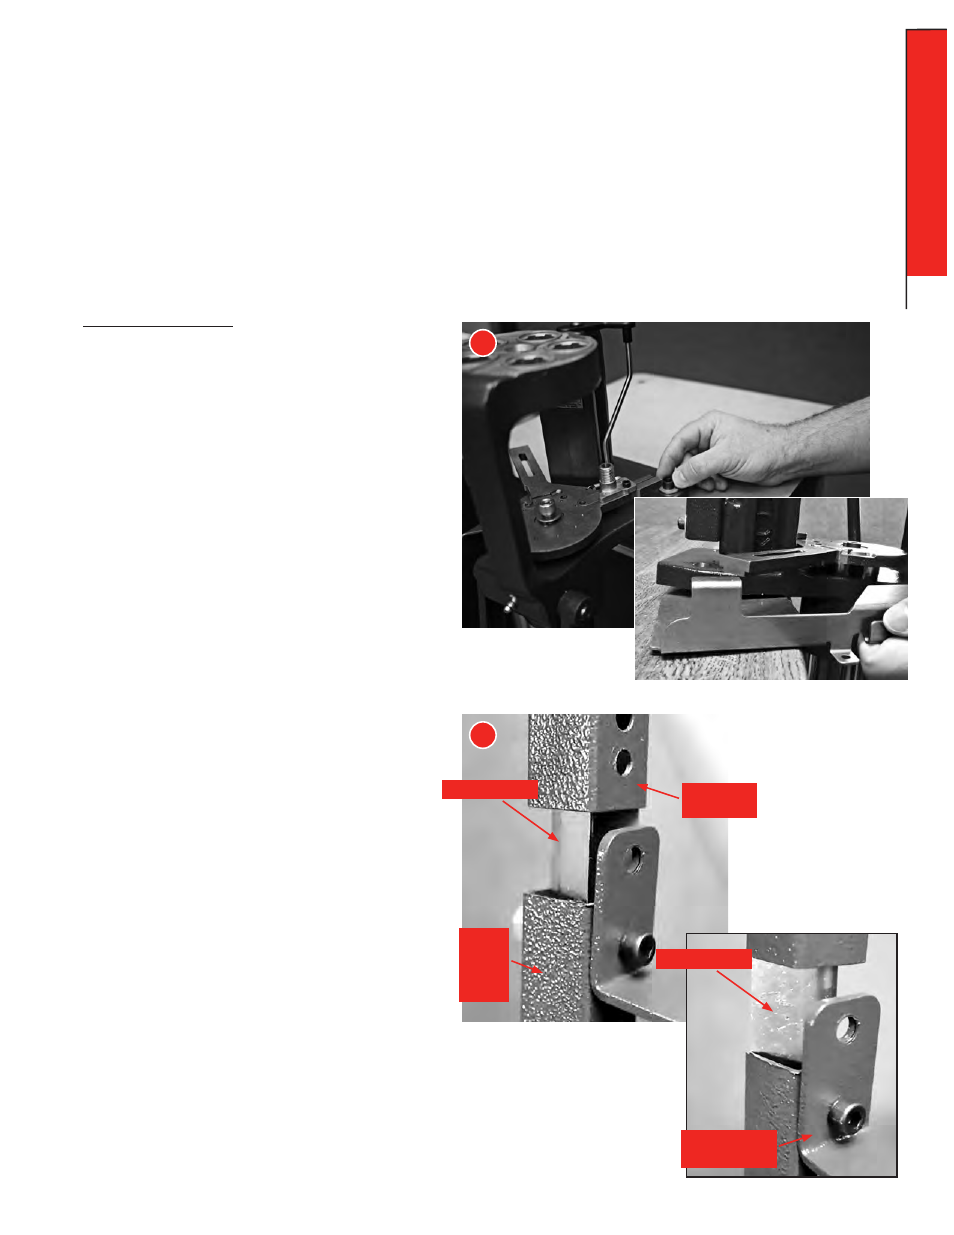
Assembling the 2-pc Square Tubing.
Place Lower Case Feeder Stand next to mounting holes on
the back of the AP
™
press to determine proper orientation of
the Lower Case Feeder Stand. Once the “top” of the Lower
Case Feeder Stand has been determined, place the Lower
Case Feeder Stand onto a block of scrap wood. Next insert
the Tube Connector into the Lower Case Feeder Stand until
the holes align. Place the Feed Tube Mounting Bracket onto
the Lower Case Feeder Stand so the Feed Tube Mounting
bracket is on the open end of the Tube Connector (see
photo). Place a ¼-20 x 1.5" bolt through the Feed Tube
Mounting bracket and Lower Case Feeder Stand and loosely
attach the flat washer, lock washer, and nut.
Place Upper Case Feeder Stand over the Tube Connector
until it touches the Lower Case Feeder Stand. Place a
¼-20 x 1.5" bolt through the Feed Tube Mounting bracket
and Upper Case Feeder Stand and securely attach the flat
washer, lock washer, and nut. Tighten the lower nut in the
Lower Case Feeder Stand.
Attach assembly onto AP
™
Press.
Tube connector
Upper Case
Feeder Stand
Feed Tube
Mounting Bracket
Tube connector
INCORRECT ASSEMBLY
CORRECT ASSEMBLY
Lower
Case
Feeder
Stand
If your AP
™
press has a cartridge box bracket that mounts
on top of the press, it will need to be changed out for the
Main Bracket (42). To do this, unbolt the press from the
bench top, remove the old cartridge box bracket, and slide
the new Main Bracket under the press so the two raised
holes fit into the press mounting holes (see exploded view
for correct orientation). Re-mount the press to the bench
top using the same hardware that was previously used to
bolt the press down.
ASSEMBL
Y
- 3 -
ASSEMBLY: CASE FEEDER