Hornady AP with Case Feeder User Manual
Page 5
5
Step 1: Mounting the Lock-N-Load Auto Progressive with Case Feeder
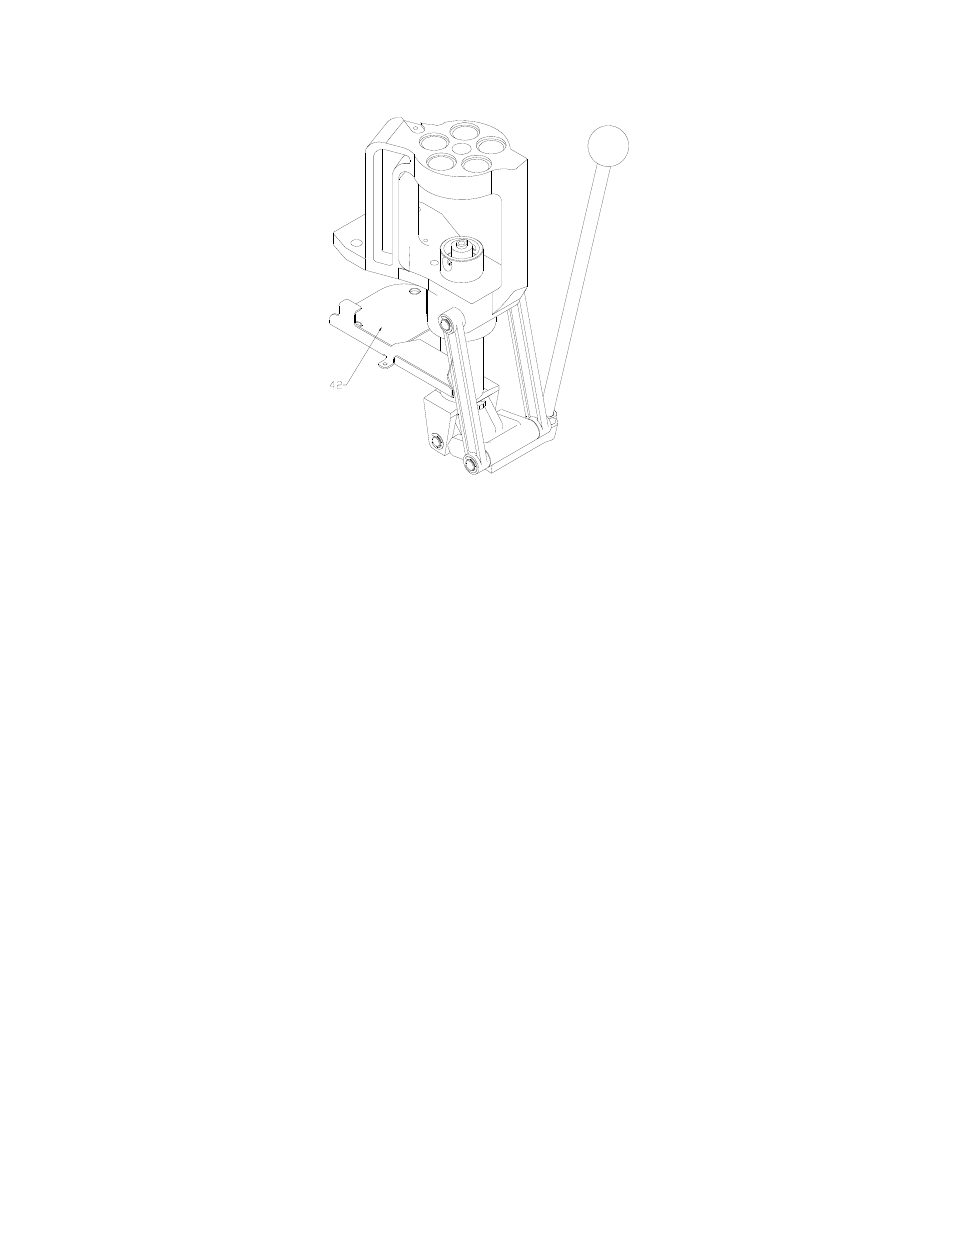
Figure 1: AP with main bracket.
• Your work area should be well lit and have plenty of room for your reloading
accessories. Your Hornady Lock-N-Load AP should be mounted securely to the
edge of a solid level bench approximately 2 ¼” from the center of holes to the front
edge of the table when using the optional case feeder.
• While facing the bench and using the Main Bracket (#42) for a pattern, mark and
drill
the mounting holes. Mount the press using (2) 5/16” bolts that are long enough
to secure the press to the bench with plenty of clearance for the nuts. (Due to
variations
of benches we have chosen to not provide these items)
We also
recommend using 5/16” flat washers at both ends of the bolts with lock washers on
the bottom side of the table. Washers are required on the two mounting bolts when
using the case feeder system.
• Place the Main Bracket (#42) on the bench and verify that the mounting holes
line
up with the holes. Place the Bracket on the underside of the Press Frame. Place one
of the 5/16
bolts through the mounting hole from the top. Place the press and bracket
on the bench, and run the bolt down through the appropriate hole and secure it to the
bench with a nut and washer assembly (finger tight is good for now). Align the
second hole, and using the second bolt, secure it to the bench. Operate the press; to
make sure that the bench does not interfere with it’s operation. If everything is
functioning proper, tighten the nuts on the bolts to finish securing the press and
mounting plate to the bench.
See Figure 1 for details.