Diagram 1 diagram 2, Diagram 3 – CARR 120164 Super Hoop Multi-Mount Step User Manual
Page 2
SUPER HOOP MULTI-MOUNT STEP INSTALLATION INSTRUCTIONS
Part No.’s: 120161, 120162 & 120164
WARNING: Do not over tighten nuts and bolts, or damage to the casting and or stripping of the threads could result.
WARNING: FOR SAFE AND PROPER USAGE OF THIS PRODUCT, THE MOUNTING INSTRUCTIONS MUST BE FOLLOWED CAREFULLY AND COMPLETELY.
IMPORTANT: The manufacturer and distributor of this product are in no way responsible for the consumer's failure to adhere to the warnings and directions of these instructions,
in the event of damage to the consumer’s vehicle, other properties and or personal injury.
1.
Remove all of the plastic carpet covers at the door jam before
starting. Refer to diagram 1. ELECTRICAL CAUTION: The
passenger side has an electrical wire harness underneath the
plastic carpet cover. The wire harness is protected by a plastic
cover. However, when drilling, be very careful not to drill
through the plastic cover into the wire harness.
2.
Assemble the Mounting Feet to the step as shown in the Master
drawing, but only hand tighten.
3.
Take only two steel brackets with the hardware provided (be sure
only to use the 5/16" bolts provided) and bolt each steel bracket to
each mounting foot . Tap each steel bracket into position until the
steel brackets are straight on each mounting foot. (Refer to diagram 2)
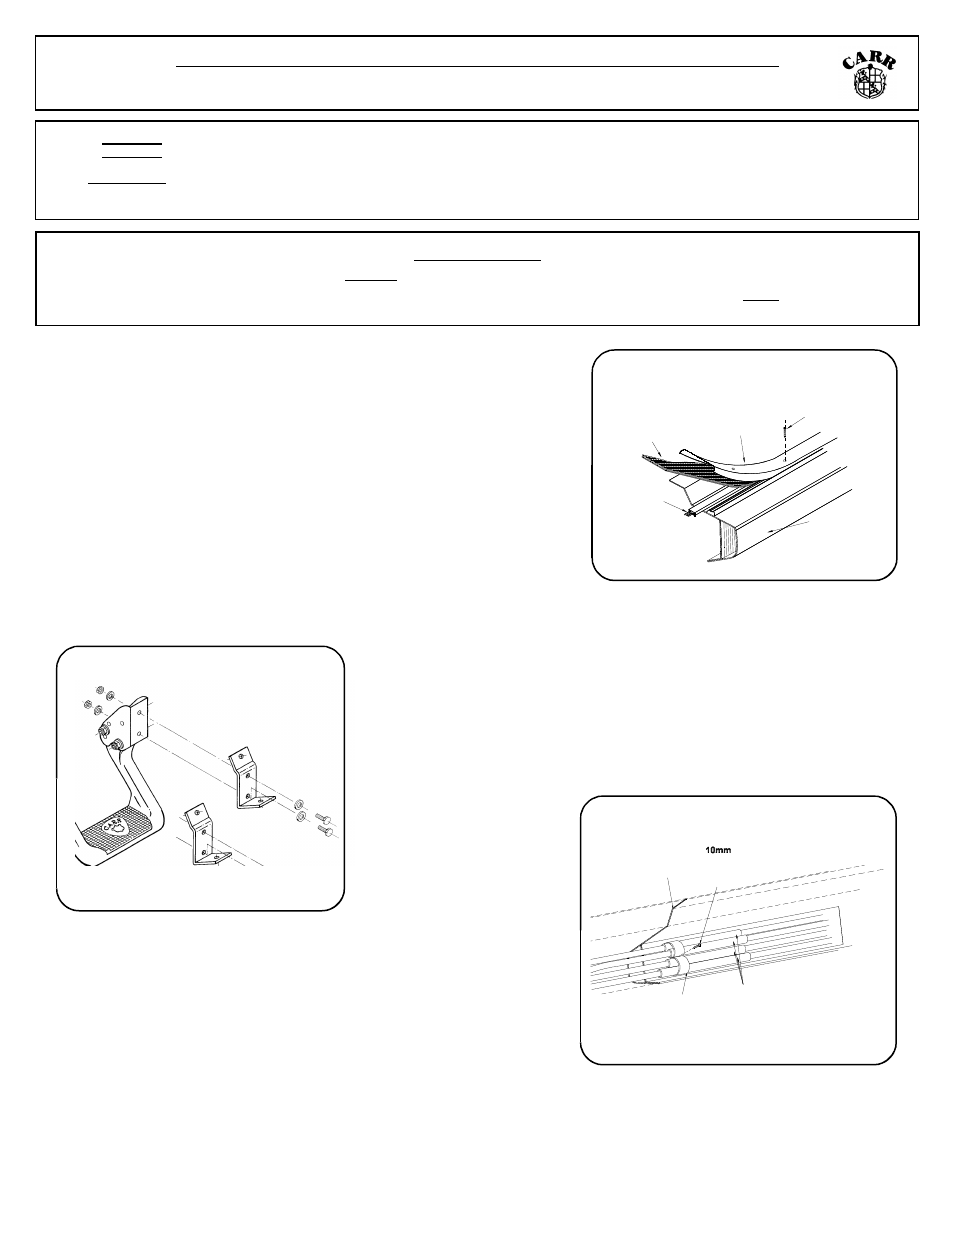
4. On the passenger side only, there are air-conditioning lines and rear heater
lines on the bottom inside face of the rocker panel that run along the
length of both doors. (Refer to diagram 3). There are four rubber clamping
brackets that hold all four lines in place. Take a 10mm socket and socket
wrench and back out the screws ONLY half way to loosen the lines up.
NOTE: (If the screws are removed, they will be extremely difficult to
reinstall.)
5. From underneath your
vehicle, place your step
in desired position with
the feet of the steel
brackets laying on top
of the pinch weld. You
may have to slightly move your step forward or backward to
avoid the rubber clamping brackets and the front body mount.
6.
While securely holding the step in place, mark the top hole of
each steel bracket and mark lines all along each side of the steel
bracket on the body metal. Remove the step from underneath the
vehicle.
7.
Center punch the two top marked holes . (REFER TO THE
ELECTRICAL CAUTION ABOVE!) Take a drill motor and a sharp 1/8" drill bit and drill out the center punched
holes. Go back with a sharp 5/16" drill bit and enlarge the 1/8" holes. (Caution: do not allow the drill to wander
when drilling. This will result in a mis-alignment of the drilled holes.)
Wire Harness
CARPETING
PLASTIC
CARPET COVER
REMOVE
SCREWS
BODY METAL
Diagram 1
Diagram 2
Hex
Head
Screw
Body Metal Contour
Rubber
Clamping
Bracket
Rubber
Coated AC
And Heater
Lines
NOTE: PASSENGER
SIDE ONLY
Diagram 3
ITS PAINTABLE
All of the bright finished products can be painted to whatever color you like. Simply sand your bright finished step lightly
all over, prime it with “Synthetic Zinc Chromate Primer”, let dry, and it’s ready to paint.