Warning, Step 3 applying the display film, Step 2 check wiring – Defi Link VSD Concept User Manual
Page 5
Adhesive tape
Display film
Display film
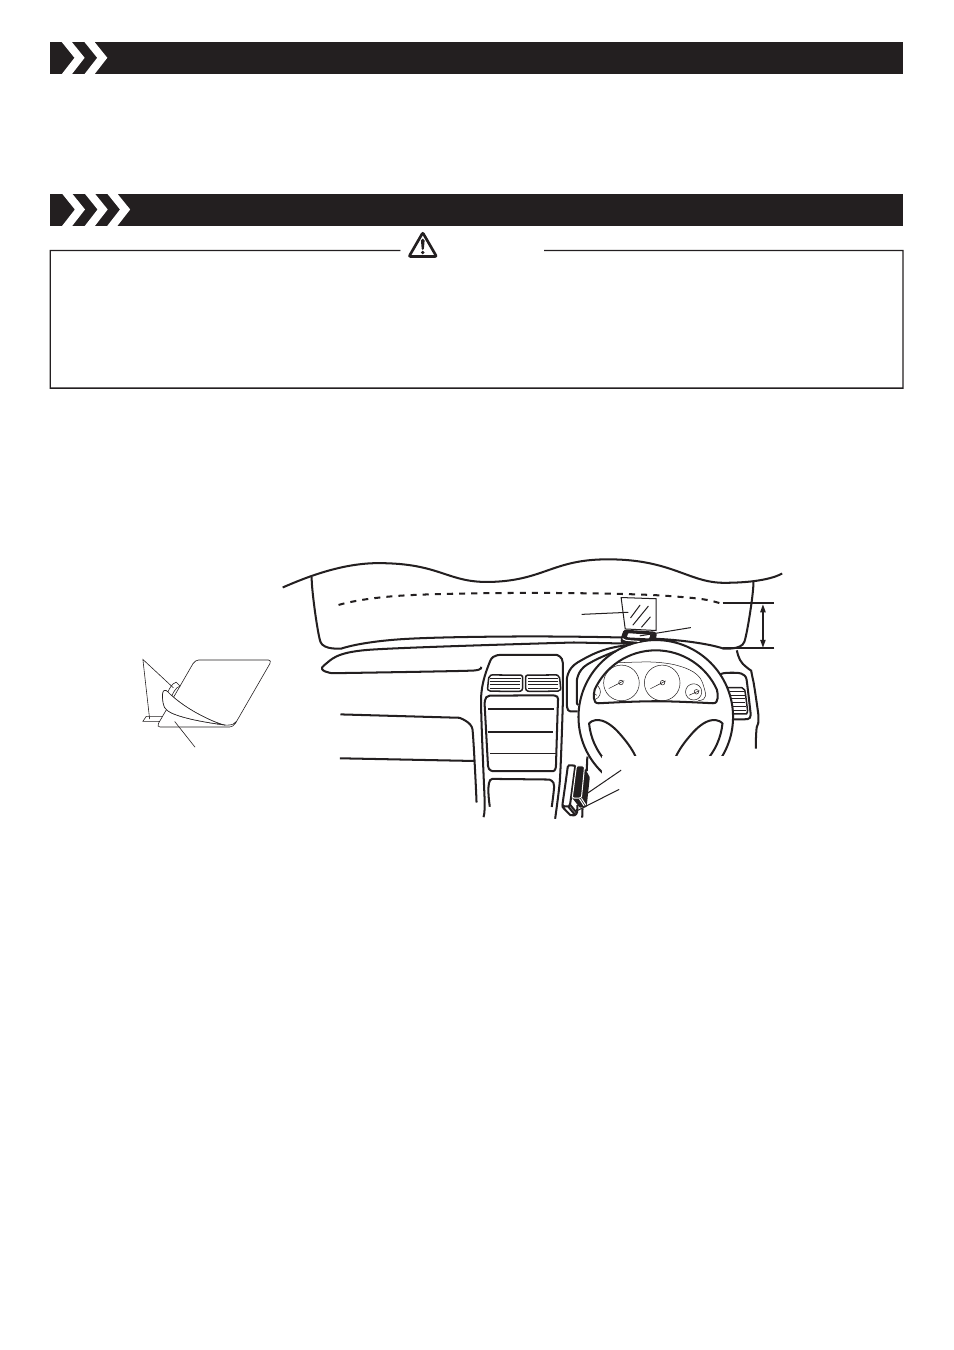
under 5in
(130mm)
Display unit
D.C.Unit
Defi-Link Control Unit
Ⅱ
(or Defi-Link Control Unit)
STEP
3 Applying the Display Film
●Display must be projected on the bottom 5in(130mm) of the windshield. Consult with customer about the place of
display projection. Attach the display unit in a location which will not hinder driving. Comply with the law concerning
vehicle safety in your district.
●The display is viewable even without the display film. The transmittance of the display film is about 45%. We are
not responsible for any damage or problems arising from the use of the display film applied on the windshield.
Please follow the local regulations as for attaching the display film.
Warning
1:Wipe off tarnish and stain on the windshield.
2:Position the display unit and the display film in place. Mark a corner of display film with adhesive tape.
3:Separate the display film from the backing paper using adhesive tape as shown in the following figure.
4:Spray a mixture of water(150ml:5oz) and mild detergent(1 or 2drops) on the windshield and the display film. Attach the
film to the windshield in a longitudinal direction.
※Dismount the display unit for a time to protect it from getting wet. Spread a towel on the instrument panel.
5:Gently squeeze out water and air bubbles under the film using a spatula. Wipe extra water with tissue.
■When the Defi-Link Display VSD CONCEPT is used WITH a connection to the Defi-Link System
■When the Defi-Link Display VSD CONCEPT is used WITHOUT a connection to the Defi-Link System
STEP
2 Check Wiring
※Do not expose D.C.Unit and Defi-Link Control Unit II(or Defi-Link Control Unit) to direct sunlight.
1:Connect the display wire of Defi-Link Display VSD CONCEPT to DISPLAY UNIT of D.C.Unit.
2:Check that all the wires are properly connected.
3:Turn on the ignition of vehicle and make sure the display is lighted.(The display looks inverted on the display unit.)
4:If the display is lighted, go to the next step. If not, go back to STEP1(WIRING) and rewire.